

Puede configurar integraciones personalizadas utilizando API![]() Interfaz de programación de la aplicación. Permite automatizar determinadas funciones conectando su sistema CXone Mpower con otro software.. Esto le permite usar su propia base de datos o aplicaciones de terceros con su bot. Puede conectar CXone Mpower Bot Builder y el servicio web con el que se está integrando configurando la integración personalizada.
Interfaz de programación de la aplicación. Permite automatizar determinadas funciones conectando su sistema CXone Mpower con otro software.. Esto le permite usar su propia base de datos o aplicaciones de terceros con su bot. Puede conectar CXone Mpower Bot Builder y el servicio web con el que se está integrando configurando la integración personalizada.
Una vez configurada la integración, debe crear una o más acciones de bot. Esto le permite definir las solicitudes que se envían al servicio web integrado. Puede usar estas acciones de bot en diálogos![]() Historias, reglas y flujos en Bot Builder. para hacer que el bot envíe una solicitud al servicio web en ciertos puntos de la conversación.
Historias, reglas y flujos en Bot Builder. para hacer que el bot envíe una solicitud al servicio web en ciertos puntos de la conversación.
Crear una nueva integración API
Sólo necesita crear una integración por cada servicio web con el que se esté conectando.
- En CXone Mpower, haga clic en el selector de aplicaciones
 y seleccioneBot Builder.
 - Haga clic en el bot con el que desea trabajar.
- Haga clic en integraciones
 en el menú del icono de la izquierda.
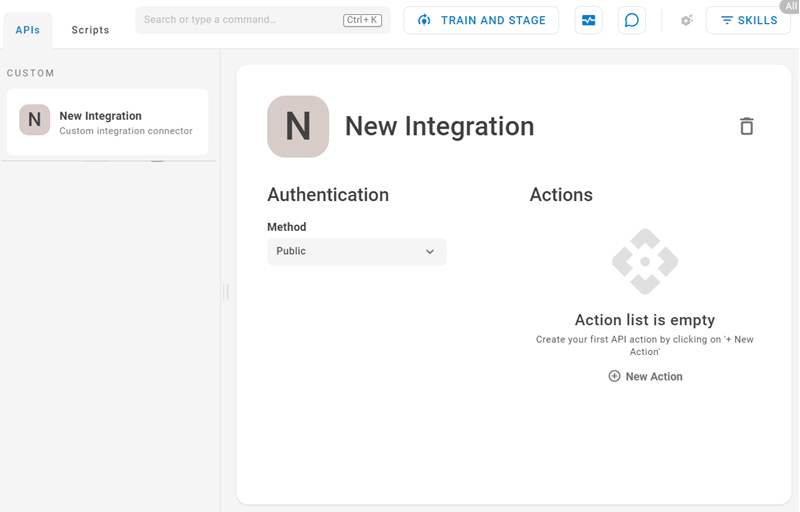
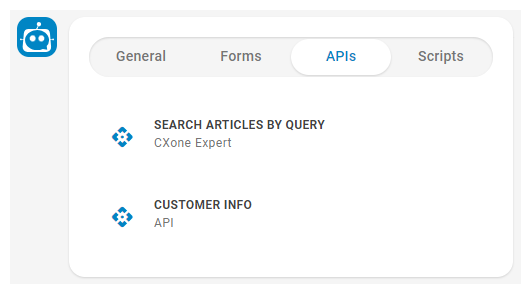
 - En la pestaña API, haga clic en Nueva integración.
- Haga clic en en el título predeterminado de la Nueva integración para cambiar el nombre de la integración y, después, pulse Intro para guardar el cambio.
- En Autenticación, seleccione un Método de autenticación. Ingrese la información solicitada para el tipo que haya seleccionado.
 Más información sobre los campos en este paso
Campo Detalles Público Su integración API no necesita autenticación. No se requieren pasos adicionales.
Todavía puede agregar una línea de autorización en el JSON para cualquier acción que cree.
Autenticación automática 2.0
Rellene elURL de autorización,Llave, ySecreto campos. Los detalles sobre el Ámbito son opcionales. El ámbito le permite limitar la cantidad de acceso que se concede a un token de acceso. Bot Builder utiliza el tipo de concesión de Credenciales de cliente de OAuth 2.0.
Esta información se encuentra en la cuenta del servicio web con el que se está integrando.
Personalización En el Editor de solicitudes JSON, agregue una línea para la autorización en la sección "encabezados" e ingrese el método de autenticación que desea usar. Puede usar la autenticación básica, el token web JSON, el token web simple o el token de portador.
{ "headers": { "Content-Type": "application/json", "Authorization": "[authentication_type] [token]" } } - Agregue una o más acciones personalizadas a la integración.
- Cuando termine de hacer cambios, haga clic en Entrenar y Aplicar para actualizar su modelo Versión de un bot que ha sido entrenado y preparado de bot y probar el cambio.
-
Agregue su acción a una historia
Se usa para entrenar al bot para el manejo de interacciones según la intención y el contexto., regla Se usa para definir la respuesta de un bot a los mensajes que no cambian con el contexto. o respaldo Una alternativa de texto sin formato que se envía cuando el destino no admite medios enriquecidos.. La sección de API de las opciones de acción del bot muestra todas las acciones de integración de API que ha configurado y activado.
Crear una acción personalizada de bot para una integración
Necesita al menos una acción personalizada de bot en su integración API. Después de crear y activar su acción personalizada de bot, puede usarla en una respuesta de bot cuando trabaje con diálogos![]() Estado que permite a un agente completar los requisitos laborales después de finalizar una interacción..
Estado que permite a un agente completar los requisitos laborales después de finalizar una interacción..
- En CXone Mpower, haga clic en el selector de aplicaciones y seleccioneBot Builder.
- Haga clic en el bot con el que desea trabajar.
- Haga clic en integraciones en el menú del icono de la izquierda.
- Seleccione la carpeta
- En Acciones, haga clic en Nueva acción.
- Escriba un nombre para la acción y pulse Intro.
- Haga clic en la acción para configurarla.
- En Configuración, escriba su configuración en la ventana Solicitar JSON. Los valores de las ranuras se pueden utilizar como variables en el formato {{slot_name}}. Puede usar el parámetro mockSlots para hacer pruebas.
- Haga clic en Solicitud de prueba en cualquier momento para completar la ventana Respuesta.
- Puede usar el campo Mensaje de error en Gestión de errores para determinar qué mostrar al contacto en respuesta a una solicitud de API fallida.
- Puede seleccionar la casilla de verificación Modo de depuración para agregar una respuesta de sufijo al mensaje de error.
- Cuando la acción esté lista para usarse con su bot, haga clic en el conmutador de acción
 en la parte superior de la página de configuración de acciones. Si el interruptor está desactivado, la acción no estará disponible para su uso.
 -
Cuando termine de hacer cambios, haga clic en Entrenar y Aplicar para actualizar su modelo
Versión de un bot que ha sido entrenado y preparado de bot y probar el cambio.
Agregar una integración API personalizada a una habilidad de bot
Puede agregar una integración API personalizada a una o más de sus habilidades de bots. Esto le permite usar las acciones de bot de la integración con las habilidades a las que agregue la integración.
- En CXone Mpower, haga clic en el selector de aplicaciones y seleccioneBot Builder.
- Haga clic en el bot con el que desea trabajar.
- Haga clic en integraciones en el menú del icono de la izquierda.
- En la pestaña API, mantenga el puntero sobre la integración con la que desea trabajar.
- Haga clic en la elipsis
 y seleccione Agregar a la habilidad.
 - Haga clic en una o más habilidades y haga clic en Seleccionar todo para agregar la integración a todas las habilidades disponibles.
- Si la habilidad que desea no está disponible, escriba un nombre en la barra de búsqueda y, después, haga clic en Crear habilidad.