

You can set up custom integrations using APIs![]() Application Programming Interface. Allows you to automate certain functionality by connecting your NiCE CXone system with other software.. This allows you to use your own database or third-party applications with your bot. You can connect NiCE CXone Bot Builder and the web service you're integrating with by setting up the custom integration.
Application Programming Interface. Allows you to automate certain functionality by connecting your NiCE CXone system with other software.. This allows you to use your own database or third-party applications with your bot. You can connect NiCE CXone Bot Builder and the web service you're integrating with by setting up the custom integration.
After the integration is set up, you must create one or more bot actions. This allows you to define the requests that are sent to the integrated web service. You can use these bot actions in dialogues![]() Stories, rules, and flows in Bot Builder. to have the bot send a request to the web service at certain points in the conversation.
Stories, rules, and flows in Bot Builder. to have the bot send a request to the web service at certain points in the conversation.
Create a New API Integration
You only need to create one integration per web service you're connecting to.
- In NiCE CXone, click the app selector
 and select Bot Builder.
 - Click the bot you want to work with.
- Click Integrations
 in the left icon menu.
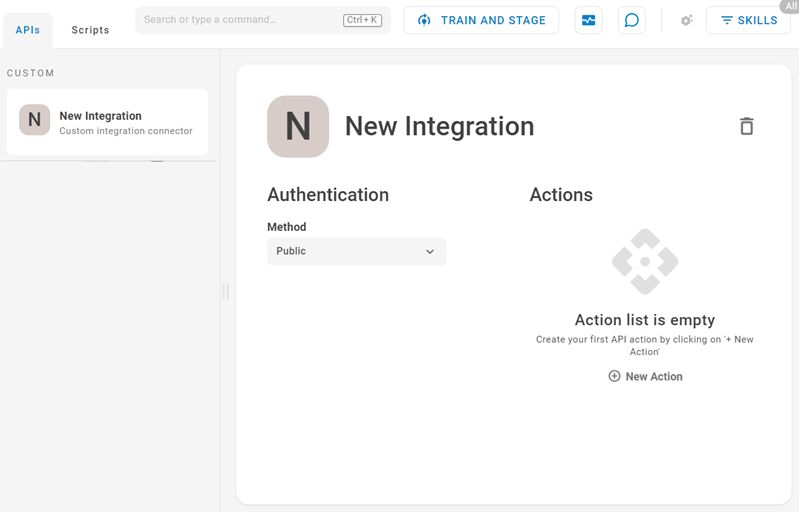
 - On the APIs tab, click New Integration.
- Click the default New Integration title to rename the integration, then press Enter to save your change.
- Under Authentication, select an authentication Method. Enter the required information for the type you select.
 Learn more about the fields in this step
Field Details Public Your API integration does not require authentication. No additional steps are required.
You can still add an authorization line in the JSON for any actions you create.
OAuth 2.0
Fill in the Authorization URL, Key, and Secret fields. The Scope details are optional. Scope allows you to limit the amount of access that's granted to an access token. Bot Builder uses the Client Credentials grant type of OAuth 2.0.
This information can be found in the account for the web service you're integrating with.
Custom In the JSON Request Editor, add a line for authorization in the headers section, then enter the authentication method you want to use. You can use Basic Authentication, JSON Web Token, Simple Web Token, or Bearer Token.
{ "headers": { "Content-Type": "application/json", "Authorization": "[authentication_type] [token]" } } - Add one or more custom actions to the integration.
- When you're finished making changes, click Train and Stage to update your bot model Version of a bot that has been trained and staged to test this change.
-
Add your action to a story
Used to train a bot for interaction handling based on intent and context., rule Used to define a bot response to messages that don't change with context., or fallback A plain text alternative sent when the destination doesn't support rich media..
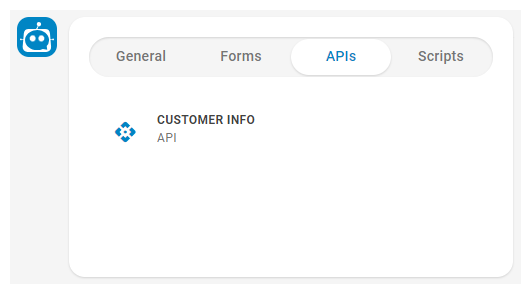
The APIs section of the bot action options shows all the API integration actions you have configured and turned on.
Create a Custom Bot Action for an Integration
You need at least one custom bot action in your API integration. After you create and enable your custom bot action, you can use it in a bot response when working with dialogues![]() State that allows an agent to complete work requirements after finishing an interaction..
State that allows an agent to complete work requirements after finishing an interaction..
- In NiCE CXone, click the app selector and select Bot Builder.
- Click the bot you want to work with.
- Click Integrations in the left icon menu.
- Select the
- Under Actions, click New Action.
- Enter a name for the action and press Enter.
- Click the action to configure it.
- Under Configuration, write your configuration in the Request JSON window. Slot values can be used as variables in the format {{slot_name}}. You can use the mockSlots parameter for testing purposes.
- Click Test Request at any time to populate the Response window.
- You can use the Error Message field under Error Handling to specify what to show the contact in response to a failed API request.
- You can select the Debug Mode checkbox to add a suffix response to the error message.
- When the action is ready to use with your bot, click the action toggle
 at the top of the action configuration page. If the toggle is off, the action will not be available to use.
 -
When you're finished making changes, click Train and Stage to update your bot model
Version of a bot that has been trained and staged to test this change.
Add a Custom API Integration to a Bot Skill
You can add your custom API integration to one or more of your bot skills. This allows you to use the integration's bot actions with the skills you add the integration to.
- In NiCE CXone, click the app selector and select Bot Builder.
- Click the bot you want to work with.
- Click Integrations in the left icon menu.
- On the APIs tab, hover your cursor over the integration you want to work with.
- Click the ellipsis
 and select Add to Skill.
 - Click one or more skills to click Select all to add the integration to all available skills.
- If the skill you want isn't available, enter a name in the search bar, then click Create Skill.