

This help page is for Studio. This information is also available for Desktop Studio.
The tasks described on this page are essential to using Studio. They include things such as creating or opening scripts, adding and configuring actions, and connecting actions to each other. The Manage Scripts help page can help you learn how to do tasks with your scripts such as viewing version history, redacting variables, and locking or unlocking.
Create a Script
Required Permission: ACD > Studio > Scripts >
- In NiCE CXone, click the app selector
 and select Omnichannel Routing > Studio
  .
. -
Click New Script and select the script media type from the drop-down. The canvas workspace for the new script opens in a new tab in your browser.
-
Add at least one action to the script canvas so you can save it.
-
Click Create.
-
Enter a Name for your script.
- Click Location to choose a folder to save the script in, or click Create New Folder and enter a New Folder Name.
-
Click Create.
Open a Script
Required permissions: ACD > Studio > Scripts >
Opening a script allows you to view a script that's currently on the NiCE CXone servers. You can open a script that was created in Desktop Studio. If you have a script file on your computer, you can load it.
Each script opens to the location you were viewing the last time you accessed it. They also open to the same zoom level you used previously.
- In NiCE CXone, click the app selector and select Omnichannel Routing > Studio .
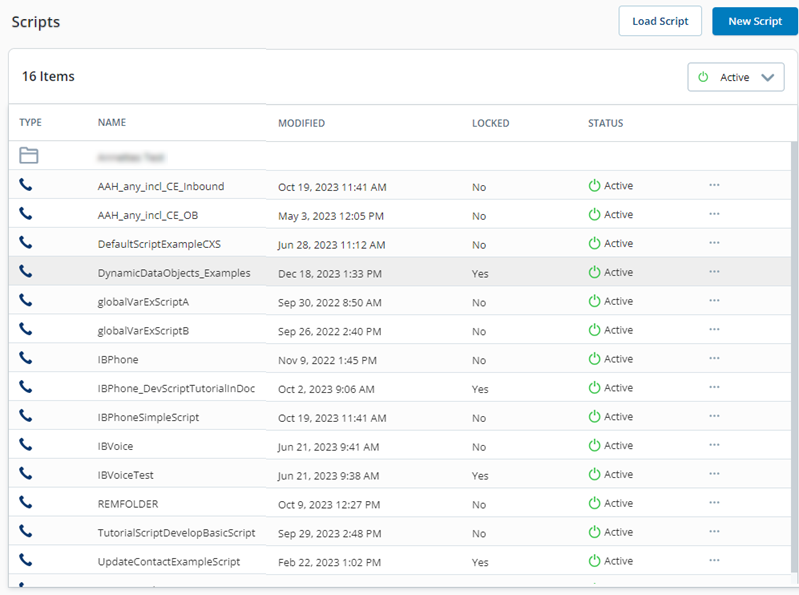
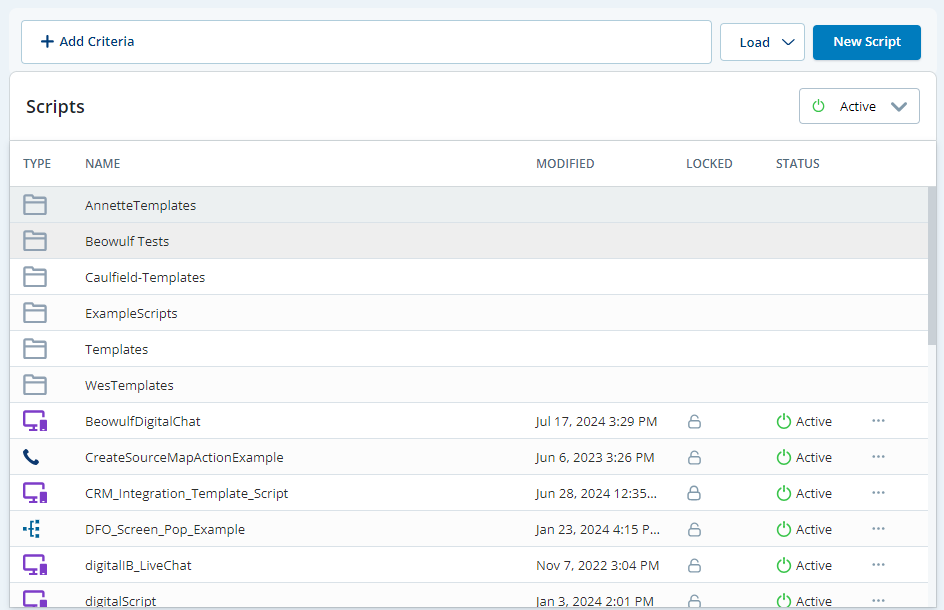
- Locate the script you want to open. If it's located in a folder, double-click to open the folder. To return to the root folder, click Scripts at the top of the page.
- If you have trouble finding the script you want, click the drop-down in the top right corner of the scripts list and select Inactive. This shows you all scripts that are currently deactivated. Deactivated scripts must be reactivated before you can open them.
- Double-click the script you want to open. It opens in a new browser tab.
Modify a Script
Required Permission: ACD > Studio > Scripts >
- In NiCE CXone, click the app selector and select Omnichannel Routing > Studio .
- On the Scripts page, locate and double-click to open the script you want to work with. The script opens in a new tab.
- Make changes to the actions in your script. In addition to adding or removing actions, you can:
- Cut, copy, and paste actions. You can use keyboard shortcuts or right-click on an action or group of actions and select the option you want to do. Keyboard shortcuts are Ctrl+C to copy, Ctrl+X to cut, Ctrl+V to paste, and Delete.
- Select multiple actions by clicking on the canvas and dragging a selection rectangle to include the desired actions. Click one of the actions in the selection rectangle to drag the group and reposition it on the canvas.
- Update an action's properties or branch condition.
- Modify the path a connector takes between actions.
- To save the modified version of the script with a different name, click the script name at the top of the canvas workspace and select Duplicate. If you want, you can deactivate the old version.
- To save changes to the same script file, click Save.
Create a Copy of a Script
Required permissions: ACD > Studio > Scripts >
If your company uses development stages and script promotion in Studio, there is an alternate way to duplicate a script.
- In NiCE CXone, click the app selector and select Omnichannel Routing > Studio .
- On the Scripts page, locate the script you want to
-
Click the three dots
 for the script you want and select Duplicate from the menu.
 - Alternatively, you can:
- Click the script you want to make a copy of. It opens in a new tab.
In the script's tab, click the name of the script at the top of the canvas workspace.
Click Duplicate in the drop-down menu.
-
Enter a unique Name for the duplicated script.
-
Click Location to choose a folder to save the script in. On the Location drop-down, you can also click Create New Folder.
-
If your organization uses script development lifecycle management, you must select the Stage and Target Folder for the script you're duplicating.
-
Click Duplicate.
Export a Script
Required Permission: ACD > Studio > Scripts >
Exporting a script saves a copy of the script in a file on your computer. You can do this to create backups of important scripts, or to send scripts via email to other Studio users. For example, you might need to send a script to your NiCE CXone account representative. If your organization has more than one NiCE CXone business unit![]() High-level organizational grouping used to manage technical support, billing, and global settings for your NiCE CXone system., you may need to move scripts between them. You can do this by exporting from one business unit and loading them into another.
High-level organizational grouping used to manage technical support, billing, and global settings for your NiCE CXone system., you may need to move scripts between them. You can do this by exporting from one business unit and loading them into another.
Studio scripts are in JSON. Desktop Studio scripts are in XML. This means that exported scripts can only be loaded into the application they were exported from. However, after loading a script, you can open and edit it with either Studio application. This is because the applications convert between JSON and XML when opening, but not when exporting or loading.
- In NiCE CXone, click the app selector and select Omnichannel Routing > Studio .
- On the Scripts page, locate the script you want to export.
- Click Options in the script's row and select Export from the menu.
- In the Save As window, choose where you want to save the script on your computer and click Save.
- Alternatively, you can:
- Open a script.
- Click the script name in the toolbar at the top of the canvas workspace and select Export.
- In the Save As window, choose where you want to save the script on your computer and click Save.
Load a Script
Required Permission: ACD > Studio > Scripts >
Loading a script allows you to import a script file from your computer to Studio. For example, if you exported a script from Studio as a backup, you can load it to revert back to that version.
Studio scripts are in JSON. Desktop Studio scripts are in XML. This means that you can only load scripts into the application they were exported from. After loading a script, you can open and edit it with either Studio application. This is because the applications convert between JSON and XML when opening, but not when exporting or loading.
Scripts open automatically in a separate browser tab after being loaded. However, you must save them or the file is not kept.
- In NiCE CXone, click the app selector and select Omnichannel Routing > Studio .
- Click Load Script at the top of the Scripts page.
- Add the script to the window that appears. You can drag the script from your desktop or click the browse for files link to choose a JSON script file.
- Click Open. The script opens in a new tab.
- On the script's tab, click Create. This allows you to save the script. If you don't save it, the file does not save to Studio.
- Enter a Name if you want to change the script's existing name.
- Select the Location where you want to save the script.
- Click Create.
Search for Scripts
You can search for scripts on the Scripts page using the following criteria:
- One or more words in the script name.
- One or more actions the script contains.
- One or more words in the captions of actions in the script.
- The name or value of a variable or parameter referenced in the script.
- The script media type, such as chat, digital, or phone.
You can add more than one criterion to the search bar. Studio remembers your search criteria. The next time you open Studio, the search terms you used in your last session populate the search bar.
The default search criterion is script name. You can enter a search term without selecting a filter option to search by script name only.
- In NiCE CXone, click the app selector and select Omnichannel Routing > Studio .
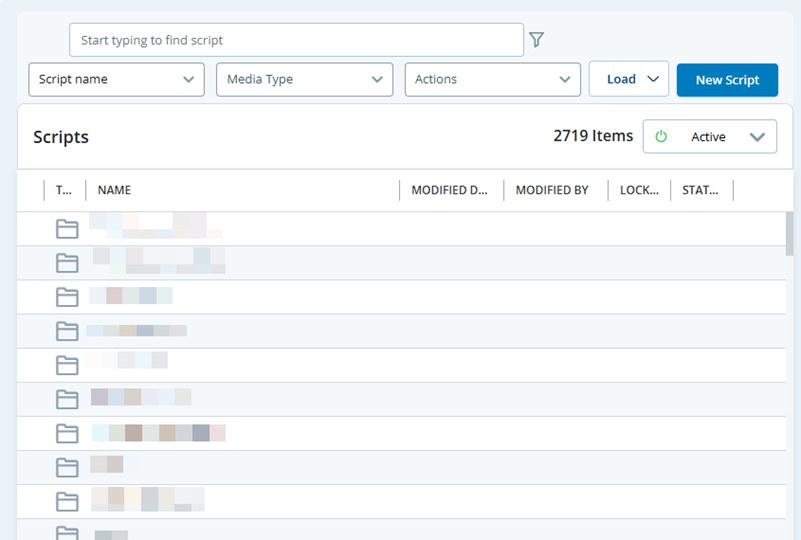
- On the Scripts page, enter a search term and press Enter to search by script name. To search by other criteria, continue to the next step.
- Click the filter
 . A set of drop-downs appears under the search bar.
 - Filter search results based on the following criteria. You can add more than one criteria to your search. To search by:
Script name: Select Script name from the drop-down on the left, then enter a word or partial word that's part of the script name and press Enter. The search results update as you type. You can add more than one script name to your search.
Action name: Click the Actions drop-down and enter the name of the action or scroll down the list. Select one or more actions in the list that appears. You can add more than one action to your search.
Action caption text: Select Caption from the drop-down on the left, then enter one or more words to search for and press Enter. You can add more than one caption to your search.
Variable name: Select Parameter from the drop-down on the left and enter some or all of the characters in a variable name and press Enter. You can add more than one action to your search.
Variable value: Select Parameter from the drop-down on the left and enter some or all of the characters in a variable value and press Enter.
Script media type: Click the Media Type drop-down and select the media type
 A medium, such as voice, email, and chat, through which a contact connects with an intended recipient. of the script you want to find. You can only filter by one media type at a time.
-
Add additional criteria, if needed. For each criterion that you add, a bubble containing that criterion appears above the filter drop-downs. The page displays all scripts matching the criteria you add and updates as you add or remove criteria.
-
To remove a criterion, click the X on the bubble below the search bar or click Clear All.
Locate Actions in a Script
Required Permission: ACD > Studio > Scripts >
You can view a list of the actions in the current script on the Actions tab. This tab is located in the script properties pane on the right side of the script canvas. From the list, you can search or sort to locate a particular action.
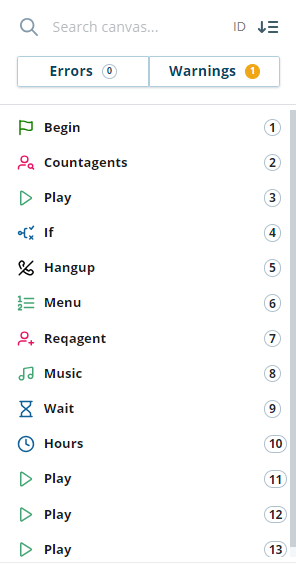
This list shows you the actions in the open script. The numbers to the right of the action names are action IDs. Action IDs are assigned in the order that actions are added to the script. If you delete an action and add it back to the script, it's assigned a new action ID.
- In NiCE CXone, click the app selector and select Omnichannel Routing > Studio .
- On the Scripts page, locate and double-click to open the script you want to work with. The script opens in a new tab.
- Click the script canvas to ensure no actions are selected.
- On the Actions tab in the properties pane on the right side of the canvas:
- Review the list of actions in the current script. By default, the list shows you all actions in the script organized by action ID number.
- Enter the name or part of the name of an action in the Search canvas field. As you type, the list narrows to show only actions matching the search term.
Sort the action list by clicking Sort By
 and selecting the option for how you want the list of actions sorted.Learn more about fields in this step
Field Details ID (ascending) Sorts the list in numeric order according to the action ID. The list starts with action ID 1 at the top and goes up. ID (descending)
Sorts the list in numeric order according to the action ID. The list starts with the largest action ID at the top and goes down. Name (A-Z) Sorts the list in alphabetical order based on the name of the action. Name (Z-A) Sorts the list in reverse alphabetical order based on the name of the action.
-
Click an action on the Actions tab.
The script highlights the selected action on the canvas in blue and displays the action's properties in the properties pane of the list of actions. You may need to zoom out to see the highlighted action. The script doesn't snap to the selection. The action properties replace the script properties in the pane on the right.
-
To return to the script properties pane and the list of actions, click the script canvas to deselect the action.
Locate Variables in a Script
Required Permission: ACD > Studio > Scripts >
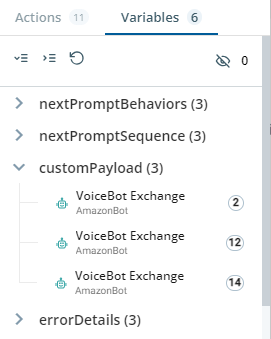
You can view a list of all variables referenced in your script on the Variables tab. This tab is located in the script properties pane on the right side of the script canvas. The tab displays an alphabetical list of the actions that contain references to variables. The variables referenced in each action appear under that action in the list.
- In NiCE CXone, click the app selector and select Omnichannel Routing > Studio .
- On the Scripts page, locate and double-click to open the script you want to work with. The script opens in a new tab.
- Click the canvas to ensure no actions are selected.
- In the properties pane on the right side of the canvas, click the Variables tab. It displays a list of actions in the script.
- Click a variable in the list. The list expands to show the actions that reference that variable.
-
Click an action under a variable name to view that action's properties.
The script highlights the selected action on the canvas in blue and displays the action's properties in the properties pane of the list of actions. You may need to zoom out to see the highlighted action. The script doesn't snap to the selection. The action properties replace the script properties in the pane on the right.
-
To return to the script properties pane and the Variables tab, click the script canvas to deselect the action.
Copy Script Path
You can copy the path to a script to use elsewhere. This saves you from having to type out the path when you need it.
- In NiCE CXone, click the app selector and select Omnichannel Routing > Studio .
- On the Scripts page, locate and double-click to open the script you want to work with
-
Click the script name at the top of the canvas and select Copy Script Path from the drop-down. A toast message
Small, temporary pop-up messages on the bottom of the screen indicating things like errors and successes. lets you know the path copied successfully.You can also click the ellipsis
next to a script on the Scripts page and select Copy Script Path.
Add a Note or Annotation to a Script
Required Permission: ACD > Studio > Scripts >
In Studio, there are two actions you can use to add documentation to your script:
- Annotation: Allows you to add text that is visible on the script canvas. You can enhance the text with rich text options available in the action.
- Note: Allows you to add text that can only be seen by viewing the action's properties. You do not need to connect either action to the other actions in your script.
When you first add a NOTE action to your script, it appears as a small chat bubble filled in solid black:  . After you add text to it, the appearance changes to a small chat bubble filled with blue and some horizontal lines representing text:
  .
.
- In NiCE CXone, click the app selector and select Omnichannel Routing > Studio .
- On the Scripts page, locate and double-click to open the script you want to work with
- To add a note to the script:
- Click Actions
 in the left icon menu to open the Actions palette.
 - Search for note and drag the NOTE action to the canvas.
- Click to select the NOTE action, then enter your message in the Comments field in the action's properties.
- Click Actions
-
To add an annotation to the script, you can do any of the following:
- Right-click on the script canvas and click Text. The cursor changes to a cross and you can draw a rectangle on the canvas. When you release the cursor, the focus is on the ANNOTATION action rectangle so you can start typing immediately without additional clicks.
- Press T on your keyboard to change the cursor so you can draw an ANNOTATION on the script canvas.
- Click Text
 in the left icon menu. The cursor changes to a cross and you can draw the action on the script canvas.
 - Click Actions in the left icon menu, search for annotation, and drag it to the canvas.
- To edit a note, select the action and change the text in the Comments field.
- To edit an annotation, double-click the ANNOTATION action on the canvas and make your changes.
- Save your script.