有时,由于网络问题或其他因素,机器人![]() 代替现场人工坐席处理客户交互的软件应用程序。的响应速度可能会变慢。 安全网可防止所有机器人延迟情况,避免对您的 SLA
代替现场人工坐席处理客户交互的软件应用程序。的响应速度可能会变慢。 安全网可防止所有机器人延迟情况,避免对您的 SLA![]() 服务提供商与客户之间的约定,具有确定的服务级别阈值,包括质量、可用性和责任等。 或您的客户体验造成负面影响。 安全网使用Digital Experience 工作流程自动化。
服务提供商与客户之间的约定,具有确定的服务级别阈值,包括质量、可用性和责任等。 或您的客户体验造成负面影响。 安全网使用Digital Experience 工作流程自动化。
按照此页面上的任务创建安全网:
- 等待 30 秒让机器人响应客户消息
 联系人在机器人交互中所说的任何内容,无论是问题还是陈述,书面或口头。。
 - 如果未收到任何消息,则向客户发送一条响应消息,表示其正在被路由到坐席,并会将交互重新路由到实时坐席队列 Digital Experience 相当于一种技能的 Digital First;将每个联系人转接到分配处理该类联系人的坐席。。
- 标记交互,这样您以后可以轻松查找到交互并故障排除导致机器人延迟的根本原因。
这是如何创建安全网的一个示例。 您的组织可能希望使用其他数字化工作流自动化选项来设计独特的安全网。 无论您使用哪些选项,设置安全网的流程都将遵循本页描述的一般流程。 工作流自动化联机帮助可帮助您了解有关可用选项的更多信息。
按照给定的顺序完成以下每一个任务。
创建触发器
- 单击应用程序选择器
 并选择ACD。
 -
转到 Digital Experience > 自动化触发器。
- 单击添加触发器。
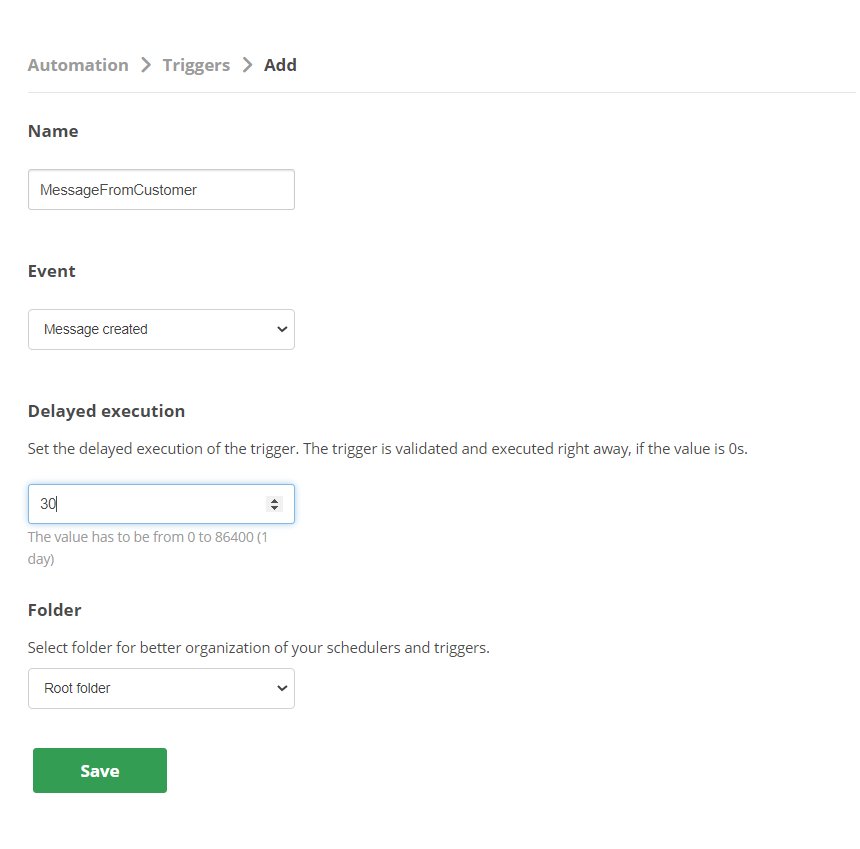
- 在名称字段中,输入一个值。 上图中显示的值为 MessageFromCustomer,但您可以根据需要使用不同的值。
- 对于事件 ,从下拉列表中选择创建的消息 。
- 对于延迟执行,输入 30 。 这是从收到客户消息到触发安全网之间经历的秒数。
- 如果您按文件夹安排触发器,请从下拉列表中选择一个。 否则,触发器将保存到根触发器文件夹。
- 单击保存。
创造条件
- 单击应用程序选择器 并选择ACD。
-
转到 Digital Experience > 自动化作业。
- 对于您刚刚创建的触发器,单击详细信息。
- 单击添加条件。
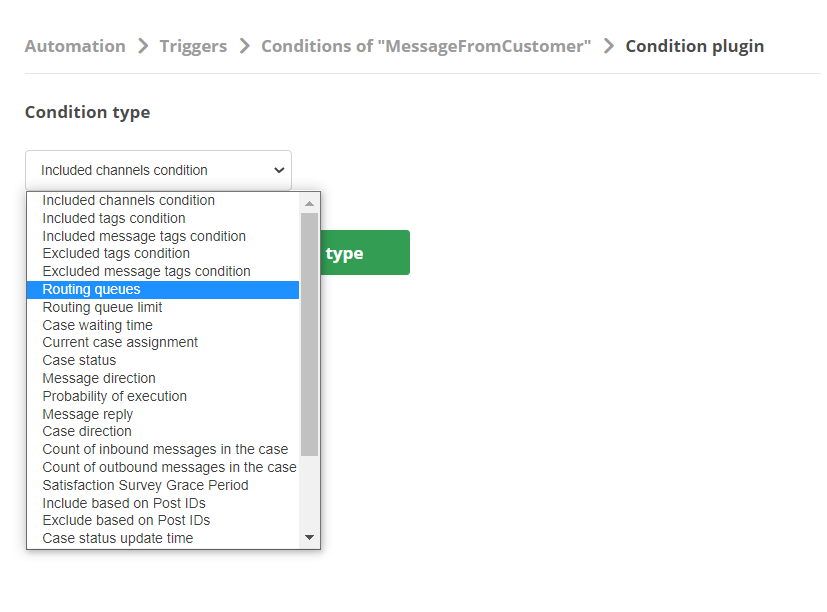
- 对于条件类型 ,从下拉列表中选择路由队列 ,然后单击为选定类型创建条件。
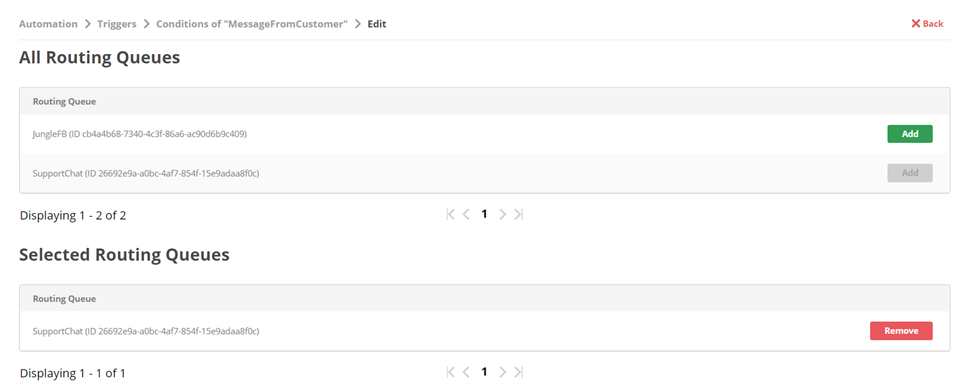
- 在所有路由队列列表中,对您的机器人 代替现场人工坐席处理客户交互的软件应用程序。所分配至的队列 Digital Experience 相当于一种技能的 Digital First;将每个联系人转接到分配处理该类联系人的坐席。单击添加。
- 在“所有路由队列”标题上方,单击触发器。
- 对于您刚刚创建的触发器,单击详细信息。
- 单击添加条件。
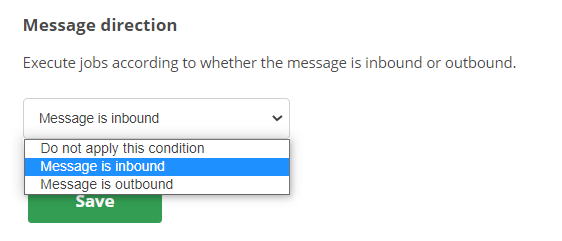
- 对于条件类型 ,从下拉列表中选择消息方向 ,然后单击为选定类型创建条件。
- 从下拉列表中选择消息已呼入。
- 单击保存。
创建延迟条件
- 在 Digital Experience 门户中,转到 设置 > 自动化 > 触发器。
- 对于您刚刚创建的触发器,单击延迟条件。
- 单击添加。
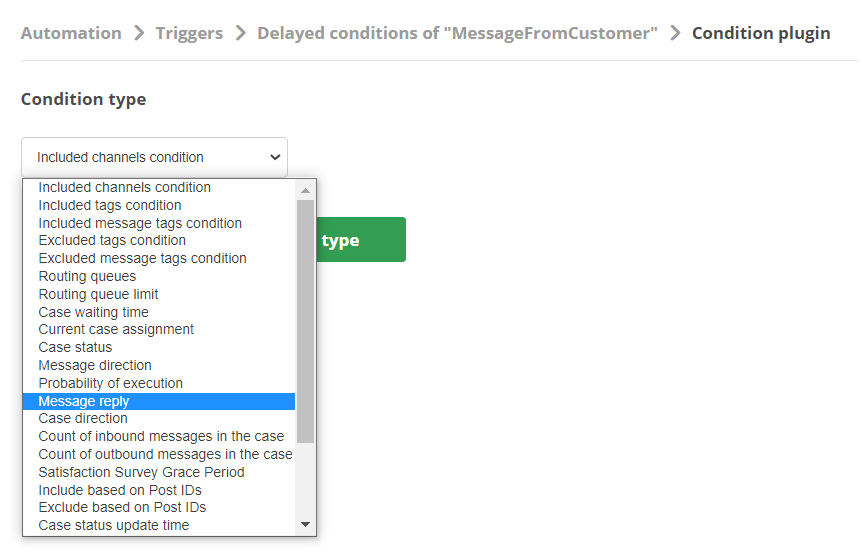
- 从条件类型下拉列表中,选择消息回复,然后单击为选定类型创建条件。
- 从下拉列表中选择消息并未回复。
- 单击保存。

创建作业以发送消息
- 在 Digital Experience 门户中,转到设置 > 自动化 > 作业。
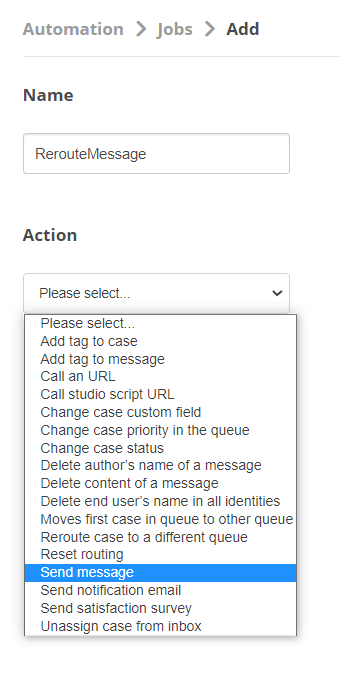
- 单击添加。
- 在名称字段中,输入一个值。 此处显示的值为 RerouteMessage,但您可以根据需要使用不同的值。
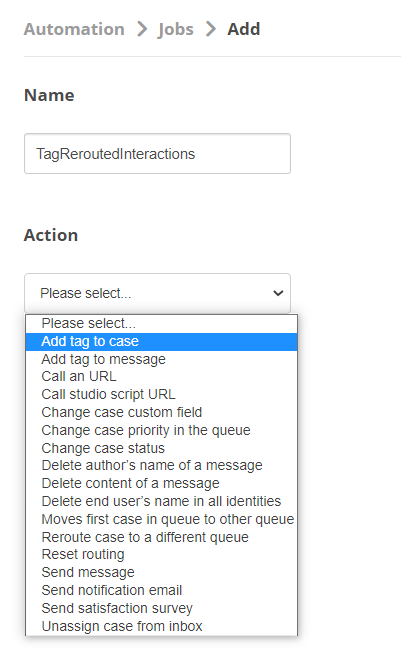
- 从操作下拉列表中,选择发送消息。
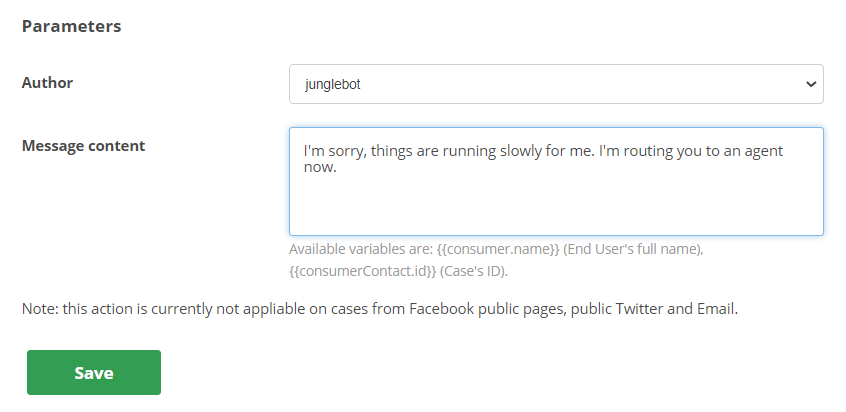
- 从作者下拉列表中,选择消息发送方。 您可以选择机器人 代替现场人工坐席处理客户交互的软件应用程序。或真人坐席。
- 对于消息内容,输入您希望客户收到的响应。
- 单击保存。
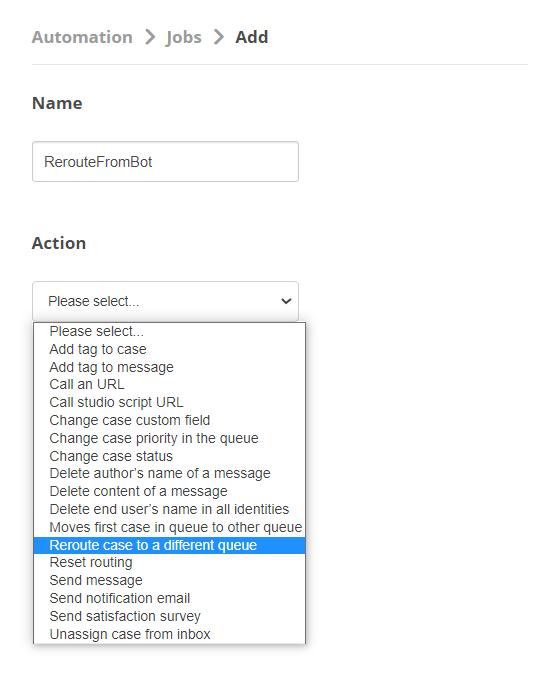
创建作业以重新路由交互
- 在 Digital Experience 门户中,转到设置 > 自动化 > 作业。
- 单击添加。
- 在名称字段中,输入一个值。 此处显示的值为 RerouteFromBot,但您可以根据需要使用不同的值。
- 从路由队列下拉列表中,选择队列 Digital Experience 相当于一种技能的 Digital First;将每个联系人转接到分配处理该类联系人的坐席。以接收重新路由的交互。
- 单击保存。
为重新路由的交互创建标记
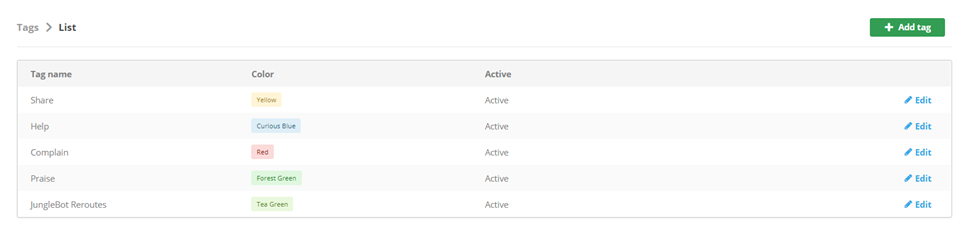
- 单击应用程序选择器 并选择 ACD。
- 转至 DFO > 标记。
- 单击添加标记。
- 在标题字段中输入一个值来为您的标记命名。 上图中显示的值为 JungleBot Reroutes。
- 从颜色下拉列表中,选择标记的颜色。
- 从活动下拉列表中,选择是。
- 单击保存。
创建作业以标记重新路由的交互
- 在 Digital Experience 门户中,转到设置 > 自动化 > 作业。
- 单击添加。
- 在名称字段中,输入一个值。 此处显示的值是 TagReroutedInteractions,但您可以根据需要使用不同的值。
- 从标记下拉列表中,选择为此目的创建的标记。
- 单击保存。