

You can handle voicemails in CXone Agent if your administrator has enabled them for you. Any voicemails assigned to you appear in the interactions menu, marked by ![]() .
.
Use Voicemail Controls
The voicemail control panel appears in CXone Agent when you're assigned a voicemail.
The panel displays the:
-
Contact's
 The person interacting with an agent, IVR, or bot in your contact center. name and phone number.
 -
Skill
Used to automate delivery of interactions based on agent skills, abilities, and knowledge. -
Duration of the voicemail.
It also shows these voicemail controls:
| Icon | Details |
|---|---|
| Play/Pause |
Start or stop listening to the voicemail. When the voicemail is stopped, the play button appears. When the voicemail is playing, the pause button appears. |
|
Go Back |
Jump back ten seconds in the voicemail. |
| Go Forward |
Jump forward ten seconds in the voicemail. |
| Loop |
Put the voicemail on loop. When it finishes playing, it starts over again. |
| Call Back |
Initiate a call with the contact. |
| Transfer |
Transfer the voicemail to another agent or skill. |
| Launch |
View a list of available indicators |
| Delete |
Delete the voicemail. |
| Outcome |
Assign a disposition |
Handle Inbound Voicemails
-
Launch CXone Agent and sign in.
-
Select the voicemail from in the interactions menu.
- If Reject and Accept appear, click Accept.
- Click Play
 to listen to the voicemail.
 - Once you've reviewed the voicemail, click Call Back
 to initiate an outbound call with the contact.
Transfer Voicemails
You can transfer voicemails to other agents. If you don't know who to transfer the voicemail to, you can transfer it to a skill![]() Used to automate delivery of interactions based on agent skills, abilities, and knowledge or team. The voicemail is then assigned to an agent with that skill or team.
Used to automate delivery of interactions based on agent skills, abilities, and knowledge or team. The voicemail is then assigned to an agent with that skill or team.
- While handling a voicemail, click Consult / Transfer
 in the voicemail controls.
 - In the Directory, search for the agent, skill, or team you want to transfer the voicemail to. You can use the drop-down below the search bar to switch between directories.
- Hover over the agent, skill, or team in the search results and click Transfer
 .
.
Use the Customer Card
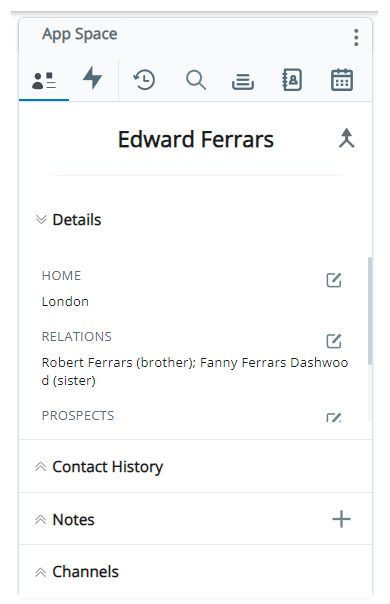
If your administrator has enabled it for you, the customer card provides information to help you handle contacts.
- Details: View, edit, and add contact information, such as an email address, phone number, and location.
-
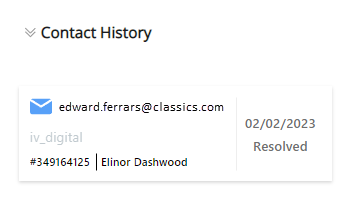
Contact History: View a list of past interactions
The full conversation with an agent through a channel. For example, an interaction can be a voice call, email, chat, or social media conversation. with the contact. For each interaction, it shows the channel, the agent who handled it, the date it occurred, and the disposition Result assigned by the agent or system at the end of a voice (disposition) or digital (status) interaction. or status Result assigned by the agent or system at the end of a voice (disposition) or digital (status) interaction.. Click an interaction to open it in a preview. -
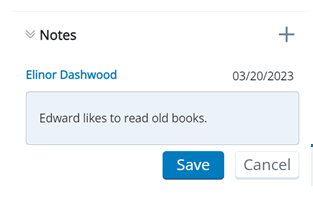
Notes: View notes written by other agents. You can also edit, add, and delete notes, if your administrator has enabled this for you.
-
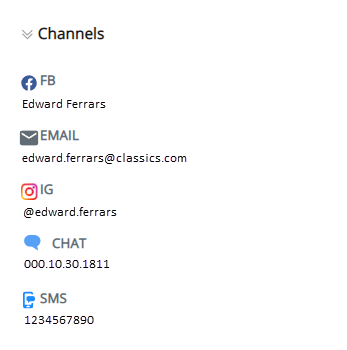
Channels: View the available channels
A way for contacts to interact with agents or bots. A channel can be voice, email, chat, social media, and so on. for the contact. -
Interaction Activity: View a history of agents who have handled the contact and those interactions' statuses.
-
Current Interaction: View a record with information about the contact. This record is only available if your administrator has connected a CRM
Third-party systems that manage such things as contacts, sales information, support details, and case histories. to  to unlink the record. Click the button next to this icon to open the record in the CRM.
 -
Related Interactions: View records from past interactions with the contact. This section may also display records for related contacts. This can include contacts in the same household or account. These records are only available if your administrator has connected a CRM
Third-party systems that manage such things as contacts, sales information, support details, and case histories. to  next to a record to link it to the CRM. Click Linked to unlink the record. Click the button next to this icon to open the record in the CRM.
There may be more than one customer card for a contact. You can merge customer cards by clicking Merge ![]() .
.
Assign a Disposition to a Voicemail
You can assign a disposition to a voicemail to indicate the result of the interaction. For example, if you called the contact back and answered their question, you could mark the voicemail as Resolved.
- In the voicemail control panel, click Outcome
 .
. - In the Outcomes window, select a Disposition from the drop-down.
- You can enter Notes about the voicemail. You can also add Tags to help you find the voicemail later.
- Click Save.