You can set up approval workflows in CXone Mpower Agent. Approval workflows are Digital Experience configurations that determine if and how agents are involved in messages that need to be approved by other users. Using approval workflows, you can:
-
Require agents to submit messages for approval before they are sent to the contact. This helps ensure that all agent responses are appropriate and correct. It is especially useful in public social interactions, where agent responses are highly visible. It is also useful for agent training.
-
Allow agents to choose whether they submit responses for approval. This is useful for agents who may want to send some messages in for approval.
-
Enable agents to handle approval requests. They can then approve, reject, or edit messages submitted by other agents.
You can set up these approval workflows by configuring permissions for agents' Digital Experience (Digital) roles. You configure these permissions for each channel in the role; for example, you can require approval for public X (formerly known as Twitter) interactions while not requiring approval for private X messages.
The Reply and Can Approve permissions configure approval workflows. These permissions are found in ACD > Digital > Roles. The table below displays how to configure these permissions for each approval workflow.
| Approval Workflow | Reply | Can Approve |
|---|---|---|
| The agent cannot send responses on their own, but can submit responses for approval. They cannot approve others' responses. |

|
|
| The agent cannot send responses on their own, but can submit responses for approval. They can approve others' responses. |
|

|
| The agent can send responses on their own, but cannot approve others' responses. |
|
|
| The agent can send responses on their own and approve others' responses. |
|
|
Classics, Inc. has just connected its Facebook page to a public Facebook channel in CXone Mpower. John Middleton, the CXone Mpower administrator for Classics, Inc., wants to make sure that Facebook comments written by agents in training are reviewed by more experienced agents before they are published. He configures the permissions for the public Facebook channel in the new agents' role so that they cannot publish Facebook comments on their own. Then, he configures the permissions for the more experienced agents' role so that they can approve the new agents' comments.
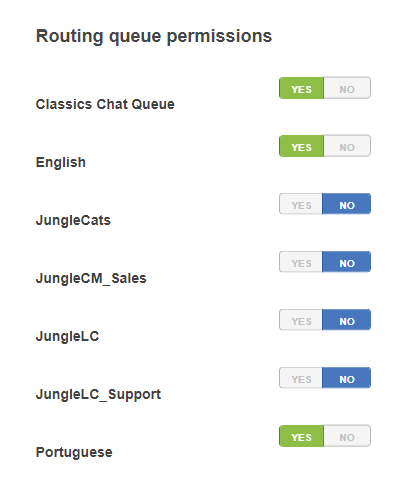
Configure Approval Queues
You can select which Digital Experience queues![]() Digital Experience equivalent of a skill; routes each contact to an agent assigned to handle that type of contact are available to which agents.
Digital Experience equivalent of a skill; routes each contact to an agent assigned to handle that type of contact are available to which agents.
- Click the app selector
 and select ACD.
 - Go to Digital > Roles.
- Click Edit
 for the role assigned to your agents who use Agent.
 -
Scroll down to the Routing queue permissions section. Click Yes for each queue you want to enable. Click No for the queues you want to disable.
- Scroll down to the bottom and click Save.
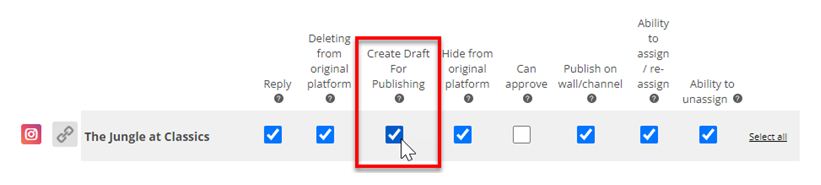
Require Agents to Request Approval
You can configure a Digital Experience permission for agents' roles to require them to submit messages for approval.
- Click the app selector and select ACD.
- Go to Digital Experience > Roles.
- Click Edit for the role you want to edit.
- In the Channels section, find the channel you want to require approval for and click Edit permissions.
-
Clear the checkbox for the Reply permission.
-
Select the checkbox for the Create Draft for Publishing permission.
- Click Save.
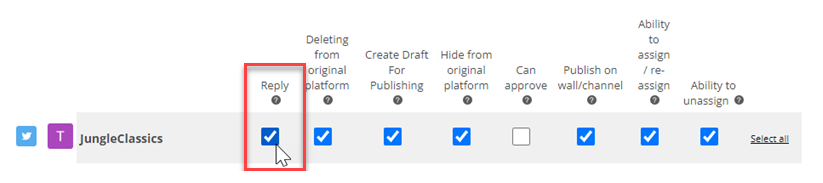

Allow Agents to Request Approval
You can allow agents to optionally request approval for messages they write. This is done by configuring a Digital Experience permission for their role.
- Click the app selector and select ACD.
- Go to Digital > Roles.
- Click Edit for the role you want to edit.
- In the Channels section, find the channel you want to allow requesting approval for and click Edit permissions.
-
Select the checkbox for the Reply permission.
-
Select the checkbox for the Create Draft for Publishing permission.
- Click Save.
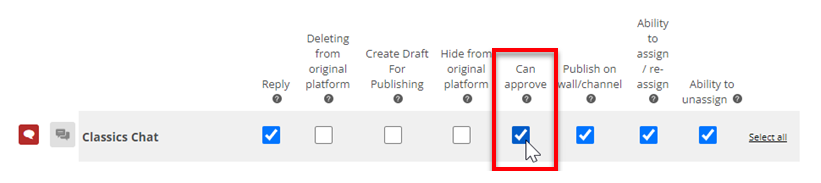
Enable Agents to Approve Messages
You can configure a Digital Experience permission for agents' roles to enable them to approve messages submitted by other agents.
- Click the app selector and select ACD.
- Go to Digital > Roles.
- Click Edit for the role you want to edit.
- In the Channels section, find the channel you want to enable approval for and click Edit permissions.
-
Select the checkbox for the Can approve permission.
- Click Save.