

This is the first step of setting up Agent Workspace (Embedded) (Agent Embedded) in Zendesk.
This page explains how to install NiCE CXone Agent Workspace (Embedded) (Agent Embedded) in Zendesk. Once it's installed, agents can use it to handle interactions directly inside Zendesk.
Complete each of these tasks in the order given.
Install Agent Workspace (Embedded) (Agent Embedded)
-
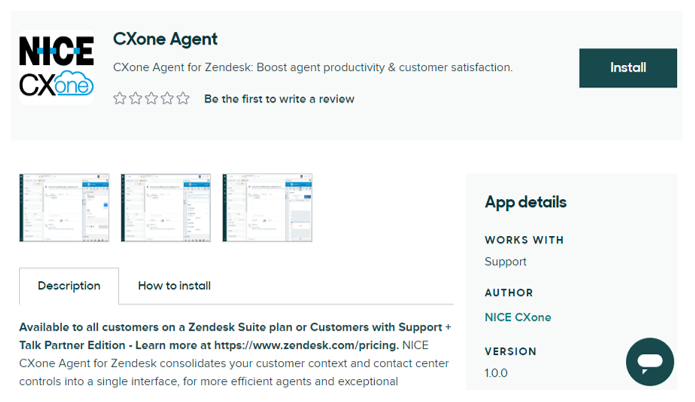
In Zendesk, navigate to the Zendesk Marketplace.
-
Search for CXone Agent.
-
Select CXone Agent in the search results.
-
Click Install.
-
Select the account where you want to install Agent Workspace (Embedded) (Agent Embedded).
-
If you haven't already, log into your Zendesk instance.
-
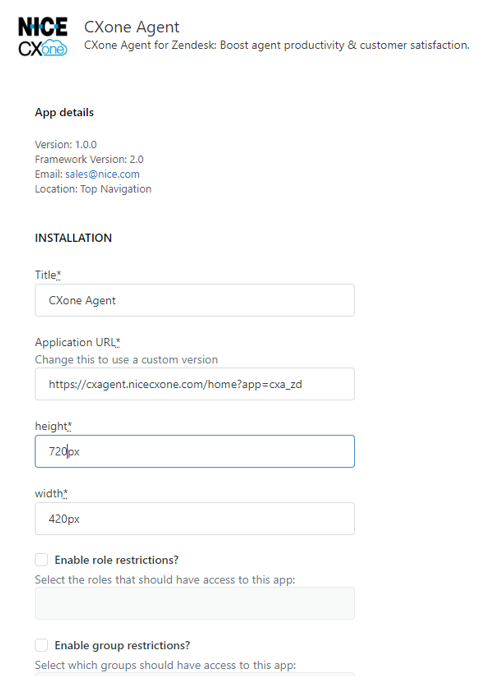
In the Apps and Integrations page that opens, fill out the Agent Workspace (Agent) form.
-
Review the Title, Application URL, Height, and Width fields. They should be auto-filled with these correct values:
-
Title: Agent
-
Application URL: One of these:
-
If you are not on FedRAMP: https://cxagent.nicecxone.com/home?app=cxa_zd
-
If you are on FedRAMP: https://cxagent.nicecxone-gov.com/home?app=cxa_zd
-
-
Height: 720px
-
Width: 420px
-
-
To limit access to Agent Workspace (Embedded) (Agent Embedded) to specific agents, select one or both of these options:
-
Enable role restrictions?: Allows you to select the roles you want to access Agent Workspace (Embedded) (Agent Embedded).
-
Enable group restrictions?: Allows you to select the groups you want to access Agent Workspace (Embedded) (Agent Embedded).
To enable access to Agent Workspace (Embedded) (Agent Embedded) for all agents, leave these fields unselected.
-
 Learn more about fields in this step
Field Details Title The title of Agent Workspace (Embedded) (Agent Embedded) as it appears in Zendesk. Application URL
Your Agent Workspace (Embedded) (Agent Embedded) URL. Do not edit.
Height The height of Agent Workspace (Embedded) (Agent Embedded) in pixels. Width The width of Agent Workspace (Embedded) (Agent Embedded) in pixels. Enable Role Restrictions When enabled, allows you to select specific roles for access to Agent Workspace (Embedded) (Agent Embedded). Enable Group Restrictions When enabled, allows you to select specific groups for access to Agent Workspace (Embedded) (Agent Embedded). -
-
Click Install.
The next step of setting up Agent Workspace (Embedded) (Agent Embedded) in Zendesk is to set up a CRM configuration.