

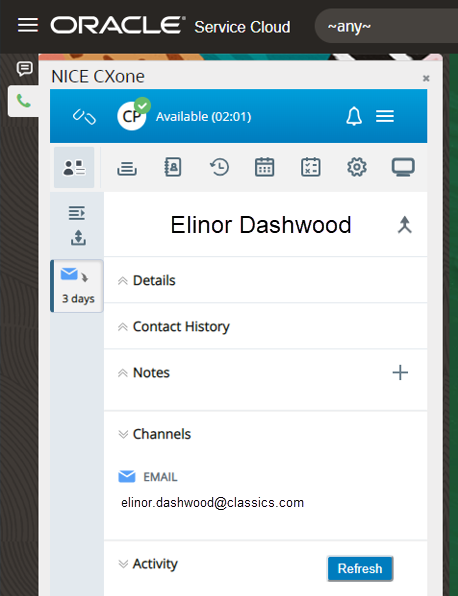
This is the first step of setting up Agent Workspace (Embedded) (Agent Embedded) in Oracle.
This page explains how to install NiCE CXone Agent Workspace (Embedded) (Agent Embedded) in Oracle. Once it's installed, agents can use it to handle interactions directly inside Oracle.
Complete each of these tasks in the order given.
Download and Configure Agent Workspace (Embedded) (Agent Embedded)
First, download Agent Workspace (Embedded) (Agent Embedded) from NiCE CXone and configure it for use within Oracle.
-
In NiCE CXone, click your initials
 in the right corner of the NiCE CXone top navigation bar.
 -
Click Support & Downloads.
-
Scroll down to Agent Applications. Find
-
Open the downloaded cxa-oracle-extension.zip folder.
-
Open the property.json file. In the defaultValue field, find the section of the Agent Workspace (Embedded) (Agent Embedded) URL that's in curly brackets.
-
Replace that section with your Oracle instance domain. To find your Oracle instance domain, open your instance of Oracle and copy and paste the URL from the address bar in your browser. You only need the section of the URL between https:// and .com.
For example, for an Oracle instance domain of company.oracle, the value of the defaultValue field would be https://cxagent.nicecxone.com/?app=cxa_osc&base=https://company.oracle.com.
-
Save property.json.

Upload Agent Workspace (Embedded) (Agent Embedded) to Oracle B2C Service
Then, upload Agent Workspace (Embedded) (Agent Embedded) to Oracle B2C Service, also known as Oracle Service Cloud.
-
Open Oracle B2C Service (Oracle Service Cloud).
-
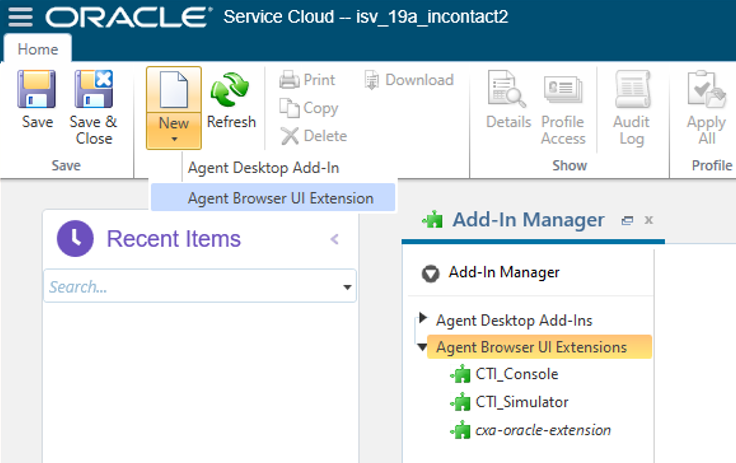
In the navigation menu, go to Configuration > Site Configuration > Add-In Manager.
-
In the toolbar at the top, click New > Agent Browser UI Extension.
-
Select the cxa_oracle_extension.zip folder and click Open.
-
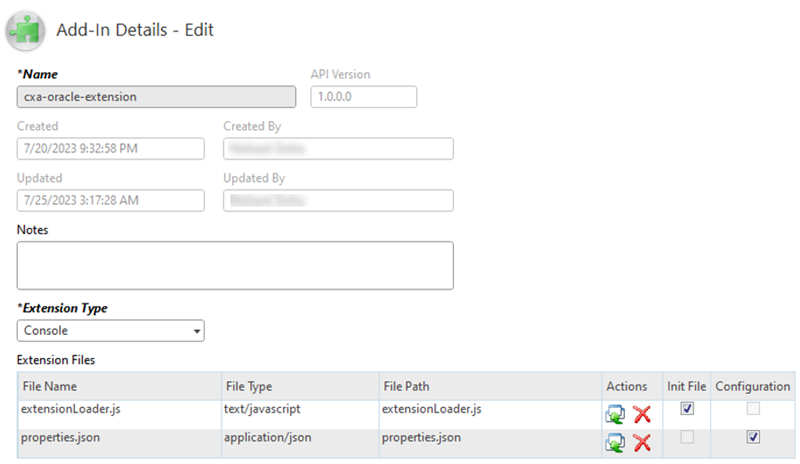
In the Add-In Details editor, give the add-in a Name of cxa-oracle-extension. This must be the name of the add-in when uploading it to Oracle. If you use a different name, Agent Workspace (Embedded) (Agent Embedded) will not appear to agents.
-
For Extension Type, select Console.
-
In the Extension Files table, check the box for Init File in the row for extensionLoader.js. Check the box for Configuration in the row for properties.json.
-
Click Save in the toolbar at the top.
Enable Agent Workspace (Embedded) (Agent Embedded) for Agent Profiles
Next, enable agents to use Agent Workspace (Embedded) (Agent Embedded) in Oracle by allowing it for their Oracle profile.
-
With the cxa-oracle-extension add-in open, click the Profile Access tab.
-
In the Profiles Allowed to Access section, select the profile of the agents who will use Agent Workspace (Embedded) (Agent Embedded).
-
In the Allowed Interfaces section, select the Oracle interface where you want agents to see Agent Workspace (Embedded) (Agent Embedded). To add it to all Oracle interfaces, select the checkbox for Select All.
-
Click Save in the toolbar at the top.
Configure Click-to-Call
Follow these steps to set up Click-to-Call for Agent Workspace (Embedded) (Agent Embedded) in Oracle.
-
Open Oracle B2C Service (Oracle Service Cloud).
-
In the navigation menu, go to Configuration > Application Appearance > Workspaces/Workflows.
-
Double-click the contact workspace for the agents' Oracle profile.
-
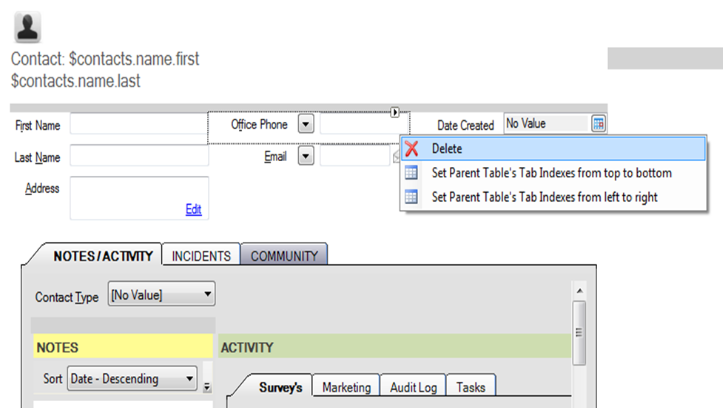
If the phone field is in the workspace, delete the Office Phone field.
-
Drag and drop the table from the Insert Control ribbon into the contact workspace. By default, the table is created with two rows. Delete the second row.
-
Drag and drop the Phone Numbers field from the Insert Field ribbon into the first column of the table.
-
Drag and drop the Button control from the Insert Control ribbon into the second column of the table.
-
Click the Button control, then click the Design tab in the ribbon. In the Text field, enter the text you want to display on the button; for example, Click to call.
-
Align the Office Phone field and Click-to-Call button:
-
Drag and drop a spacer from the Insert Control ribbon. Make sure to add the spacer vertically.
-
Click the Design tab in the ribbon. Use the Increase Column Span option in Table Cell to increase the width of the Office Phone field.
-
-
Add a rule to the Click-to-Call button:
-
Click the Click-to-Call button, then click the Rules tab.
-
In the window that opens, set the Trigger as A button is clicked.
-
Click Next, then skip the Conditions tab.
-
On the Then Actions tab, select Fire a named event.
-
Click Named Event Hyperlink and name the event as cxone-click-to-dial. This is case-sensitive.
-
Click Next. In the Properties tab, enter a Rule Name for this rule and click Finish.
-
Save the workspace.
-
-
Make sure you're logged out of Agent Workspace (Embedded) (Agent Embedded), then clear your cache and refresh your browser. Test the Click-to-Call button in Agent Workspace (Embedded) (Agent Embedded) in Oracle.
The next step of setting up Agent Workspace (Embedded) (Agent Embedded) in Oracle is to set up a CRM configuration.