Message templates make it easy for agents to send messages to contacts. Your agents may send the same type of message, like appointment confirmations, many times every day. With message templates, you can ensure that your agents all send messages the same way. You can also set up message templates using iMessage extensions for iOS apps. This allows you to use information and functions from other iOS apps within the chat so customers don't need to leave the chat interface. You can set up app extensions for maps and Apple Pay.
To create rich messages using list pickers, time pickers, quick replies, form messages, and rich links you must go to Rich Message Settings.
The Jungle at Classics has a significant number of customers who use Apple Messages for Business. Mowgli Kipling, the contact center administrator, takes advantage of this by creating interactive templates that help make his agents more be effective when chatting with customers:
- Customers often ask about merchandise in The Jungle's online store. Agents can use a template to send pictures and links to the items customers have questions about.
- Once a customer has decided on a book they would like to purchase, there may be options available for that book. For example, it may be available in hardback, paperback, or audiobook. Agents can send a list of these options for the customer to choose from.
- Some Jungle locations provide services for book repairs. Customers want to book appointments for this service. Agents can send available time slots for different bookings to the customer for easy scheduling. They can also send a map so customers know exactly where the Jungle location they're visiting is.
- When customers have made their selections, the agent can use a template to send the customer a payment request.
Some templates require you to have additional information on-hand before you can create the template. For example, to set up templates for app extensions, you need information from the application developer so Digital Experience can communicate with the app. If you're setting up an app extension for Apple Pay, you also need information so Digital Experience can communicate with the financial institution that will process the payments. Read on to learn more about each template type.
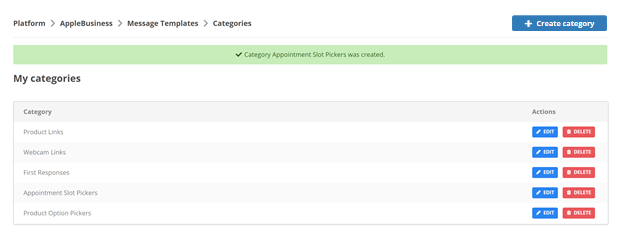
Create Categories for Message Templates
Categories allow you to organize message templates so that agents can find them easily. When you create a message template, you can assign a category to it. Categories are optional.
- Click the app selector
 and select ACD.
 -
Go to DFO > Points of Contact Digital.
- Click Apple Messages for Business > Message Templates > Categories.
- Click Create Category.
- Enter a Name for your category and then click Save.
- Click Save.
Create an Authentication Message Template
Authentication templates let agents send access requirements. This template type lets agents use a contact's secure information, such as an email address or login for another service.
The authentication protocol Apple Messages for Business supports is called OAuth. You will need to complete setup tasks in Apple Business Register to create an authentication message template.
Set Up OAuth Parameters in Apple Business Register
You will need the following information from your OAuth service provider to complete this task:
-
OAuth URL
-
Token URL
-
Client Identifier
-
Go to Apple Business Register and sign in.
-
Select Messages for Business Account.
-
Find your organization.
-
Locate the Integrated OAuth2 Authentication section and click Edit.
-
Enter the Oauth URL. You can find this in the API documentation for the specific service provider you are using to authenticate information. For example, if you are trying to verify someone using LinkedIn, you would go to the documentation for LinkedIn for this information.
-
Enter the Token URL. You can find this in the API documentation for the specific service provider you are using to authenticate information.
-
Enter the Client Identifier. You can find this in the API documentation for the specific service provider you are using to authenticate information.
-
Click Submit.
-
Click Send for Review on the screen for your organization.
-
A notification will appear telling you your profile has been sent to Apple for approval. Click OK.
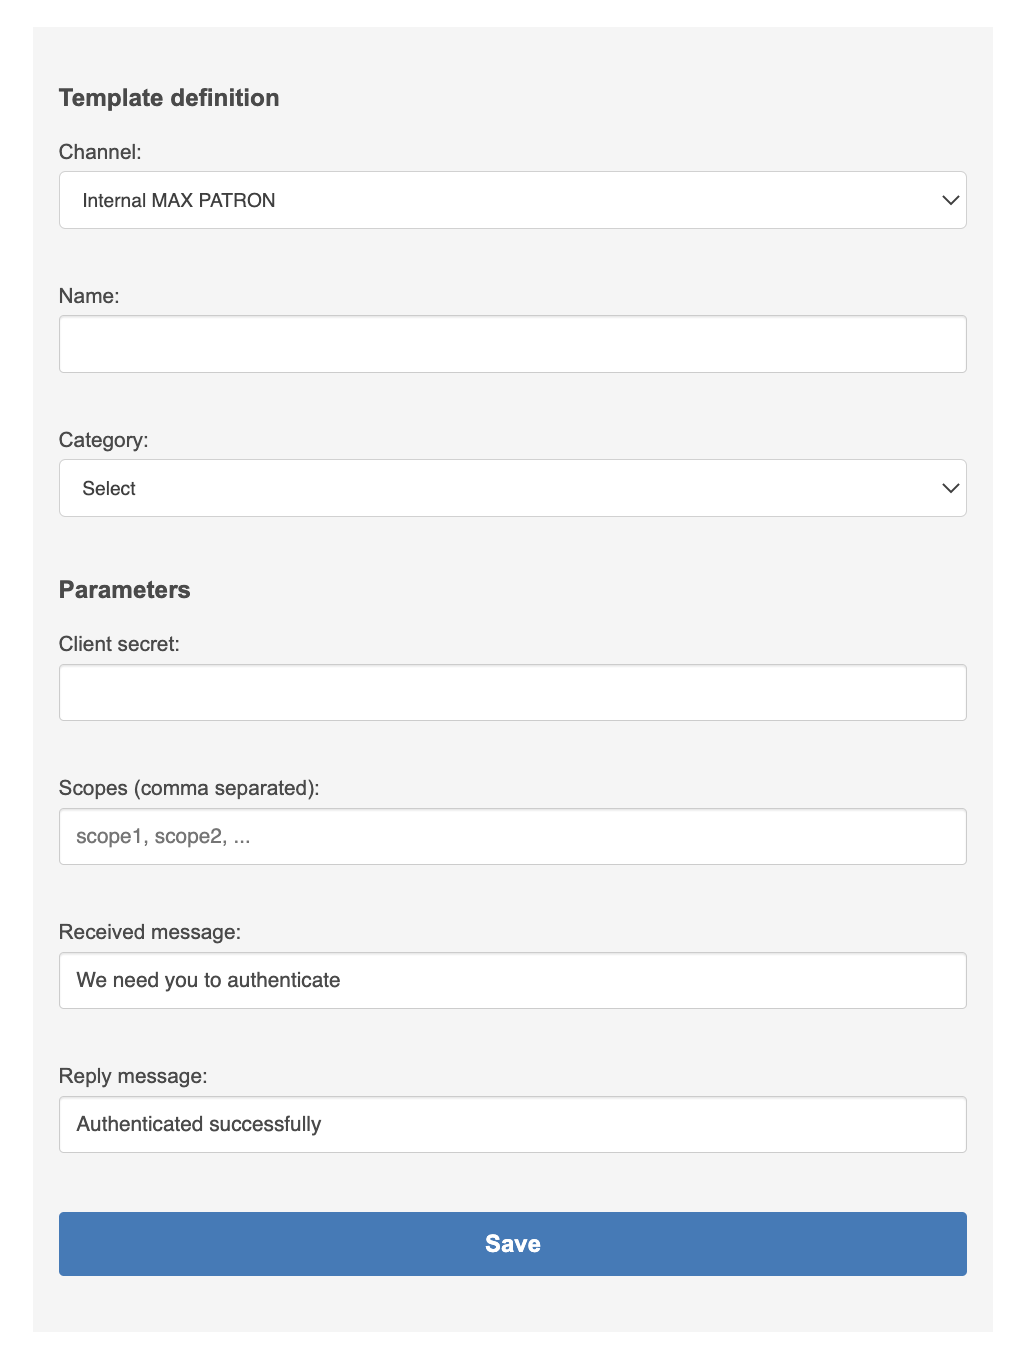
Create Authentication Message Template in CXone
|
Field |
Details |
|---|---|
| Channel | The channel the authentication template is assigned to. You will need to create a unique authentication template for each Apple Messages for Business channel. |
| Name | Internal name for the template. It appears in the Message Templates list and in MAX. Include the OAuth service provider in the name, such as LinkedIn. |
|
Category |
List of all the category names you've created for message templates in this channel. Describes the purpose of the template. For example, you might want to create a category called Authentication before you create an authentication template. This step is optional for authentication templates. |
| Client Secret | OAuth provider token. You can find this information in the OAuth provider's online documentation. |
| Scopes |
What you can do on the user's behalf, such as use their name, photo, or email address. You can find the scope information in the OAuth provider's online documentation. |
| Received Message | Message the contact receives to tell them what needs to be authenticated. |
| Reply Message | Message the contact receives when they have been successfully authenticated. |
- Click the app selector and select ACD.
-
Go to DFO > Points of Contact Digital.
-
Open Apple Messages for Business.
-
Click Message Templates.
-
Click Authentication.
-
Select a Channel from the drop-down.
-
Enter a Name for the template.
-
Select a Category.
-
Enter the Client secret.
-
Enter the Scopes, separating each with a comma.
-
Enter the Received message.
-
Enter the Reply message.
-
Click Save.
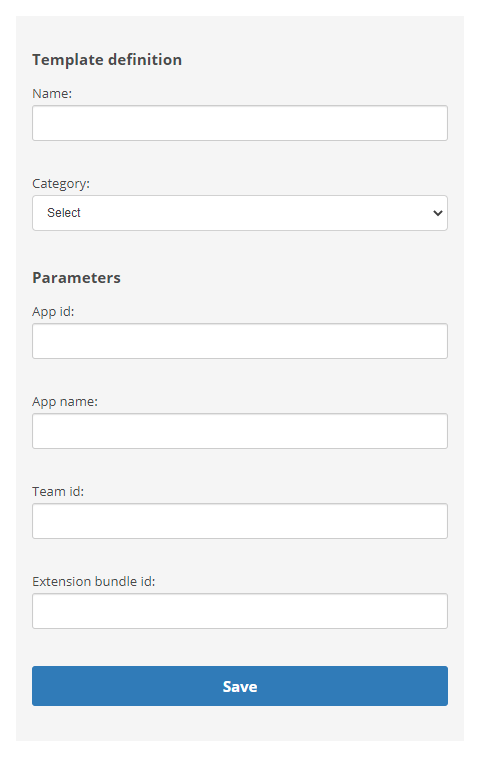
Create an App Extension Message Template
App Extension templates let agents send messages that contain content from iOS applications. Mowgli uses this template type so agents can send customers information such as maps that will appear in the chat interface. This template only works with applications that have app extensions built for using in iMessage or Apple Messages for Business.
Before you can set up an app extension, you must obtain this information some from the application developer:
-
App ID
-
App name
-
Team ID
-
Extension bundle ID
|
Field |
Details |
|---|---|
| Name | Internal name for the template that appears in the Message Templates list and in MAX. |
|
Category |
List of all the category names you've created for message templates in this channel. |
| App id | Identifies one or more applications produced by a single developer. This information comes from the developer of the app. |
| App name | The name of the application. This information comes from the developer of the app. |
| Team id | The Apple Developer Team ID of the developer of the application. This information comes from the developer of the app. |
| Extension bundle id | The application's unique identifier. This information comes from the developer of the app. |
- Click the app selector and select ACD.
- Go to DFO > Points of Contact Digital.
- Click Apple Messages for Business > Message Templates.
-
Click App Extension.
- Enter a Name for the template.
-
If you use them, select a Category from the drop-down list.
-
Enter the App id, App name, Team id, and Extension bundle id that the application developer provided you.
- Click Save.
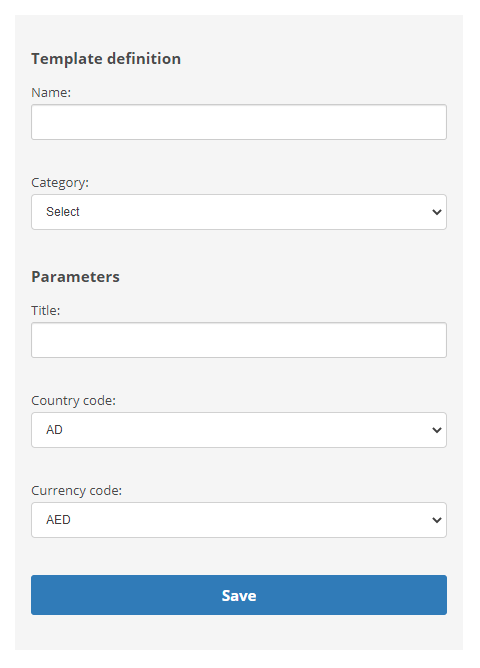
Create an Apple Pay Message Template
Apple Pay templates let agents send a payment request. This template type lets agents collect payments from customers who want to use Apple Pay.
In addition to creating an Apple Pay message template, you need to have an active Apple Pay account. You also need to configure Digital Experience with information about the financial institution you use to process payments.
|
Field |
Details |
|---|---|
| Name | Internal name for the template which appears in the Message Templates list and in MAX. |
|
Category |
List of all the category names you've created for message templates in this channel. |
| Title | (On the Message Template page) Appears in the chat message created using this template, so make it customer-friendly. |
| Country code | The abbreviation for the country where the transactions will take place. |
| Currency code | The abbreviation for the currency used for this payment. |
| Title | (On the Add item page) The title for the payment option that appears in the template. |
| Amount | The amount the customer must pay when the agent sends this template with this item selected. The amount will be charged in the currency selected in the template definition. |
- Click the app selector and select ACD.
- Go to DFO > Points of Contact Digital.
- Click Apple Messages for Business > Message Templates.
-
Click Apple Pay.
- Enter a Name for the template.
- If you use them, select a Category from the drop-down list.
- Enter the Title that the customer sees.
- Select your Country code and Currency code from the drop-down lists.
- Click Save.
Add Payment Options to an Apple Pay Message Template
- Click the app selector and select ACD.
- Go to DFO > Points of Contact Digital.
- Click Apple Messages for Business > Message Templates.
- Locate the Apple Pay template and click Items.
- Click Apple Pay Message Item to add payment options for this Apple Pay message template. When agents send a message with this template, they can choose an item to use with the template from the message items you add.
- Enter a Title for this item.
- Enter an Amount that the customer will be charged for this item.
- Click Save.
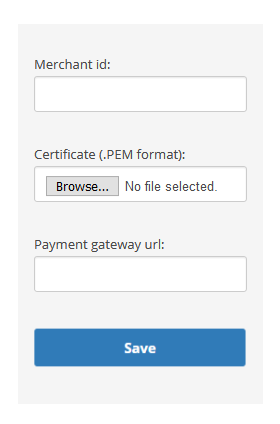
Configure Digital Experience to Accept Apple Pay
When you use Apple Pay message templates, you need to configure Digital Experience to accept Apple Pay. If you don't have an Apple Pay account, you need to create one. To configure Digital Experience, you'll need your Apple Pay merchant ID and Payment Processing certificate. You'll also need the gateway URL for the financial institution that processes payments for you.
|
Template Type |
Details |
|---|---|
| Merchant ID | The Apple Pay account merchant ID for your organization's Apple Pay account. |
|
Certificate (.PEM format) |
The Payment Processing certificate PEM file created during the process of setting up the Apple Pay account. |
| Payment gateway url | The gateway URL for the payment processing company your organization uses. |
-
Click Settings > Channels > All Channels > Apple Messages for Business.
- Click the app selector and select ACD.
- Go to Digital Experience > Points of Contact Digital.
-
Open Apple Messages for Business and click Apple Pay Account.
-
Enter your Apple Pay Merchant id and the Payment gateway url.
-
Under Certificate (.PEM format):, click Choose File and select the Payment Processing certificate PEM file that goes with your Apple Pay merchant account.
-
Click Save.