

Required permissions to map accounts: General > Account Mapping Create
Map an external platform to NiCE CXone so they can share information back and forth. For example, mapping Microsoft Teams to NiCE CXone lets you sync the agent states between the two platforms. When an agent's NiCE CXone state changes to Busy when answering a call, the Teams state would also change to Busy. After mapping NiCE CXone to your external platform, you can sync agent states.
Before You Begin
Part of this process is selecting an access key user. This user's access key is used to validate communicate between NiCE CXone and the external platform. Your NiCE CXone system may already have this type of user created, especially if your organization uses NiCE CXone APIs. This user must not be deactivated, or the account mapping will stop functioning. If you do not have this type of user set up and you do not want to use an existing NiCE CXone account, create a user with the following permissions:
Map NiCE CXone to RingCentral and Unify
Pre-requisite: For the RingCentral application that you're mapping with NiCE CXone, be sure that it can issue refresh tokens. This can be enabled in the application settings.
RingCentral is deprecating the username and password authentication option in favor of OAuth. If you have an existing integration between NiCE CXone and RingCentral, contact your account representative to learn more about migrating to the new auth method. The username and password credentials will continue to function until further notice. This ensures that your integration will not break before you have migrated to the new OAuth method.
- Click the app selector
 and select Adapters.
 -
Click Account Mapping.
-
If you have multiple registered tenants
 High-level organizational grouping used to manage technical support, billing, and global settings for your NiCE CXone system., click the tenant that you want to map the account with RingCentral.
 -
Click RingCentral.
-
Click Map Accounts.
-
In the Adapter Version section, select the correct versions for the Presence Sync Adapter Version and Directory Sync Adapter Version drop-downs.
-
In the ACD Business unit Details section, enter the details about the tenant.
Learn more about the fields in this step
Field
Details
Tenant ID Enter your tenant ID. Displays your tenant ID. Tenant Name Enter the name of your tenant. Displays your tenant name. From the User For Access Key drop-down, select the user for whom you want to generate an access key. This user is used for various Directory Sync operations. When you select the user, the access key is generated and stored in the system. It is recommended to create a separate system user in NiCE CXone that is active all the time.
Email Address The email addresses for personnel to receive critical notifications about any issues in the agent state sync process. For instance, when an authentication failure happens for your tenant.
If there's an authentication failure, check the credentials entered in the ACD BU Details tab and [Partner] Account Details tab. In case of authentication failure, the agent state synchronization will not happen.
-
Click Next.
-
Enter your RingCentral Account ID.
-
Set up the OAuth authentication. This grants NiCE CXone the necessary credentials for your NiCE CXone and RingCentral systems to communicate back and forth securely:
-
Click Use OAuth Token.
-
Click Generate Token. A RingCentral authentication window opens.
-
Enter your RingCentral credentials to sign in.
-
Click Authorize.
-
Enter the address of the physical location where you will use the RingCentral service with NiCE CXone.
-
Click I Accept and close the authentication window. This creates OAuth credentials with RingCentral as the identity provider.
-
-
If you want to use your RingCentral tenant's default client ID and secret, leave Use Default ClientId and Secret enabled. If you disable this checkbox, you can enter the client ID and secret from a specific RingCentral application.
-
Click Create & Activate.
Map NiCE CXone to Microsoft Teams
You can map up to 8 Microsoft tenants to your NiCE CXone account.
-
Click the app selector
and select Adapters. -
Click Account Mapping.
-
If you have multiple registered tenants
High-level organizational grouping used to manage technical support, billing, and global settings for your NiCE CXone system., click the tenant that you want to map the account with RingCentral. -
Click Microsoft Teams.
-
Click Map Account.
-
Under ACD Business unit Details, enter the details about your business unit.
Learn more about the fields in this step
Field
Details
Business Unit ID Enter your business unit ID. This field is required. Business Unit Name Enter the name of your business unit. This field is required. From the User For Access Key drop-down, select the user you want to generate an access key for. This user is used for various Directory Sync operations. When you select the user, the access key is generated and stored in the system. You should create a separate system user in NiCE CXone that is active all the time.
- Click Next.
- From the Microsoft Teams Platform Version drop-down under Adapter Version, select Microsoft - Version 1.
-
Enter your Account ID, Access Key ID, Secret, and Domain. The domain is only required for users that were created programmatically.
Learn more about the fields in this step
Field
Details
Account ID Enter your Microsoft Teams Directory (tenant) ID. You get this ID when you create the Microsoft Teams app for access credentials. Access Key ID Enter your Microsoft Teams Application (client) ID. You get this ID when you create the Microsoft Teams app for access credentials. Secret Enter the secret key generated when you created an app in the Microsoft Teams directory. Domain Enter the domain name for the system users.
Programmatically-created system users have a configurable domain name. A domain name is required only for this type of user.
- Select Create System Users Programmatically if you want to automatically create system users in your Microsoft Azure Directory using the app credentials from the Azure portal. If you enable this, Azure creates each system user with the name CXone_xxxxx.
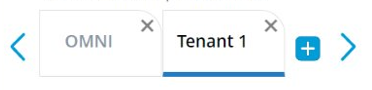
- If you want to add additional Microsoft Teams tenants:
- Click
 to add a new tab for each new tenant. You can double click the new tab name to rename it.
 - Complete the information for the additional tenant as specified in the previous steps.
- Click
- Click Next.
- Enter the account credentials of your Microsoft Teams system users. You must have at least one Teams system user per 650 Azure Active Directory Sync or Presence Sync mapped users.
You have two options:
- If you select the Create System Users Programmatically checkbox, it automatically creates system users in Azure Directory using the app credentials from the Microsoft Azure portal.
- If you clear the Create System Users Programmatically checkbox, you'd have to manually add the Teams account credentials. This may be necessary if your organization's policies do not allow these system users to be added programmatically. This option provides you independent system users for Microsoft Teams Presence Sync and Microsoft Teams Directory Sync
- In the Email Notifications section, add any email addresses that you want to receive notifications for adapter health, authentication failures, and exceptions.
- Click Map and Register.
You can map multiple NiCE CXone accounts to a Azure account.
Map NiCE CXone to Zoom
-
In NiCE CXone, click the app selector
and select Adapters. -
Click Account Mapping.
-
If you have multiple registered tenants
High-level organizational grouping used to manage technical support, billing, and global settings for your NiCE CXone system., click the tenant that you want to map the account with RingCentral. -
Click Zoom.
-
Click Map Account.
-
In the Adapter Version section, select the correct version for the Presence Sync Adapter Version and Directory Sync Adapter Version drop-downs.
-
In the ACD Business unit Details section, enter the details about the tenant and your login information.
Learn more about the fields in this step
Field
Details
Business Unit ID Enter your tenant ID. Displays your business unit ID. Business Unit Name Enter the name of your tenant. Displays your business unit name. Select a user for whom you want to generate an access key. When you select the user, the access key is generated and stored internally in NiCE CXone. The access key is used for various operations. You should create a separate system user in NiCE CXone that is active all the time.
Access Key ID Enter your tenant access key ID, which was generated when you created a Zoom app. This field is required. -
Click Next.
-
In the Adapter Version section, select the correct version for the Zoom Platform Version drop-down.
-
In the Zoom Account Details section, enter your Zoom account and authentication details.
Learn more about the fields in this step.
Field
Details
Account ID Enter your Zoom account ID. Account Name Enter your Zoom Account Name. Access Key ID Enter your Zoom application (client) ID. This field is required. Secret Enter the secret for the access key ID you have entered. This field is required. Secret Token Enter your Zoom application secret token. This field is required. -
Enter email addresses to receive notifications for Adapter Health, Authentication Failures, and Exceptions. Use comma-separated values to enter multiple email IDs.
-
Click Map & Register.
Map NiCE CXone to Agent Workspace for Salesforce Voice
- Click the app selector and select Adapters.
-
Click Account Mapping.
-
If you have multiple registered tenants
High-level organizational grouping used to manage technical support, billing, and global settings for your NiCE CXone system., click the tenant that you want to map the account with RingCentral. -
Click Salesforce.
-
Click Map Account.
-
In the Adapter Version section, select the correct versions for the Presence Sync Adapter Version drop-down.
-
In the ACD Business unit Details section, enter the details about the tenant.
Learn more about the fields in this step
Field
Details
Business Unit ID Enter your tenant ID. Displays your tenant ID. Business Unit Name Enter the name of your tenant. Displays your tenant name. User For Access Key
From the User For Access Key drop-down, select the user for whom you want to generate an access key. When you select the user, the access key is generated and stored in the system.
-
Click Next and add your Salesforce account and authentication details.
Learn more about the fields in this step
Field
Details
Organization ID Enter the Salesforce account ID. This field is required. Username Enter a valid username for the Admin account in the partner platform. This field is required. Password
Enter a password for your account. This field is required.
Client ID Enter your public identifier for your Salesforce account. You use the client ID to identify yourself to Salesforce. Client Secret Enter your client secret. This establishes you as the owner of the client ID. -
Click Map & Register.
Map Omni-Channel Statuses once you are finished with account mapping.