Program Manager
The Program Manager allows you to manage the configuration of your EM entities in IEX WFM Integrated.
There are two options for Program Manager:
-
Programs for WFM: EM automatically imports data from WFM.
-
Programs for IEX WFM Integrated: Map your activity codes and set up hours of operation.
Programs for WFM
For WFM, you can:
-
View programs associated with your tenant.
-
View scheduling units assigned to a program and set agent capacity for them.
-
Map the activity codes used for each program.
-
Specify parameters for schedule trades between agents.
EM automatically creates a default program![]() A collection of CTs and MUs that share agent resources across one or more sites with unique operating parameters for your tenant after you activate the WFM-EM license.
A collection of CTs and MUs that share agent resources across one or more sites with unique operating parameters for your tenant after you activate the WFM-EM license.
The Programs page displays the details of your company's programs.
You don't need to create any programs or assign scheduling units because EM imports these details directly from WFM.
Programs for IEX WFM Integrated
For IEX WFM Integrated, you can:
-
Create, edit, and delete programs
 A collection of CTs and MUs that share agent resources across one or more sites with unique operating parameters.
 -
Assign management units
 A group of agents and supervisors within a contact center location. to a program.
 -
Map the activity codes used for each program.
-
Manage the hours of operation for each site and skill combination associated with your programs.
-
Specify parameters for schedule trades between agents.
You must create the programs for your line of business and assign management units to each program.
Keep in mind:
-
Before you create programs, you must import your site's agent data group and supervisor from IEX WFM Integrated to EM on the ADGs page.
-
You can only assign a management unit to one program.
-
To edit a program, double-click on the name of the program.
-
When editing a program, removing a management unit does not delete agents from the management unit. However, the agents cannot use the agent mobile app. An error message displays after they log in.
-
To delete a program, you must remove all management units assigned to the program. Then click Actions
 .
.
The Programs page displays the details of your company's programs.
The number of programs and the total number of agents displayed above the table are imported from IEX WFM Integrated and are assigned to the management units of those programs.
For each program, you can see the number of agents, management units, and sites, as well as the status of the program. Programs marked as Draft are still being configured. Agents assigned to a program marked as Active can use the agent mobile app.
To add a program and assign resources:
-
Go to Program Manager > Programs, and click New Program.
-
Enter a Program Name and a Description for the program.
- Click Next.
-
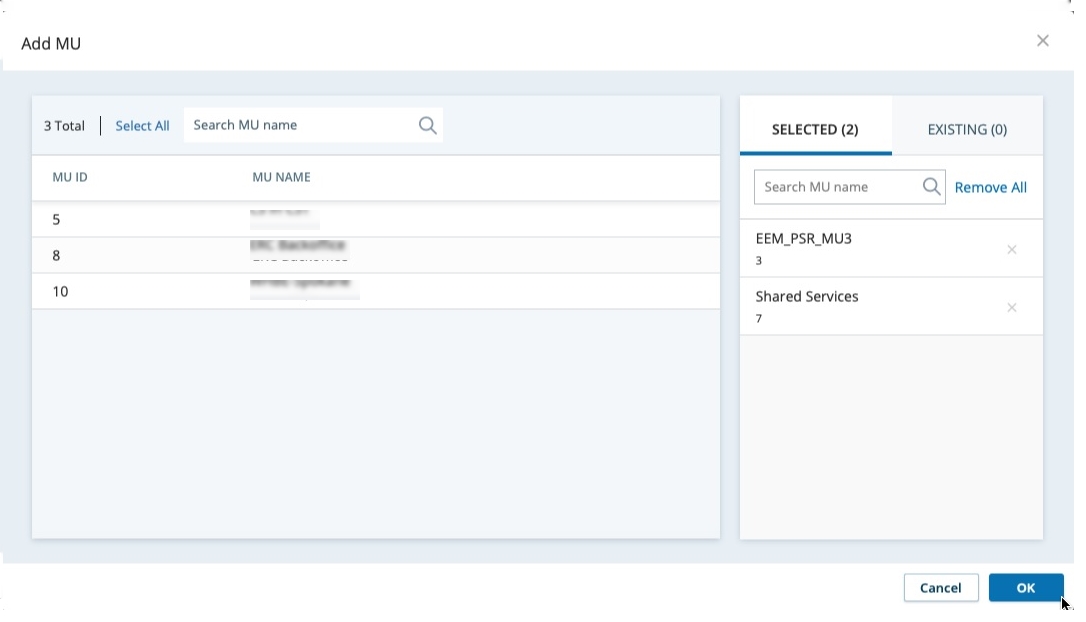
Click Add MU.
The management units and their IDs are imported from IEX WFM Integrated and are available to assign to a program.
-
Click the management units you want to assign to this program.
- Click OK. The data for the management units is imported on the next sync with IEX WFM Integrated.
-
Click Submit.
Activity Code Mapping
For WFM, EM uses the activity codes imported from WFM scheduling units.
EM uses activity codes to describe the different activities agents engage in. These activities could be break, lunch, chat, email, phone call, meeting, or holiday. Activity codes are created in IEX WFM Integrated. You must map the activity codes used by your programs to the categories they apply to.
Because you may have many programs using the same activity codes, you must create activity code mapping templates. Assign a template to each program. You can also create a copy of any existing template.
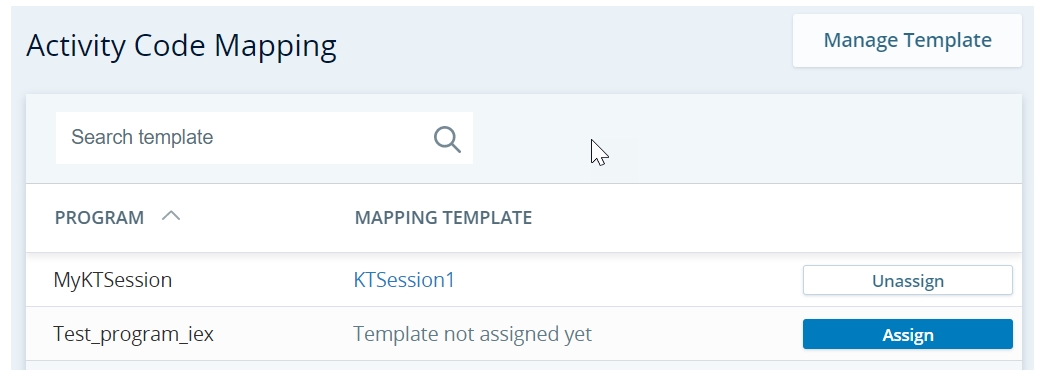
The Activity Code Mapping page displays the template assigned to your program.
To create an activity code template and to assign it to a program:
- Go to Program Manager > Activity Code Mapping, and click Manage Template.
-
Click Create New Template and enter a Template Name.
-
Go to the Write-Back tab, select the activity code to use for time off trades from the Trade Time Off drop-down list. For IEX WFM Integrated, also select the required Request Absence from the drop-down list.
-
This step is applicable only for IEX WFM Integrated. For CXone Mpower WFM, these configurations are picked from Shift Trading.
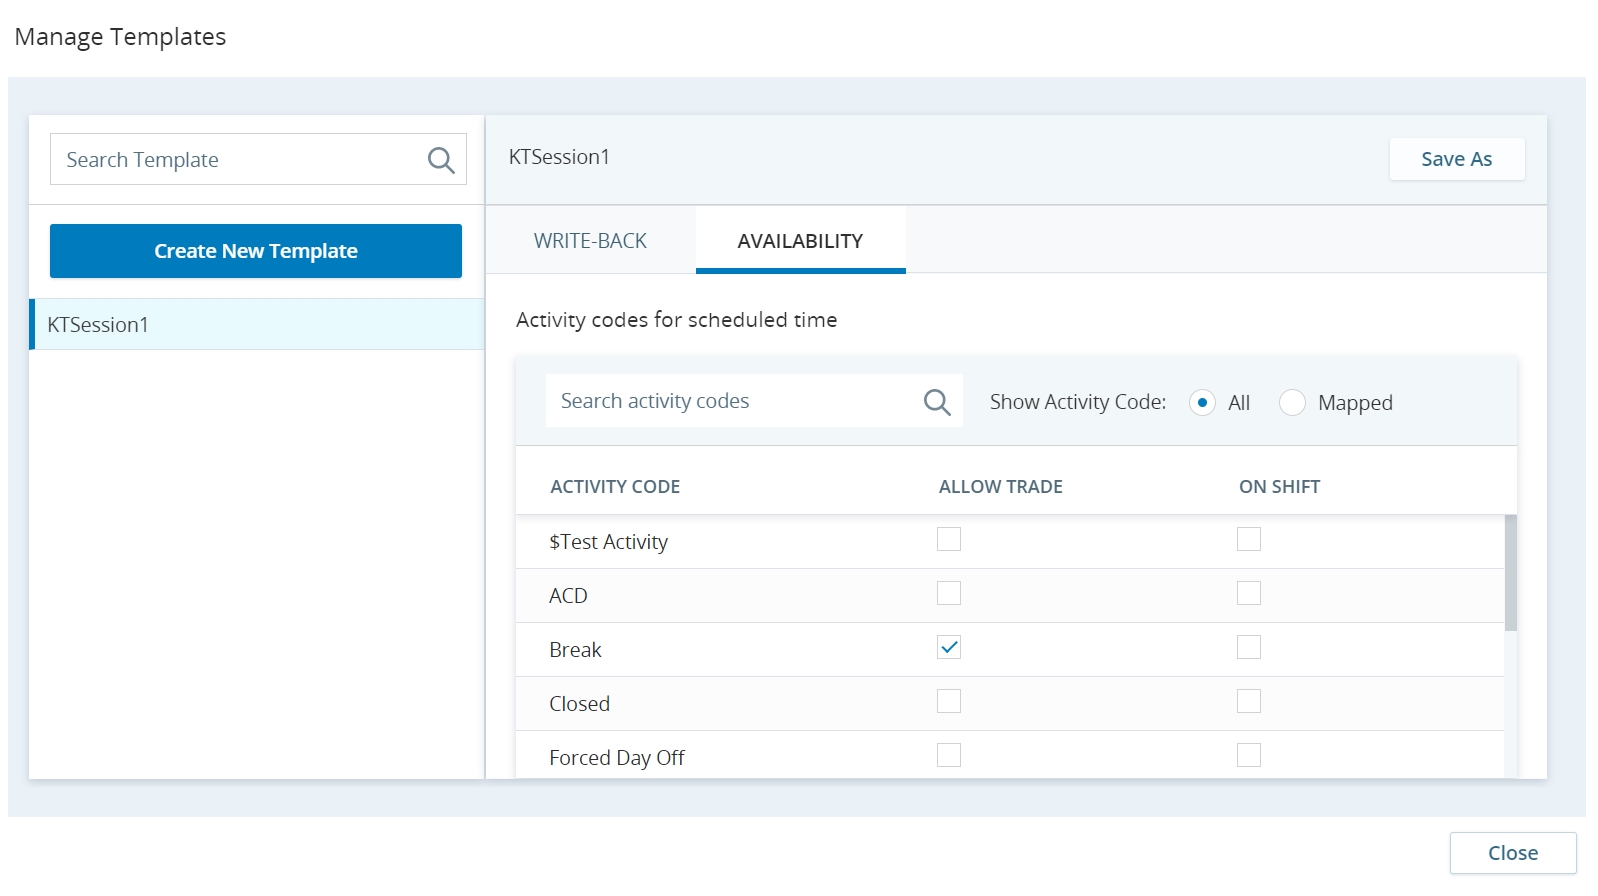
Go to the Availability tab:
-
You can view either All or just Mapped activity codes.
-
For each activity code, you can define if the agent can trade it or if it indicates if the agent is on shift.
-
-
Click Save and Close.
-
Click Assign.
-
Select the template to assign to this program.
-
Click Save.
Hours of Operation
For WFM, EM uses the hours of operation imported from WFM scheduling units.
Your programs![]() A collection of CTs and MUs that share agent resources across one or more sites with unique operating parameters have site and skill combinations assigned to them. For these combinations, agents should have the required skills to handle contacts. These agents must also be available during specific times and days of the week (the hours of operation). For example, the contact center may need agents to handle chats, emails, and inbound calls at different times of the day on different days of the week.
A collection of CTs and MUs that share agent resources across one or more sites with unique operating parameters have site and skill combinations assigned to them. For these combinations, agents should have the required skills to handle contacts. These agents must also be available during specific times and days of the week (the hours of operation). For example, the contact center may need agents to handle chats, emails, and inbound calls at different times of the day on different days of the week.
Because you may have many site and skill combinations with the same hours of operation, you must create hours of operation templates. Assign a template to each site and skill combination. You can also create a copy of any existing template.
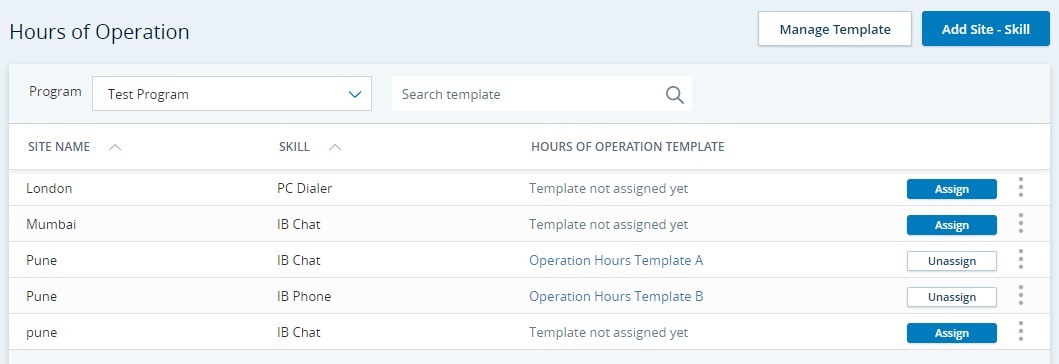
The Hours of Operation page displays the template assigned to each site and skill combination for the selected program.
To create a an hours of operation template:
-
Click Create New Template and enter a Template Name.
-
Select each day of the week this site needs agents with this skill.
-
For each selected day, define the work hours. You can select All Day or specific work hours within the day.
-
Click Save.
To add site and skill combinations and assign a template:
-
Click Add Site - Skill.
-
Select a site and a skill from the Select site and Select skill drop-down lists, respectively.
-
Click Add.
-
Click Assign.
-
Select a template to assign to this site and skill combination.
-
Click Save.


