

The Schedule Manager is a flexible tool that simplifies reviewing and editing employee schedules.
WFM uses the staffing plan you created or uploaded using WFM Forecasting, and generates a schedule. You can view and edit that schedule in the Schedule Manager, and publish it to your agents when it's ready.
Keep in mind:
-
The Forecast/Staffing Name column displays which forecast was used or which staffing plan was imported for schedule generation.
-
Not Available could mean that the forecast was deleted after the schedule was generated or wasn't used in the first place.
-
The staffing plan will always have .CSV extension to distinguish it from forecast.
-
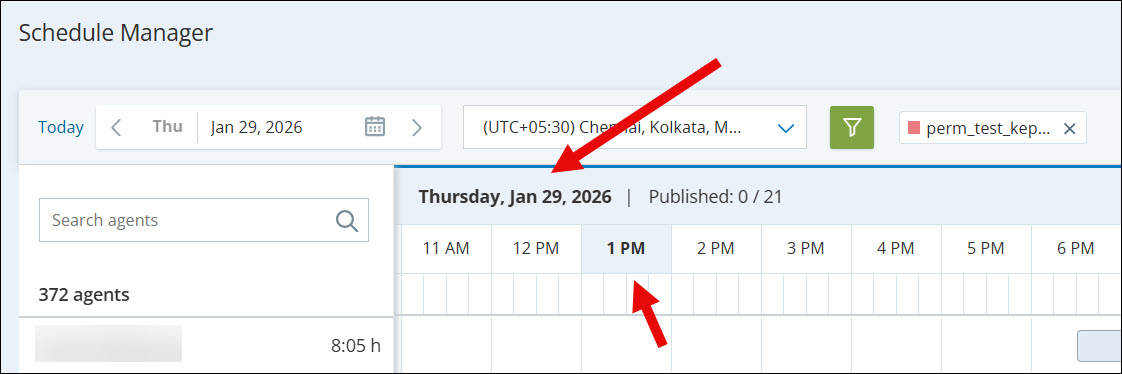
The Schedule Manager Day grid will be positioned based on the most significant time zone difference in the Scheduling Unit list when compared to the time zone selected in Schedule Manager.
When the Schedule Manager screen loads, it starts 1 hour earlier than the earliest configured time based on the earliest time zone among all Scheduling Units.
sCHEDULING uNIT
tIME zONE
Monday Start time
SU A UTC+08:00 7:00 AM SU B UTC-03:00 5:00 AM SU C UTC-05:00 8:00 AM Positioning:
For Monday, the day view will be positioned using UTC+08:00 and 4:00 AM (one hour before the earliest configured time of 5:00 AM).
For the current day, the view loads based on the system’s current time.
-
The Schedule Manager Day grid includes a visual separator and shading between days to help you distinguish dates when you scroll across midnight.
-
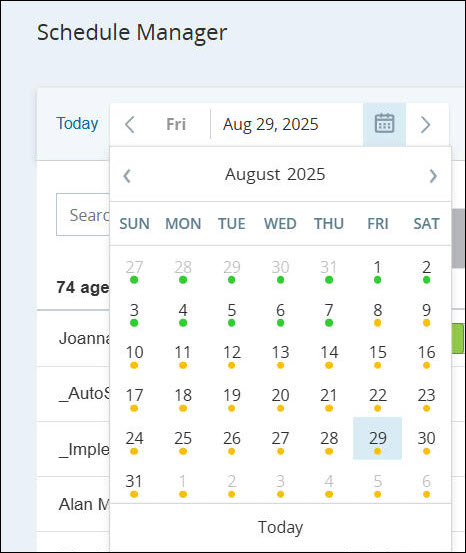
To verify if a generated schedule is published, check the calendar in Schedule Manager:
-
Green dots indicate schedules published for all skills.
-
Yellow dots indicate schedules published for specific skills.
-
Hover over a yellow dot to view the list of skills associated with that schedule.
-
You can also select Weekly or Daily view in the Schedules tab to see the same green/yellow indicators.
-
To filter data, first select the scheduling units you want to view. You cannot filter by specific WEM skills or groups without selecting a scheduling unit.
When you first access the Schedule Manager page, the system automatically applies the default Scheduling Unit (SU) filter, displaying agent schedules and related data based on this default SU.
The default Scheduling Unit (SU) filter functions as follows in the Schedule Manager:
-
Initial Load: When you first load the Schedule Manager page, the system automatically selects the default SU and filters the view to show only the agents and data relevant to this SU.
-
Clearing the Default SU: If you clear the default SU filter, the Schedule Manager UI displays all available agent details, regardless of the scheduling unit.
-
Custom Filter Persistence: If you apply different filter criteria (For example, select a different SU or custom parameters), the system remembers the applied filter. The same filter is applied automatically the next time you log in, providing a consistent and personalized user experience.
-
Data Retention Period: The system will automatically purge data that is older than 36 months.
This functionality ensures a streamlined experience with relevant data shown upfront, while still allowing you the flexibility to modify filters as needed.
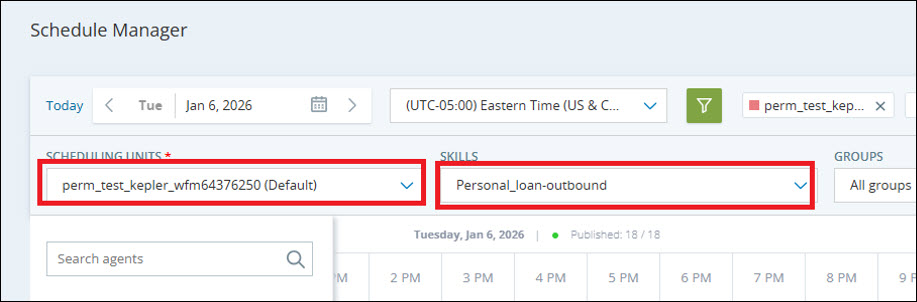
To filter, first select a scheduling unit. You cannot filters by skill, group, or activity code without selecting at least one scheduling unit. If you clear the filter for all scheduling units, the other filters are cleared automatically.
When filtered, the selected scheduling units are marked with a red box  and are displayed first.
After filtering, the displayed agents and net staffing (data and bar) are updated.
The Scheduling Units and Skills dropdown displays more text, making it easier to read and select the correct filter values without hovering.
For example, you have 100 agents in three schedule units. You filter by one of those units. Now there are 30 agents displayed. Next, you filter by one of the skills. The displayed agents goes down again to show 15 agents. Those are the only agents in the selected scheduling unit with the selected skill.
You can add, update, or remove shifts as needed, letting you quickly adjust a schedule if agents call in sick, if your call volume is expected to change, etc.
You can even create schedules from scratch, if you didn't generate a schedule from forecast data, or through shift bidding.
To control access to Schedule Manager content, assign a view to the scheduler or the employee managing the schedule. A view limits visibility to schedules for agents in the Scheduling Units (SUs) associated with that view.
See Manage Data Access to learn how to assign views to employees or create user-based views.
This section explains how to:
- Define Net Staffing Thresholds
- Add Shifts
- Add Activities
- Copy and Duplicate Schedules
- Add Time Off
- Export Schedules or Net Staffing
- Schedule Meetings
- Schedule Future Activities
- View Schedule Changes and History
- Frequently Asked Questions (FAQs)
Once you've created your shifts, don't forget to save and publish the schedule.