

Instead of manually approving all time off, you can use Approval Rules to automate responses. The same Approval Rules defined for Time-off will be leveraged for Self-service Time-off requests. In addition, Approval Rules are required to allow Self-service Extra Hours requests and Self-swap requests. Using Approval Rules reduces the time you spend handling requests and helps agents avoid waiting for their manager to review each submission.
The requests are automatically approved based on the conditions you define in the rules. You can choose to have the rules either auto-decline or forward the request for manual approval when the conditions aren't met.
When creating the rule, you can define net-staffing levels as a condition for handling requests. For example, you can choose to decline all requests when you're understaffed. This feature is only available for users with the WFM Advanced license.
You can review the automated responses and the pending requests in the Manage Requests page.
You can watch a video that gives an overview of the Approval Rules page. The video also includes a tutorial on creating an approval rule.
Keep in mind:
-
The rule is activated by default once you create it. To deactivate a rule, click Options
 and select Deactivate.
 -
The Broken status means that one or more of the activities or scheduling units in the rule were deleted, and that the rule is inactive.
-
You can duplicate, edit, and delete each rule from Options
as well. -
When an agent submits a request, a notification is sent to all managers who have the Manage option enabled in the Permissions tab (see the screenshot for details). This option must be enabled for managers to receive notifications.
-
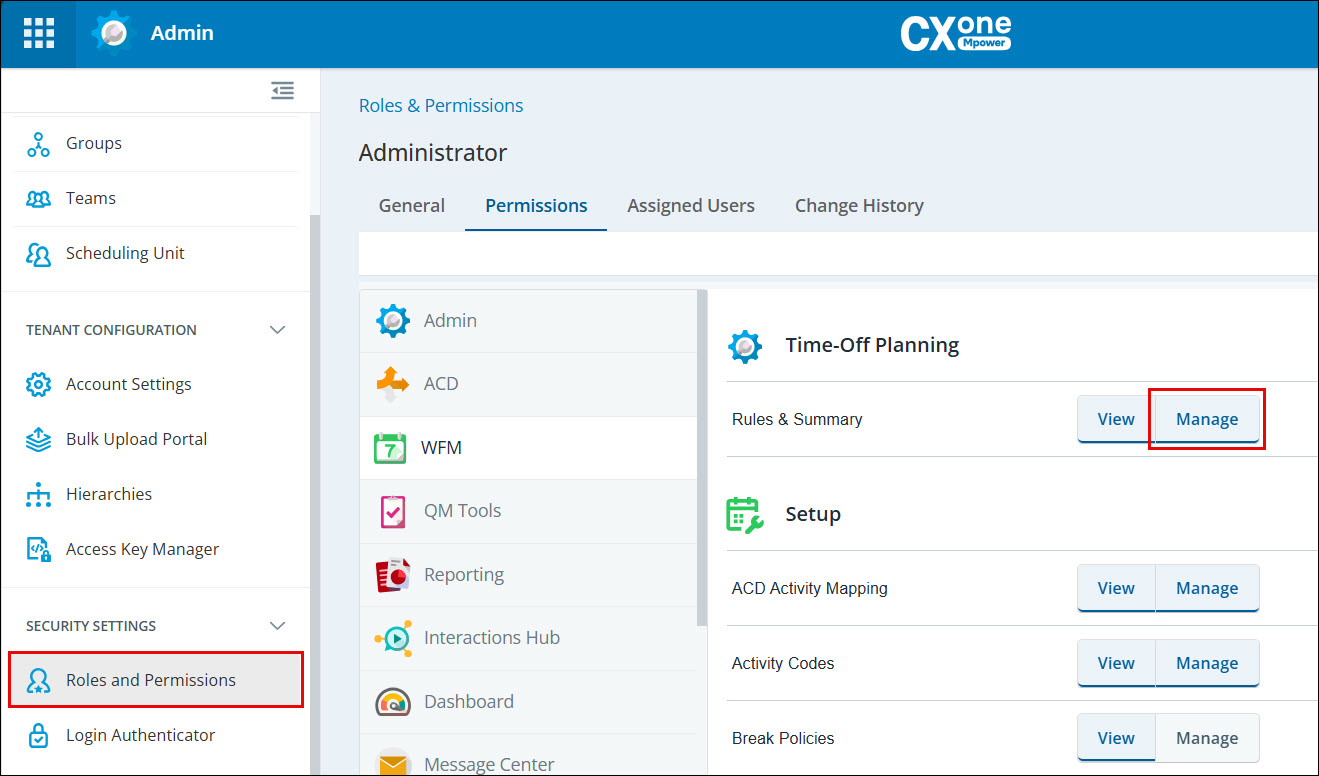
To create approval rules, you must have View and Manage enabled in the Approval Rules permission. This permission is available in Admin > Security > Roles & Permissions, in the WFM > General Permissions section.
Date-Specific Options for Approval Rules
Note: This feature is available with the Advanced license.
When creating any approval rule, such as Time Off, Extra Hours, or Self Swap, you can define date-specific settings to handle requests during holidays, blackout periods, or seasonal events. These rules help automate responses during critical scheduling periods, reducing the need for manual intervention.
You can create a rule for the holiday season that auto-approves time-off requests only when staffing levels meet your defined thresholds, which can be different than your normal Approval Rules used for the rest of the year. You can also set the rule to repeat annually for the same dates.
When defining a date-specific rule, you can configure the following:
-
Start Date: The date when the rule becomes active. By default, this is set to the current date.
-
End Date: The date when the rule expires. Requests outside this range are handled based on other active rules.
-
Repeat: Use this option to create recurring rules for predictable patterns:
-
Daily: For rules that apply every day within the date range.
-
Default value: 1 (every day)
For example, setting this value to 2 means every other day.
-
Maximum value: 366
-
-
Weekly: For weeks that require unique approval constraints.
-
Default value: 1 (every week within the defined date range)
-
Maximum value: 52
-
Example Use Case:
-
Start Date: January 1, 2026
-
End Date: January 31, 2026
-
Weekly frequency: Recur every 1 week on Friday, Saturday, and Sunday.
-
SU Balance values can differ for January weekends (Friday, Saturday, and Sunday) versus February weekends (Friday, Saturday, and Sunday), along with net staffing values for approvals.
-
-
-
Monthly: For seasonal variations, such as peak months.
-
Monthly rules can be set for:
-
A specific date, such as the 1st of the month
-
A day of the month, such as the first Monday or the last Friday
-
-
-
Yearly: For annual events like holidays.
-
For Yearly frequency, a manager can select a calendar date or a day for yearly occurrence.
-
The value in Every 1 Year(s) is fixed.
If the Start Date equals the End Date, the Repeat checkbox is disabled.
-
-
-
Set as High Priority: Marks the rule as high priority. High-priority rules take precedence when multiple rules overlap.
-
Expire After End Date:
-
If selected: Requests for the date range after expiration are sent for manual approval.
-
If not selected: The rule continues to approve requests within the defined range.
-
Key Points for Date-specific Approval Rules
-
When Rules overlap, they follow this hierarchy:
-
Yearly
-
Monthly
-
Weekly
-
Daily
-
-
A low-hierarchy rule marked as High Priority will override higher-level rules for approval in the event of a conflict.
If a December monthly rule exists and a weekly rule from December 20–26 is set as High Priority, the weekly rule will take precedence.
-
A rule with an End Date will not expire automatically. It only expires when the manager selects Expire After End Date to ensure approval rules work for past dates.
-
After a rule expires, you can update it to reactivate it.
The Start Date cannot be changed for expired rules.
-
When Expire After End Date is selected:
-
A notification is sent to the manager 3 days before expiration.
-
A warning icon appears on the Approval Rules screen.
-
Validations for Expiring Rules
To help you manage date-specific rules effectively:
-
Notifications: A notification is sent three days prior to a rule's expiration.
-
Warning Icon: A warning icon appears on the Approval Rules page 15 days before expiration, counting down until the rule expires. Hover over the icon to view details such as:
-
This rule expires today
-
This rule is about to expire in 6 days
-
Approval Rule: Time-Off
To create an approval rule for time-off:
-
Click the app selector
 and select WFM.
 -
Go to Requests > Approval Rules.
-
Click New Rule.
-
Define a Name for the rule.
-
From Approval Rule For, select Time-off.
-
Select Scheduling units that the rule will apply to.
Keep in mind, you can create multiple time-off approval rules for the same scheduling unit.
-
Select one or moreActivities that the rule will apply to.
-
In the Net Staffing tab, you can choose to use the net staffing levels as a condition for handling requests. For example, you can decline all requests when you're understaffed.
 How you can use net staffing
Let's say you want your time-off rule to handle requests based on these levels:
-
Overstaffed by 15% or higher: Approve the request automatically. In this case, the request must meet the conditions you selected as well.
-
Between 15% overstaffed and 10% understaffed: Forward the request to the manager for manual approval.
-
Understaffed by 10% or more: Decline the request automatically.
Keep in mind:
-
Net staffing settings are available only for WFM Advanced license users.
-
To create a Time-off rule without using net staffing, skip this step.
-
When the rule has more than one scheduling unit, the net staffing levels apply to each unit separately.
To add net-staffing to your rule:
-
Click Define Net Staffing.
-
Select the days the chart applies to.
By default, the chart applies to all days of the week. To create an individual chart for one or more days, select the day(s) from the Days dropdown. Using Add Net Staffing, you can keep adding charts for more days or a day of the week.
The Add Net Staffing button is not available when the chart is defined for all days of the week.
-
Click inside the chart and drag the net staffing bar left and right to define the hours.
Let's say you want to set the net-staffing levels from 8:00 until 12:30. Click the column for 8:00 and drag the bar to 12:30.
In the net-staffing chart:
-
The chart displays columns for every 15 minutes of the day (horizontal) and the net-staffing levels (vertical).
-
Inside the columns, set the staffing levels for the selected time interval.
The rule will handle requests based on the time and staffing levels in the chart.
Removing charts:
-
To remove individual net-staffing charts, click Options
and select Delete. -
To remove all net-staffing charts, click Delete all. Net staffing won't be part of your rule.
-
-
Inside the bar, drag the sliders up and down to define the actions for the net staffing levels: Approve, Send to manager, or Decline.
Adjusting the net-staffing bar
-
Instead of using the slider, you can enter the Approve or Decline values under the chart.
-
Hover over the bar to see the net-staffing levels for each action.
-
If you want to clear net staffing bars, select them and click Clear Selected.
-
The rule won't apply net staffing for the Not defined hours. In cases like this, the rule will check only the other condition in the rule.
-
When there's a conflict between the actions you define for net staffing and in the Condition tab—Decline takes precedence over Approve or Send to manager. Send to manager takes precedence over Approve.
Let's say an agent submits a request for a day off. The request meets the net staffing in the approval rule, so the request should be approved. However, that agent doesn't have days remaining in their time-off balance, so the request should be declined.
In this case, the request is denied.
The requests are declined if the set condition of minimum submission time is not met.
Adding more bars for different hours of the day
Let's say you want to set time-off Approve when you're 20% overstaffed during the morning shift and 5% in the evening. You can define separate net-staffing bars for each time interval of the day.
Setting multiple net-staffing bars simultaneously
You can edit or set multiple net-staffing bars at a time. Click and drag over the bars to select them. Select any of the sliders from the selected bars. Drag the slider up or down to the required staffing conditions.
-
-
Select what happens If there's no forecast or published schedule on the requested day: Approve, Send to manager, or Decline.
Without a forecast and published schedule, the rule won't be able to validate the request with the net staffing levels.
-
-
In the Conditions tab, select the conditions for the rule. All selected conditions must be met for a request to get auto-approved.
How to set the conditions tab for a time-off
Agent time-off balance,
-
Agent time-off balance: This condition is met if enough days remain in the agent's time-off balance.
Keep in mind, the agent's balance will be affected even when you don't select this condition. For example, a request might get approved for an agent who doesn't have days remaining in their time-off balance.
In cases like this, the agent's balance will be negative.
-
Scheduling unit time-off balance: Define how many hours each scheduling unit can take off per day for each activity. This condition is met when the number of hours requested doesn't exceed the remaining time-off balance.
See example
Let's say you define these parameters for your rule:
-
Scheduling units: NY Tech Support and LON Tech Support
-
Activity codes: Paid Time Off and Unpaid Time Off
-
Group time-off balance: 10 hours
If an agent from NY Tech Support requests 10 hours of Paid Time Off, this condition will be met. The balance is now zero for this scheduling unit and activity. This condition won't be met for other agents from NY Tech Support asking for Paid Time Off on that day. They can ask for Unpaid Time Off.
Now, the balance is zero for both activities for NY Tech Support. However, the balance remains 10 hours for each activity for LON Tech Support
You can define one balance for all days or different balances by day of the week.
Daily balance or Balance for custom days
-
Daily balance: Define the balance that applies to each day of the week.
-
Balance for custom days: Define a different balance for the days you want. The condition won't be met for the unselected days.
Let's say you defined hours for Tuesdays and Wednesdays. The rule won't auto-approve requests for any other day.
Define a different balance for the days you want. The days you don't select won't be included in the rule.
Let's say you defined hours for Tuesdays and Wednesdays. If an agent requests for any other day, the rule ignores this condition. If this is the only condition for the rule, the request will be auto-approved.
You can also set that this condition won't be met for specific days. After you select those specific days, set the balance at 0 hours. The condition won't auto-approve requests for those days.
-
-
Minimum days since hire: Set how many days the agent must work at the company to be eligible for auto-approval.
-
Maximum hours agent works in a day: Set the total number of hours an agent can work in a day.
Define the Submission time. This condition is met depending on when the request was submitted.
Submission time: -
In advance: Only requests made a certain number of days in advance will be approved. You define the minimum days in advance the agent can submit his request.
-
Same day: Only same-day requests will be approved.
-
Within time frame: Only requests made within a specific time frame will be approved.
You define the maximum days before the time-off date and the maximum days after the time-off date.
Let's say you defined that the maximum days after the time-off date is 5. Today is August 1. Your agent requests time-off for August 10. In this case, the request doesn't fall within the time range and won't be approved.
Using this condition for last-minute requests
You can create a rule that auto-approves urgent requests (such as for sickness, bereavement, and more).
Create a rule for those activate codes (for example, a code called PTO_Sick_Leave) and:
-
Select Same day in the Submission time condition.
-
Don't select any other conditions.
This will approve same-day requests for those activities.
-
-
Define what happens when at least one of your defined conditions isn't met.
Decline or Send to manager
-
Decline: The agent won't be able to submit the request, or the request will be declined automatically shortly after requesting.
-
Send to manager: You can choose to review requests manually. In this case, you can see the pending requests on the Manage Requests page. Keep in mind, a request that gets declined in the net staffing condition won't be sent to the manager.
-
-
Click Save.
The new rule will appear in the list on the Approval Rules page.
Approval Rule: Extra-Hours
To create an approval rule for extra-hours:
-
Click the app selector
and select WFM. -
Go to Requests > Approval Rules.
-
Click New Rule.
-
Enter a Name.
-
From Approval Rule For, select Extra hours.
-
Select the Scheduling unit that the rule will receive an automated reply.
Keep in mind, one scheduling unit can have only one extra hours approval rule.
-
Select the Activities that will receive an automated reply.
When creating an approval rule for the extra hours, only the Open activity is available from the Activities dropdown. This is auto-selected.
-
In the Net Staffing tab, you must set the net-staffing conditions for handling requests. For example, you can decline all requests when you're overstaffed.
How you can use net staffing
Let's say you want your extra-hours rule to handle requests based on these levels.
-
Understaffed by 15% or higher: Approve the request automatically. In this case, the request must also meet the conditions you selected.
-
Between 15% overstaffed and 10% understaffed: Forward the request to you for manual approval.
-
Overstaffed by 10% or more: Decline the request automatically.
Keep in mind:
-
Net staffing settings are available only for WFM Advanced license users.
-
Net staffing must be defined to create an approval rule for the Extra hours.
To add net-staffing levels to your rule:
-
Click Define Net Staffing.
-
Select the days the chart applies to.
By default, the chart applies to all days of the week. If you want to create an individual chart for a day or days, do so by selecting the day or days from the Days dropdown. You can keep adding charts for more days or a day of the week using Add Net Staffing.
Add Net Staffing button will not be available when the chart is defined for all days of the week.
-
Click inside the chart and drag the net-staffing bar left and right to define the hours.
Let's say you want to set the net staffing levels from 8:00 until 12:30. Click the column for 8:00 and drag the bar to 12:30.
In the net-staffing chart:
-
The chart displays columns for every 15 minutes of the day (horizontal) and the net-staffing levels (vertical).
-
Inside the columns, you set the staffing levels for the selected time interval.
The rule will handle requests based on the time and staffing levels in the chart.
Removing charts:
-
To remove individual net-staffing charts, click Options
and select Delete. -
To remove all net-staffing charts, use the Delete All.
-
-
Inside the bar, drag the sliders up and down to define the actions for the net staffing levels: Approve, Send to manager, or Decline.
Adjusting the net-staffing bar
-
Instead of using the slider, you can enter the Approve or Decline values under the chart.
-
Hover over the bar to see the net-staffing levels for each action.
-
If you want to clear net staffing bars, select them and click Clear Selected.
-
The rule won't apply net staffing for the Not defined hours. In cases like this, the rule will check only the other condition in the rule.
-
When there's a conflict between the actions you define for net staffing and in the Condition tab—Decline takes precedence over Approve or Send to manager. Send to manager takes precedence over Approve.
Let's say an agent requests to work extra hours. If the request meets the net staffing in the approval rule, the request should be approved. If you have the Conditions set for maximum hours, an agent can work in a week and a day. The request is declined if a agent already worked for the maximum hours allowed in a week or a day. When no conditions are set in the approval rule, the extra hours approval works based on the defined net staffing conditions.
Adding more bars for different hours of the day
Let's say you want to set extra-hours Approve when you're 20% understaffed during the morning shift and 10% in the evening. You can define separate net-staffing bars for each time interval of the day.
Setting multiple net-staffing bars simultaneously
You can edit or set multiple net-staffing bars at a time. Click and drag over the bars to select them. Select any of the sliders from the selected bars. Drag the slider up or down to the required staffing conditions.
-
-
Select what happens If there's no forecast or published schedule on the requested day: Approve, Send to manager, or Decline.
Without a forecast and published schedule, the rule won't be able to validate the request with the net-staffing levels.
-
-
In the Conditions tab, select the conditions for the rule. All selected conditions must be met for a request to get auto-approved.
How to set conditions tab for extra-hours
-
Maximum hours agent works in a week: Set the total number of hours an agent can work in a week.
-
Maximum hours agent works in a day: Set the total number of hours an agent can work in a day.
Define the Submission time. This condition is met depending on when the request was submitted.
Submission time --
Minimum days in advance: You define the minimum days in advance the agent can submit his request.
Let's say you defined the minimum days in advance to submit the request as 3 days. You want to work extra hours on the 5th of August. In this case, you cannot submit the request after the 2nd of August since it will not fall in the minimum-day range.
-
Same day: Only same-day requests will be approved.
-
Maximum days in advance: You define the maximum days before the extra hours date.
Let's say you defined the maximum number of days in advance to submit the request as 10 days. You want to work extra hours on the 15th of August. Today is the 1st of August. So, you cannot submit the request before the 5th of August since it will not fall in the maximum-day range.
-
-
Define what happens when at least one of your defined conditions isn't met.
Decline or Send to manager
-
Decline: The agent won't be able to submit the request, or the request will be declined automatically shortly after requesting.
-
Send to manager: You can choose to review requests manually. In this case, you can see the pending requests on the Manage Requests page. Keep in mind, a request that will get declined in the net staffing condition won't be sent to the manager.
-
-
Click Save.
The new rule will appear in the list on the Approval Rules page.
Approval Rule: Self-Swap
To create an approval rule for self-swap:
-
Click the app selector
and select WFM. -
Go to Requests > Approval Rules.
-
Click New Rule.
-
Enter a Name.
-
From Approval Rule For, select Self swap.
-
Select the Scheduling unit that will receive an automated reply.
Keep in mind, one scheduling unit can have only one self-swap approval rule.
-
In the Activities, only Open activity is allowed for self-swapping. This will be auto-selected.
-
In the Net Staffing tab, you must set the net-staffing conditions for handling requests. For example, you can provide self-swap intervals only when you are overstaffed.
How you can use net staffing
Let's say you want your self-swap rule to handle requests based on these levels.
Intervals to remove:
Intervals that agents will be giving away.
-
Net staffing above 10%: Show self-swap intervals. This means self-swapping is allowed only when net staffing is above 10%.
-
Net staffing below 10%: Do not show self-swap intervals. This means self-swapping is not allowed when net staffing is below 10%.
Intervals to add:
Intervals that agents will be taking in exchange.
-
Net staffing below 10%: Show self-swap intervals. This means self-swapping is allowed only when net staffing is below 10%.
-
Net staffing above 10%: Do not show self-swap intervals. This means self-swapping is not allowed when net staffing is above 10%.
Keep in mind:
-
Net staffing settings are available only for users with the WFM Advanced license.
-
Net staffing must be defined to create a Self swap approval rule.
To add net-staffing levels to your rule:
-
Click Define Net Staffing.
Here, you need to set net staffing levels for both types of intervals:
-
Select the days the chart applies to.
By default, the chart applies to all days of the week. If you want to create an individual chart for a day or days, do so by selecting the day or days from the Days dropdown. You can keep adding charts for more days or a day of the week using Add Net Staffing.
Add Net Staffing button will not be available when the chart is defined for all days of the week.
-
Click inside the chart and drag the net-staffing bar left and right to define the hours.
Let's say you want to set the net staffing levels from 8:00 until 12:30. Click the column for 8:00 and drag the bar to 12:30.
In the net-staffing chart:
-
The chart displays columns for every 15 minutes of the day (horizontal) and the net-staffing levels (vertical).
-
Inside the columns, you set the staffing levels for the selected time interval.
The rule will handle requests based on the time and staffing levels in the chart.
Removing charts:
-
To remove individual net-staffing charts, click Options
and select Delete. -
To remove all net-staffing charts, use the Delete All.
-
-
Inside the bar, drag the sliders up and down to define the actions for the net-staffing levels: Approve or Decline.
Adjusting the net-staffing bar
-
Instead of using the slider, you can enter the Approve or Decline values under the chart.
-
Hover over the bar to see the net-staffing levels for each action.
-
If you want to clear net staffing bars, select them and click Clear Selected.
-
The rule won't apply net staffing for the Not defined hours. In cases like this, the rule will check only the other condition in the rule.
-
When there's a conflict between the actions you define for net staffing and in the Condition tab—Decline takes precedence over Approve.
Let's say an agent requests to work extra hours. If the request meets the net staffing in the approval rule, it should be approved. If you have the Conditions set for maximum hours, an agent can work in a week and a day. The request is declined if the agent has already worked for the maximum hours allowed in a week or a day. When no conditions are set in the approval rule, the self-swap approval works based on the defined net staffing conditions.
Adding more bars for different hours of the day
Let's say you want to set self-swap Approve when you're 20% overstaffed during the morning shift and 10% in the evening. You can define separate net-staffing bars for each time interval of the day.
Setting multiple net-staffing bars simultaneously
You can edit or set multiple net-staffing bars at a time. Click and drag over the bars to select them. Select any of the sliders from the selected bars. Drag the slider up or down to the required staffing conditions.
-
-
-
In the Conditions tab, select the conditions for the rule. All selected conditions must be met for a request to get auto-approved.
How to set conditions tab for self-swap
-
Maximum hours agent works in a week: Set the total number of hours an agent can work in a week.
-
Maximum hours agent works in a day: Set the total number of hours an agent can work in a day.
Define the Submission time. This condition is met depending on when the request was submitted.
Submission time --
Same day: Only same-day requests will be approved.
-
Within time frame
-
Minimum days in advance: You define the minimum days in advance an agent can submit the request.
Let's say you defined the minimum days in advance to submit the request as 3 days. You want to swap hours on the 5th of August. In this case, you cannot submit the request after the 2nd of August since it will not fall in the minimum-day range.
-
Maximum days in advance: You define the maximum days in advance an agent can submit the request.
Let's say you defined the maximum number of days in advance to submit the request as 10 days. You want to swap hours on the 15th of August. Today is the 1st of August. So, you cannot submit the request before the 5th of August since it will not fall in the maximum-day range.
Keep in mind, you cannot set past days to submit self-swap request. This means selector will not go below 0 while setting the limits.
-
-
Minimum days since hire: Set how many days the agent must work at the company to be eligible for self-swap.
-
-
Click Save.
The new rule will appear in the list on the Approval Rules page.
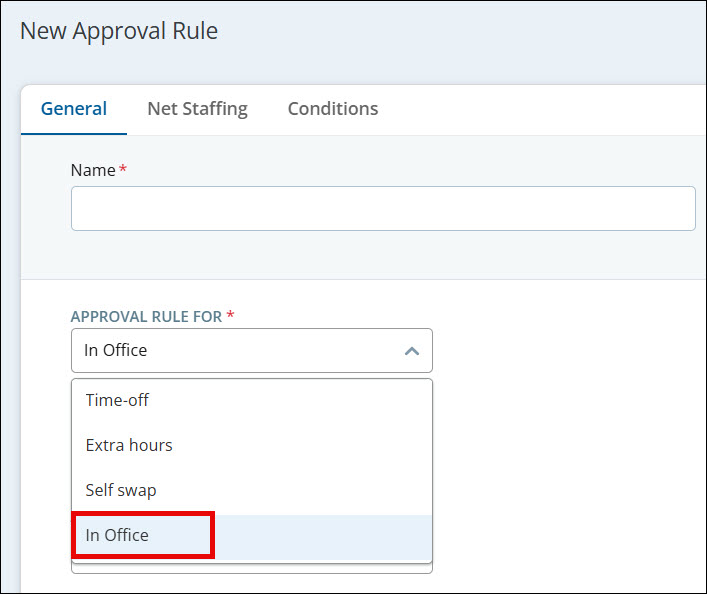
Approval Rule: In Office
This feature requires a WFM Advanced license.
To create an approval rule for In Office:
-
Click the app selector
and select WFM. -
Go to Requests > Approval Rules.
-
Click New Rule.
-
Enter a Name.
-
From Approval Rule For, select In Office.
-
Select the Scheduling unit that the rule applies to.
You can create multiple in office approval rules for the same scheduling unit if the date ranges do not overlap.
-
In Activities, select the in office activity codes that the rule applies to.
-
The list shows only activities that are marked as Allow In-office Activity in the Setup > Activity Codes page.
-
Activities that are defined as Out of Office cannot be used for in office approval rules.
-
If an activity is marked as both In Office and Overtime (Open), it is not considered an in office activity and does not appear in the list.
-
If you select Allow In-office Activity for an out of office activity in the Setup > Activity Codes page, it is not available in the Activities dropdown for in office approval rules. It is the manager’s responsibility to ensure that only true in office activities are marked as in office.
-
-
In the date settings for the rule, define the Start Date and End Date.
-
You can use date-specific rules for in office activities, for example, to handle schedule changes differently during seasonal periods.
-
Recurring options are not available for in office rules, but you can create additional rules for other date ranges if needed.
-
You can select Expire After End Date so that requests submitted after the end date are sent for manual approval.
-
-
In the Net Staffing tab, define the net-staffing conditions for handling in office requests.
-
Net staffing must be defined for in office approval rules.
-
You can create different net-staffing charts for different days or times to control when in office schedule changes are auto-approved, sent to a manager, or declined.
-
Net staffing is evaluated for approval of both open and non-open activities. Non-open activities affect net staffing, while open activities do not.
-
When a request is submitted from My Zone or Mobile, the rule evaluates the request against the defined net staffing levels.
-
Requests that meet the net-staffing conditions can be auto-approved, even when managers do not review each request manually.
-
-
In the Conditions tab, define the Submission time conditions for the rule.
-
For in-office approval rules, only Submission time conditions are available, similar to time-off approval rules.
-
You can require agents to submit requests in advance, on the same day, or within a specific time frame.
-
-
Define the Submission time. This condition is met depending on when the request was submitted.
Submission time options are: In advance, Same day, or Within time frame.
-
In advance: Only requests made a certain number of days in advance are approved. You define the minimum days in advance that the agent can submit the request.
-
Same day: Only same-day requests are approved.
-
Within time frame: Only requests made within a specific time frame are approved.
You define the maximum number of days before the in office date and the maximum number of days after the in office date.
If the maximum number of days after the in-office date is 5, and today is August 1, a request for August 10 does not fall within the time range and is therefore not approved.
-
Limitations for In Office Approval Rules
-
The Allow in office Activity checkbox appears for all activities in the Activity Code Setup page. There are no system validations for determining which activities can be conducted in office. Managers must ensure that only true in office activities (such as breaks, lunches, meetings, and training) are marked as in office.
-
Out of office activities (for example, activities that use out of office codes such as extra hours) are not eligible for in office auto-approval and do not appear in the Activities dropdown for in office rules.
-
If an Open activity is marked as both in office and overtime, it is treated as an overtime activity. This activity is exempt from in office approval rules, and the net-staffing requirements for the in office rule do not apply.
-
Net Staffing conditions in in office rules can be applied to activity codes marked as Open, but they do not affect Net Staffing calculations. Open activities marked as Overtime and Open will be considered in the Extra hours Approval rules. Any change to open activities within shifts does not impact Net Staffing; however, changes outside of shifts may affect it. The reverse applies to Non-open Activities.
Frequently Asked Questions
The rule checks the staffing levels of the forecasted and published schedule. When agents submit a request, the time they'll miss is also excluded from the staffing levels.
For example, your schedule requires 100 agents, while 90 agents are staffed for that day.
-
In this case, your net staffing is 10% understaffed.
-
If an agent submits a request, the rule considers the net staffing to be 11% understaffed.
When you set the net staffing levels, you might have different levels depending on the time of day. An agent may submit a full-day or a partial-day request for a time with different net staffing levels. When this happens, the rule acts according to the worst-case net staffing.
For example, your rule is set to Decline requests when you're understaffed by 15% for the morning shift and 5% in the evening. Then, an agent submits a request for that day. The rule will decline the request if you're understaffed by 15% during the morning or 5% during the evening.
It is enough that one 15-minute interval gets declined for the request to get declined automatically.
Let's say an agent submits a request for a day off. The request meets the net staffing in the approval rule, so the request should be approved. However, that agent doesn't have days remaining in their time-off balance, so the request should be declined.
Decline takes precedence over Approve or Send to manager. Send to manager takes precedence over Approve.
In this case, the request is denied.
A request for the same scheduling unit and activity code could be handled by more than one rule. When there is a conflict between more than one rule, Decline takes precedence over Approve or Send to manager. Send to manager takes precedence over Approve.
Time-off self-service is intended to make your schedule flexible. With this, adding time-off intervals to your schedule is more convenient. In emergencies, you can use this feature. Requests may be auto-approved for a smoother experience.
Intervals can be either auto-approved or need approval. This depends on the conditions set in the approval rule:
Auto-approved: these are automatically approved.
Need approval: these require approval.
Each time-off interval is 30 minutes. You can extend the interval depending on the availability of the following intervals.
Yes, you can take time off for as little as 15 minutes.
Yes, you can extend your time off if:
-
The intervals are continuous.
-
Set validations are met.
Suppose you initially select an auto-approved time-off interval from 11:00 AM to 11:30 AM. To extend this, enter an End time of 12:00 PM. The extension is successful only if:
-
The 11:30 AM to 12:00 PM interval is available for self-service time-off.
-
It is also auto-approved.
-
The same selected Activity code applies.
You can add as many time-off intervals as you want from the available self-service options. All added self-service time-offs will be reflected on your schedule.
If approval is needed, your time-off request is added to the schedule pending approval.
Extra-hours self-service allows you to work additional hours beyond your scheduled shifts.
Intervals can be either:
-
Auto-approved: These are automatically accepted.
-
Need approval: These require approval based on predefined conditions in the Approval Rules.
You can work extra time for as little as 15 minutes.
Yes, you can extend the extra hours interval beyond 30 minutes if:
-
The extra hours intervals are continuous.
-
Set validations are met.