Before You Begin
- Talk to your account representative. The export must be enabled for your tenant
 High-level organizational grouping used to manage technical support, billing, and global settings for your NiCE CXone system. by a member of the Interaction Analytics (CXone) team.
 - You can create a maximum of two S3 buckets using the S3 Browser. If you need more, you must sign up for Amazon Web Services and purchase them. In most cases, a single S3 bucket is sufficient for the Interaction Analytics (CXone) data export.
Create a Life Cycle Management Rule
These instructions are specifically for the Interaction Analytics (CXone) data export feature. You can also create life cycle management rules for other types of data in your NiCE CXone system.
Required permissions: Secure External Access Edit and File Life Cycle Management Edit
- Click the app selector
 and select Admin.
 - Click Cloud Storage > Life Cycle Management.
- Click New Rule.
-
In the General Details section, enter a Name for this rule and select its Start Date, Media Type, and Rule Priority.
Learn more about fields in this step
-
Under Active Storage Requirements, select Keep Files Forever from the Action Type drop-down.
- For After # of Days, enter 0.
- For Copy to Secure External Access, select Yes. Files can only be copied to Secure External Access (SEA) once.
- Click Create.
Create Secure External Access Credentials
Required permissions: Secure External Access Edit
- Click the app selector and select Admin.
- Click Cloud Storage > Storage Settings.
-
If you're creating credentials for the first time, click Create Credentials.
- If you're generating replacement credentials, click Generate New Key.
- Click Yes to acknowledge that generating a new key makes all earlier credentials invalid.
- Copy the File Location, Access Key ID and Secret Access Key and save them to a safe location. If the 60-second window where the values are displayed ends before you can save them, click Show.
Copy the Secret Access Key value first, and do so quickly. If it disappears, you cannot display it again.
- Keep this window open for the next task.
Create S3 Account for IA Export
This task uses the free S3 Browser application, a utility for configuring and managing Amazon Web Services (AWS) S3 buckets for data storage.
- Download and install S3 Browser from s3browser.com.
- Follow the onscreen instructions to configure the application.
-
Set up your S3 account using these field values.
Learn more about S3 account fields
Field
Details
Display name Enter a unique name for the account. The name should help you recognize what the account is for, such as IA Data Export. Account type
Select Amazon S3 Storage.
Access Key ID Enter or paste the Access Key ID value you copied in the previous task. Secret Access Key Enter or paste the Secret Access Key value you copied in the previous task.
Encrypt Access Keys with a Password This checkbox should be cleared.
Use secure transfer (SSL/TLS) This checkbox should be selected. - If you're generating replacement credentials, click Generate New Key.
- Click Add New Account.
- Click Yes when asked if you want to add a new bucket.
- Return to the Storage Settings page in the NiCE CXone Admin app. In the Secure External Access section, under file location, you'll see a URL that begins with https://s3.amazonaws.com/. Copy the portion of the URL after that slash.
- Return to the S3 Browser application. Paste the copied URL portion into the Bucket name field on the Add External Bucket dialog.
- Click Add External bucket.
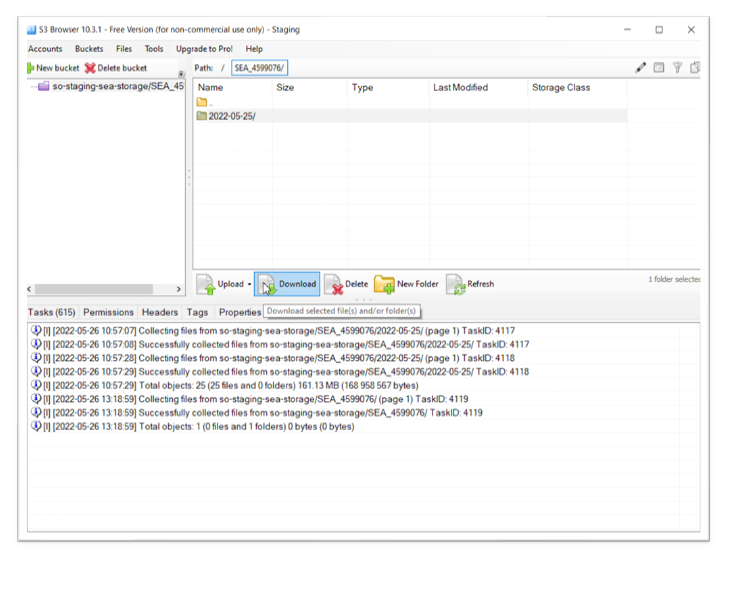
- Click the file you want and then click Download. Follow the on-screen prompts to save your file.