

If you have Multi-Region Business Continuity Plan (Business Continuity Plan) set up, this page helps you switch between the two tenants![]() High-level organizational grouping used to manage technical support, billing, and global settings for your NiCE CXone system..
High-level organizational grouping used to manage technical support, billing, and global settings for your NiCE CXone system..
Switch to a Multi-Region BCP Tenant
Required Permission: BCP > BCP Tenant Enablement > BCP Tenant Enable > Edit
These steps help you change to your Multi-Region BCP tenant![]() High-level organizational grouping used to manage technical support, billing, and global settings for your NiCE CXone system.. This directs contact
High-level organizational grouping used to manage technical support, billing, and global settings for your NiCE CXone system.. This directs contact![]() The person interacting with an agent, IVR, or bot in your contact center. traffic to the Multi-Region BCP tenant so your agents can continue handling interactions
The person interacting with an agent, IVR, or bot in your contact center. traffic to the Multi-Region BCP tenant so your agents can continue handling interactions![]() The full conversation with an agent through a channel. For example, an interaction can be a voice call, email, chat, or social media conversation..
The full conversation with an agent through a channel. For example, an interaction can be a voice call, email, chat, or social media conversation..
You must have the passkey to enable the Multi-Region BCP tenant. If you don't have a passkey, contact your NiCE account representative. The passkey was generated when Multi-Region BCP was enabled.
You can switch to a Multi-Region BCP tenant from either your primary or Multi-Region BCP tenant.
-
Click the app selector
 and select Admin.
 -
Click BCP Enablement in the left menu.
-
Enable Enable/Disable BCP Tenant. A confirmation modal appears with the following message:
You are switching the entire contact center backup to the primary tenant. Do you want to proceed?
-
Click Yes to proceed.
The system initiates the switch. Once enabled, the following message is displayed: All operations have switched to BCP tenant. BCP tenant enabled successfully. Once disabled, the following message is displayed: Primary tenant is now active. BCP tenant disabled successfully.
When enabling or disabling a BCP tenant, simply confirm the action in the pop-up dialog instead of providing a passkey.
Revert to a Primary Tenant
Required Permission: BCP > BCP Tenant Enablement > BCP Tenant Enable > Edit
These steps help you revert back to your primary tenant. This directs contact traffic back to the primary tenant, where your agents can continue handling contacts.
You must have the passkey to revert to the primary tenant. If you don't have a passkey, contact your NiCE account representative.
You can disable the Multi-Region BCP tenant in either your primary or Multi-Region BCP tenant's settings.
-
Click the app selector
and select Admin. -
Click BC Enablement in the left menu.
-
Disable Enable/Disable BCP Tenant.
-
Enter the passkey that was generated when Multi-Region Business Continuity Plan (Business Continuity Plan) was set up.
-
Click Submit.
After NiCE CXone validates the passkey:
-
Your Multi-Region BCP tenant is disabled
- Traffic routes back to the primary tenant
- Users must log out and log back in
- When logging in, users are automatically logged in to the primary tenant
Check Which Tenant is Active
There are several ways users can check which tenant is active. The options depend on the level of access the user has.
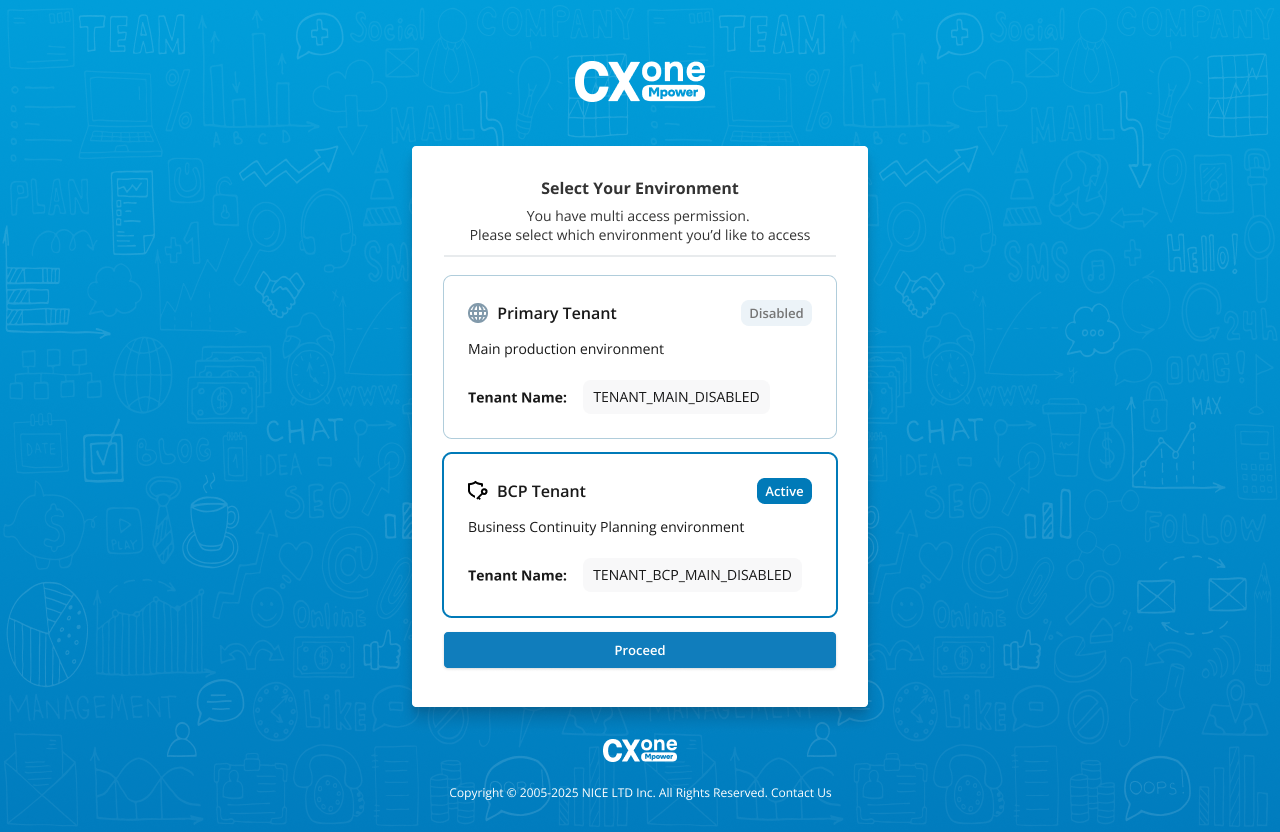
Check on Login Page
Administrators with Multiple Access assigned as their BCP Type can check which tenant is active on the login page. These users have a selector on the login page that lets them log in to either the primary or Multi-Region BCP tenant. It also shows which tenant is active and which is disabled.
Check in My Profile
During an emergency situation, any user can check which tenant is active. This may be useful since users are automatically redirected to the Multi-Region BCP tenant when logging in and may not notice. Each user's profile information shows which tenant they're logged into. The name of the tenant should indicate which one is active. For example, the tenant name could be Classics Inc. BCP, or Classics Inc. Backup.
-
In NiCE CXone, click your profile icon in the top-right corner.
-
Select My Profile.
-
Look at the Account name in the General Information section. This is the tenant's name, which should indicate whether it's a backup system.