

這是在Zendesk中設定Agent Embedded的第一步。
本頁解釋了如何在 CXone Mpower 中安裝 Agent Embedded Zendesk。 安裝完成後,客服專員可以直接在 Zendesk 中使用其來處理互動。
按照給定的順序完成每一個任務。
安裝 Agent Embedded
-
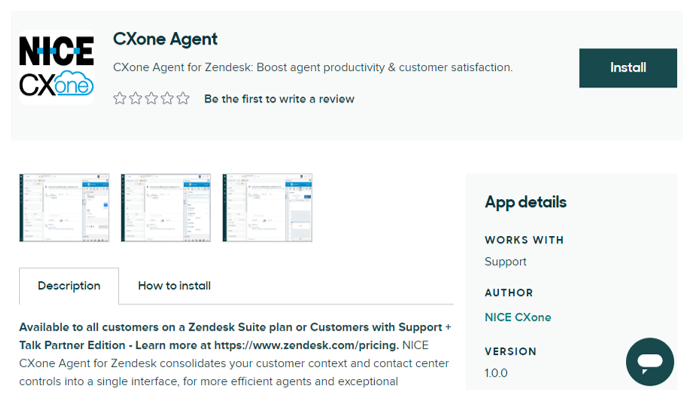
在 Zendesk 中,導覽到 Zendesk 市場。
-
搜尋Agent。
-
在搜尋結果中,選擇 Agent。
-
點擊安裝。
-
選擇要安裝 Agent Embedded 的帳戶。
-
如果尚未登入,請登入 Zendesk 實例。
-
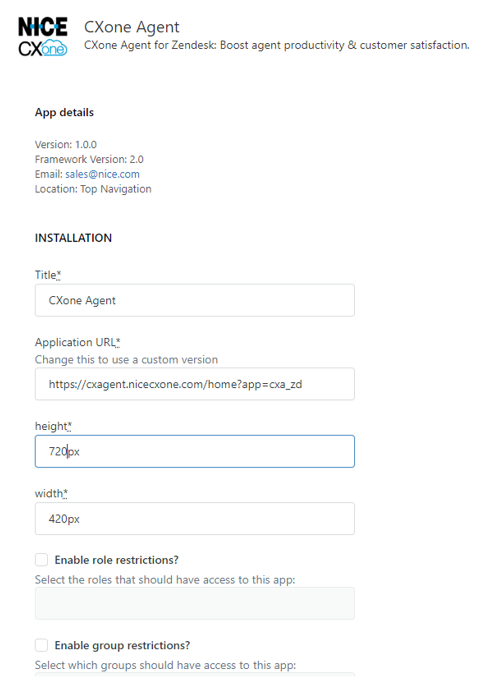
在打開的應用程式和整合頁面中,填寫 Agent 表單。
-
查看標題、應用程式 URL、高度和寬度欄位。 它們應自動填入這些正確的值:
-
標題:Agent
-
應用程式 URL:其中之一:
-
如果您未使用 FedRAMP:https://cxagent.nicecxone.com/home?app=cxa_zd
-
如果您正在使用 FedRAMP:https://cxagent.nicecxone-gov.com/home?app=cxa_zd
-
-
高度:720px
-
寬度:420px
-
-
要限制特定客服專員存取 Agent Embedded,請選擇其中一個或兩個選項:
-
啟用角色限制?:允許您選擇要存取 Agent Embedded 的角色。
-
啟用群組限制?:允許您選擇要存取 Agent Embedded 的群組。
要使所有客服專員都能存取 Agent Embedded,請不要選擇這些欄位。
-
 詳細了解此步驟中涉及的欄位
欄位 詳細資訊 標題 在 Zendesk 中出現的 Agent Embedded 標題。 應用程式 URL
您的 Agent Embedded URL。 請勿編輯。
高度 Agent Embedded 的高度(圖元)。 闊度 Agent Embedded 的寬度(圖元)。 啟用角色限制 啟用後,允許您選擇特定角色存取 Agent Embedded。 啟用群組限制 啟用後,允許您選擇特定群組存取 Agent Embedded。 -
-
點擊安裝。
在Zendesk中設定Agent Embedded的下一步是設定 CRM 配置。