

You can handle work items in CXone Mpower Agent Integrated if your administrator has enabled them for you. Work items are tasks customized by your administrator. Any work items assigned to you appear in the Interactions Menu, marked by ![]() . Work items are inbound only. You cannot place work items on hold.
. Work items are inbound only. You cannot place work items on hold.
Answer Inbound Work Items
-
Launch Agent Integrated and sign in.
- Select the work item
 from the Interactions Menu.
 - If Reject and Accept appear, click Accept.
- Review the work item.
-
Assign the work item a disposition by clicking Outcome
 .
. -
Click Complete.
Transfer Work Items
You can transfer work items to other agents. If you don't know who to transfer the work item to, you can transfer it to a skill![]() Used to automate delivery of interactions based on agent skills, abilities, and knowledge. or team. The work item is then assigned to an agent with that skill or team.
Used to automate delivery of interactions based on agent skills, abilities, and knowledge. or team. The work item is then assigned to an agent with that skill or team.
- Select the work item you want to transfer from the Interactions Menu.
- Click
 > Consult / Transfer
 .
. - In the Directory, search for the agent, skill, or team you want to transfer the work item to. You can use the drop-down below the search bar to switch between directories.
- Hover over the agent, skill, or team in the search results and click Transfer
 .
.
Assign Dispositions to Work Items
You can assign a disposition to a work item to indicate its status. For example, if you completed the task in the work item, you could mark the work item as Resolved.
- Open a work item. Click More > Outcome .
- In the Outcomes window, select a Disposition from the drop-down.
- You can enter Notes about the work item. You can also add Tags to help you find the work item later.
- Click Save.
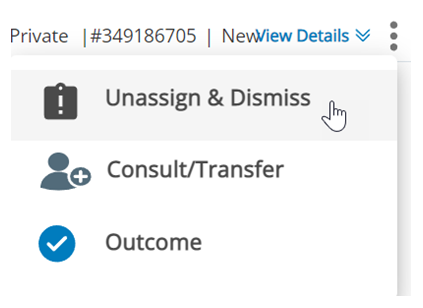
Unassign and Dismiss Work Items
You can manually unassign and dismiss a work item to remove it from your inbox. When you're done handling a work item, you should unassign and dismiss it. Your administrator configures the maximum number of work items you can have in your inbox. If you reach that number, you cannot receive new work items. This includes work items automatically routed to you. For example, if your administrator has set the maximum number to 3, and you have three work items in your inbox, you cannot receive new work items.
If your administrator has configured this, work items are automatically dismissed from your inbox when you mark them as Resolved or Closed. This happens after a certain amount of time your administrator configures.
You can manually unassign and dismiss a work item by following these steps:
- Assign the work item a disposition.
-
Click Options
at the top right of the open work item. -
Select Unassign & Dismiss. The work item is then removed from your Interactions Menu.
Use the Customer Card
If your administrator has enabled it for you, the customer card provides information to help you handle contacts.  in the top menu.