

If you're using Cloud Storage Services in Azure, your files are stored in an Azure bucket until their deletion time. You configure when files are automatically deleted by creating a Life Cycle Management rule for each file type.
Enable Cloud Storage in Azure
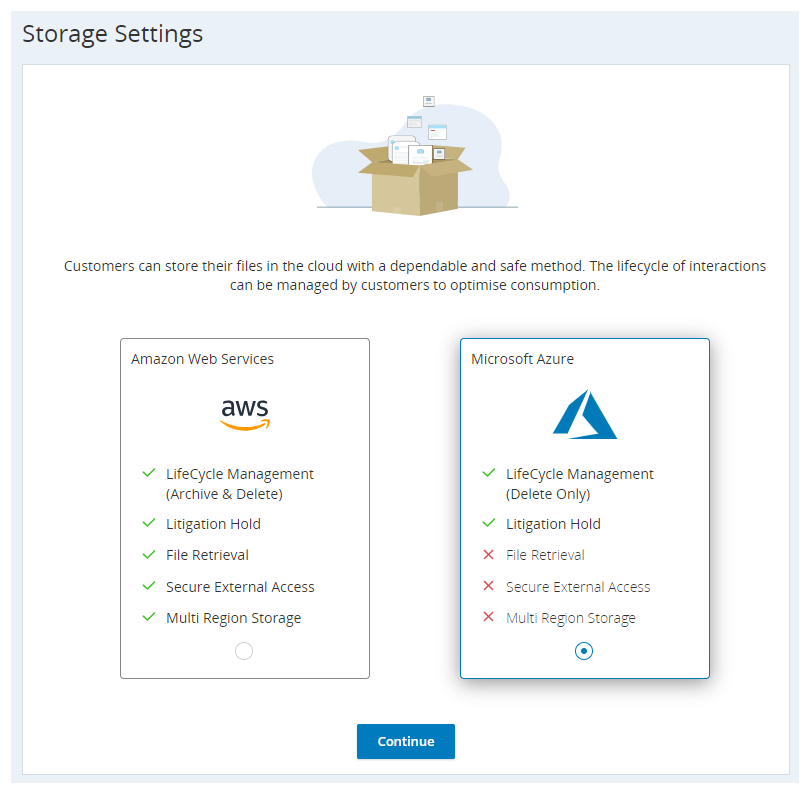
If you're a new customer or an existing customer setting up Cloud Storage for the first time, you need to select AWS or Azure.
After you choose an option for your environment, you won't see that setting again and you won't be able to switch to the other option. If you are an existing customer who was already using Cloud Storage Services before the Azure option was introduced, you cannot switch to Azure.
- Click the app selector
 and select Admin.
 - Click Cloud Storage > Storage Settings.
- Read the differences between Cloud Storage Services with AWS and Azure. If you're sure you want to use Azure, select the radio button at the bottom of the Microsoft Azure card. Click Continue.
- Read the Are You Sure? pop-up. If you're happy with your selection, select Yes, I agree and click Confirm.
Create File Deletion Rules
Required permissions: Life Cycle Management Edit
Create Life Cycle Management rules to automatically delete your files after a certain number of days. Each rule applies to one file type, so you need one rule per file type you're storing.
- Click the app selector and select Admin.
- Click Cloud Storage > Life Cycle Management.
- Click New Rule.
-
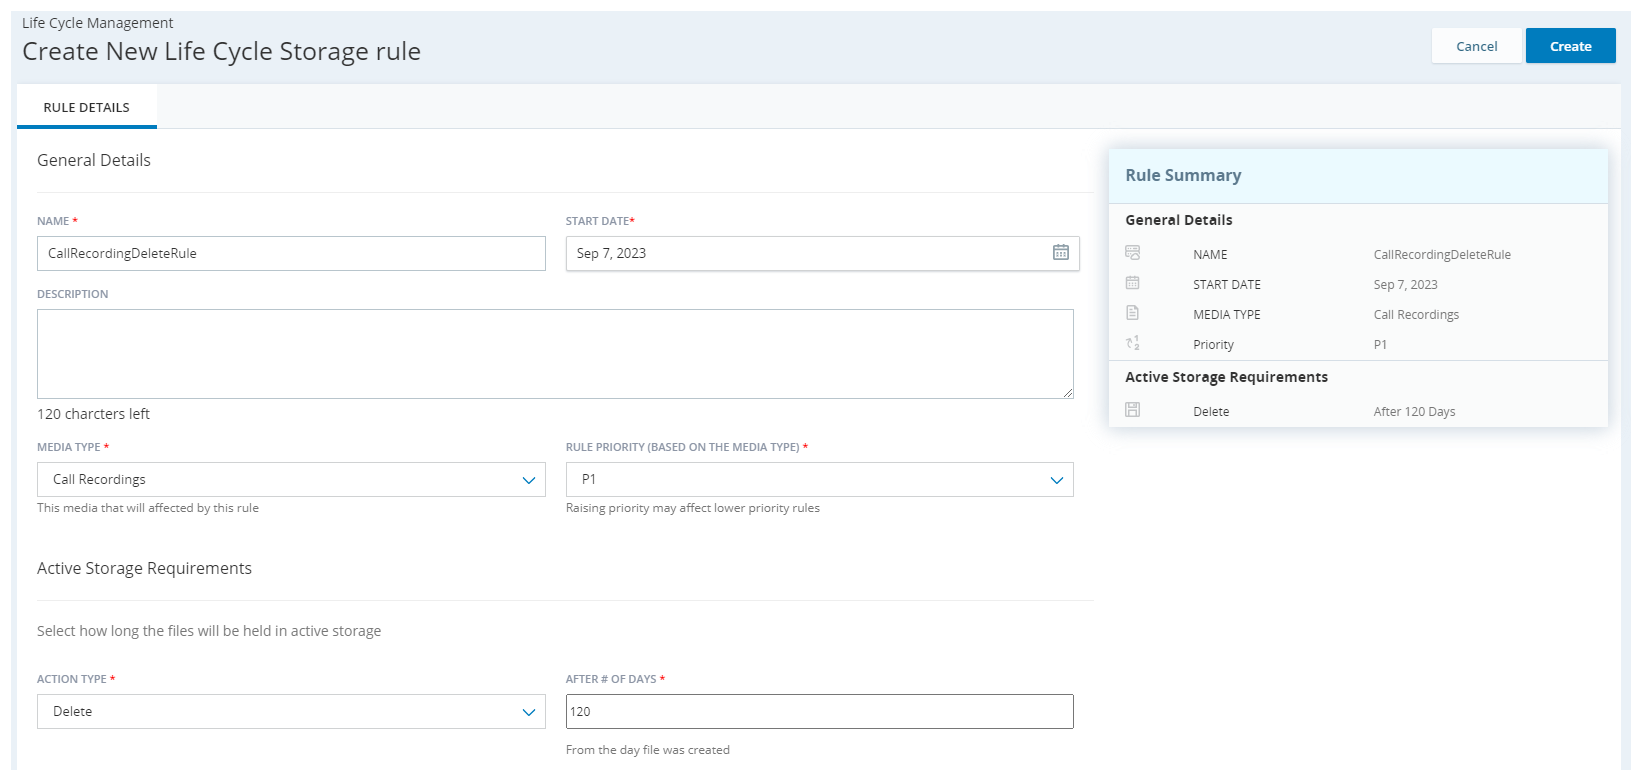
In the General Details section, enter a Name for this rule and select its Start Date, Media Type, and Rule Priority.
 Learn more about fields in this step
Field
Details
Name Enter a unique name for the rule. The name should help you recognize what the rule is created for and what it applies to. For example, Compliance regulation - 7 years or Team A, B, and C calls. Start Date
Select the date on which the rule becomes active. This can be today's date or a future date.
Description Describe the rule, so that you or someone else could understand the context and the conditions in the rule. Media Type Select the type of files you want this rule to apply to. The options available to you depend on your license. possible types are:
-
Call Recordings
-
Chat Transcripts
-
Digital: This type manages the life cycle of attachments from Digital Experience interactions. You can manage the transcripts of digital interactions using WFA jobs.
-
Email
-
IA Report: For Interaction Analytics
-
Screen Recordings
Rule Priority Select the priority level for the rule. P1 is the highest priority. If multiple rules apply to the same files, the rule with the highest priority applies.
Each rule must have a different priority. If you give a new rule a priority that another rule already has, then the priority level of the preexisting rule, and all rules with lower priorities, are reduced by one level each. -
-
Under Active Storage Requirements, select Delete for the Action Type.
- Enter a value for After # of Days to specify how long the files should stay in active storage before they are automatically deleted. The minimum number of days is 0 and the maximum is 9999. If you enter 0, the file is deleted immediately.
-
If you chose Call Recordings, Chat Transcripts, Emails, or Screen Recordings as the Media Type and want to refine the rule to apply to only certain files, create a filter in the Filter criteria section.
By default, a rule applies to all skills
Used to automate delivery of interactions based on agent skills, abilities, and knowledge., DNIS The number dialed on inbound or outbound voice calls., teams, and agents. Learn more about fields in this step
Field
Details
Filter By DNIS Enter the DNIS that you want this rule to apply to. If you want to add more than one DNIS, separate them with commas. Don't include spaces after the commas. You may have up to 10 DNISes in a filter.
This option is available only for Call Recording and Screen Recording media types.
Filter By Skills Click each of the skills you want this rule to apply to. You can select up to 10 skills. Filter By Teams/Agents Click Teams or Agents to limit this rule by that option, then select up to 10 teams or agents from the drop-down list. - Click Create.
- Repeat these steps to create a rule for each file type.