

Create a Role
Required permission: Admin > Role Management > Create
To learn more about the parameters for a specific permission, see the help page for the permission category.
- Click the app selector
 and select Admin.
 - Go to Security Settings > Roles and Permissions.
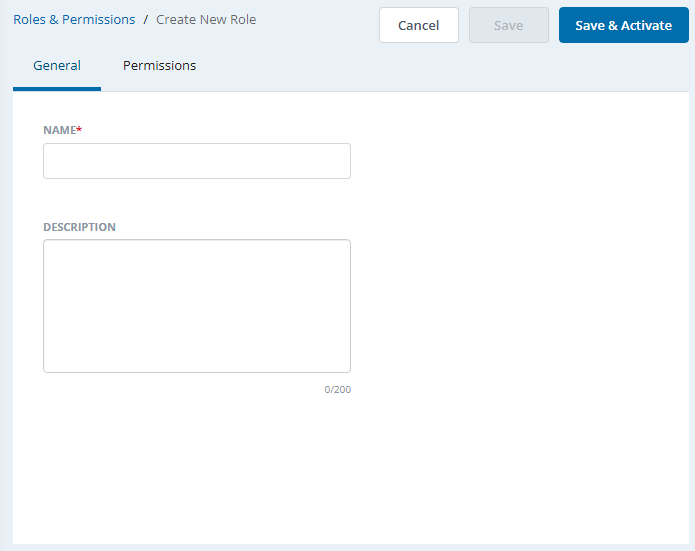
- Click New Role.
-
Enter a Name and an optional Description for the role. The description cannot have more than 200 characters. Use plain text only. URLs or markup such as HTML will not be saved.
- Click the Permissions tab.
- Configure the permissions for the role. Permissions are categorized by NiCE CXone application, and you can only see applications that are part of your NiCE CXone system. To configure permissions:
- Click the role categories on the left to move between them.
- Locate the permission you want to assign to the role.
- Click one or more parameters for the permission that you want to give to this role. You can:
- Click a parameter On or Off.
- Click a parameter to enable or disable the role's ability to View, Edit, Create, Delete, Deactivate, and so on. Some parameters have dependencies that automatically select another parameter when you enable them.
- If the role you're creating has permissions similar to one of the four out-of-the-box (OOTB) roles, click Set To Default, select the relevant OOTB role (Agent, Manager, Administrator, or Evaluator) from the drop-down, and then click Apply. The permissions are set according to the selected out-of-the-box role. Make the changes in the permissions, as required for the role.
- When you are finished configuring permissions, click Save to save the role in draft status or click Save and Activate to save the role in active status. You cannot assign users to the role until you activate it.
Copy a Role
Required permission: Admin > Role Management > Create
You can duplicate an existing role to create a new role. Duplicated roles have the same permissions as the original. This is helpful when two rules are very similar and only have small differences in the assigned permissions.
To learn more about the parameters for a specific permission, see the help page for the permission category.
- Click the app selector and select Admin.
- Click Security > Roles & Permissions.
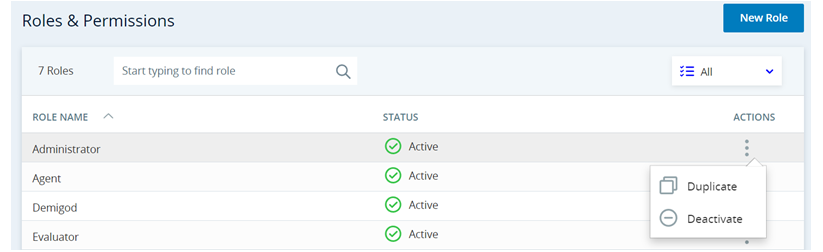
- Click the three vertical dots in the Actions column for the role you want to copy.
- Click Duplicate.
- Enter a Name for the role.
- Click Duplicate.
- Click the Permissions tab.
- Make any needed changes to the permissions for the new role.
- When you are finished configuring permissions, click Save to save the role in draft status or click Save and Activate to save the role in active status. You cannot assign users to the role until you activate it.
Assign Users to a Primary Role
Required permission: Admin > Role Management > User Assignment
In a role's settings, you can assign users to the role. This assigns the role as a primary role. As an alternative, you can also assign a primary role to an individual user when you create or edit an employee profile.
If you want to assign a secondary role, you must do so on the individual employee's profile.
- Click the app selector and select Admin.
- Click Security > Roles and Permissions.
- Click the role to which you want to assign employees.
- Click the Assigned Users tab, then click Add Users.
-
Enter a user's name in the search bar. You can filter results by clicking the filter
 , then selecting one or more Teams, Scheduling Units, or Groups.
 -
Select the checkbox next to each user you want to assign to this role. The Selected counter shows how many users you have selected.
-
Click Confirm.
- Click Save.
Remove Users from a Role
Required permission: Admin > Role Management > User Assignment
This section explains how to remove users from a role in the role's settings. This lets you remove either a primary or secondary role assignment from the user. As an alternative, you can also remove a role assignment directly from the employee's settings.
Remember, all employees must be assigned a primary role. So, if you remove a primary role assignment, be sure to assign the user to a different primary role.
- Click the app selector and select Admin.
- Click Security > Roles & Permissions.
- In the roles list, click the role from which you want to remove employees.
- Click the Assigned Users tab.
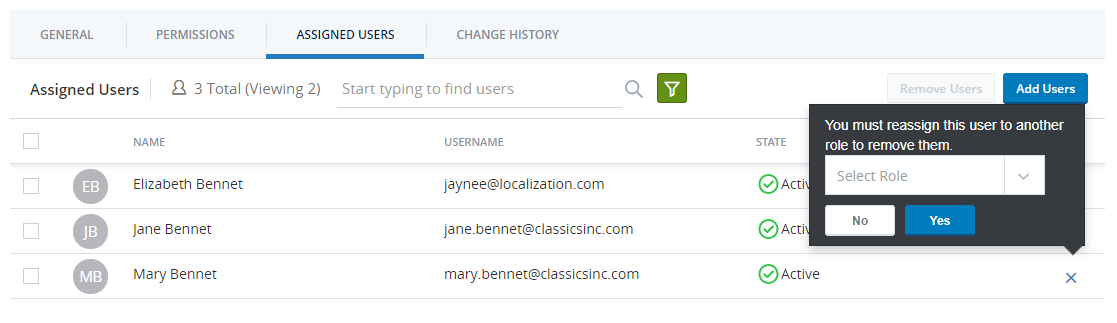
- To remove a single user from this role:
- Click the X in the user's row in the table.
- Select a different role to assign the user to. Users must be assigned a primary role.
- Click Yes.
-
To remove more than one user from this role:
-
Select the checkbox next to each user you want to remove or click the checkbox at the top of the column to select all users.
-
Click Remove Users at the top of the page.
-
Select the role you want to assign the selected users to. Users must be assigned a primary role.
-
Click Yes.
-
- Click Save.
Manage a Role's Permissions
Required permission: Admin > Role Management > Edit
To learn more about the parameters for a specific permission, see the help page for the permission category.
-
Click the app selector
and select Admin > Security Settings > Roles and Permissions. -
Select the role you want to modify.
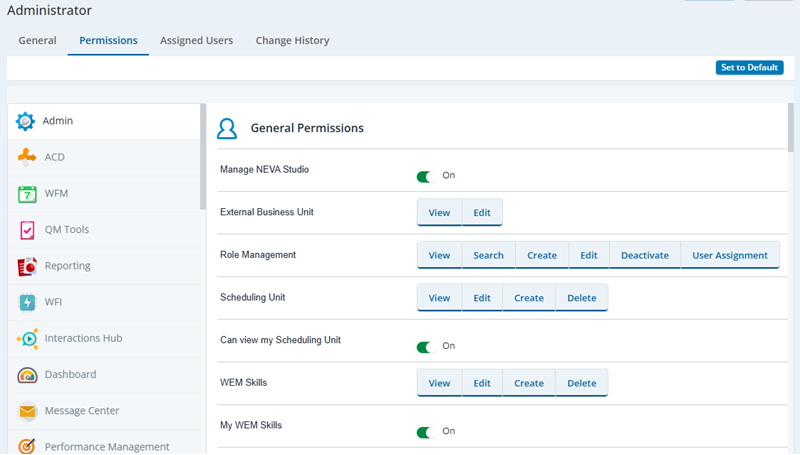
-
Click Permissions and then click the permission category on the left side. In the following image, the Admin category is selected.
- Locate the permission you want to change.
- Click one or more parameters for the permission that you want to give to this role. You can:
- Click a parameter On or Off.
- Click a parameter to enable or disable the role's ability to View, Edit, Create, Delete, Deactivate, and so on. Some parameters have dependencies that automatically select another parameter when you enable them.
- If the role you're modifying has permissions similar to one of the four out-of-the-box (OOTB) roles, click Set To Default, select the relevant OOTB role (Agent, Manager, Administrator, or Evaluator) from the drop-down, and then click Apply. The permissions are set according to the selected out-of-the-box role. Make the changes in the permissions, as required for the role.
- Save the role.
Deactivate a Role
Required permission: Admin > Role Management > Deactivate
You cannot delete roles, but you can deactivate them. Deactivated roles cannot be assigned users. Before you deactivate a role, you must first remove all users assigned to it as the primary role or a secondary role.
- Remove users assigned to the role:
- Click the app selector and select Admin.
- Click Security > Roles & Permissions.
- Open the role you want to deactivate. Open the Assigned Users tab.
- Select each user, click Remove Users, and select a new role for the users from the drop-down. Click Yes.
- Click Save.
- Click the app selector
- When you're redirected to the Roles & Permissions page, click the three vertical dots in the Actions column for the role you want to deactivate. Click Deactivate.
- If you see an error saying all users must be removed before deactivating the role, even after removing them, check each employee’s Security tab for secondary roles. Clear the checkbox for any user still assigned to the role as a secondary. Once no users have the role as a secondary, repeat the steps to deactivate it.
Reactivate a Role
Required permission: Admin > Role Management > Deactivate