

This task applies only if your tenant![]() High-level organizational grouping used to manage technical support, billing, and global settings for your NiCE CXone system. is licensed for the NiCE CXone ACD application. To manage access to other data, see Manage Data Access.
High-level organizational grouping used to manage technical support, billing, and global settings for your NiCE CXone system. is licensed for the NiCE CXone ACD application. To manage access to other data, see Manage Data Access.
Data access works together with roles and permissions to determine not only what users can do, but what data and entities they can see. You can restrict data access by teams, campaigns, or both. For example, you may have a number of supervisors who perform similar tasks, but should only be able to do so for their assigned team. You can create a role for each team that has the same permissions, but restrict access to a different team for each role.
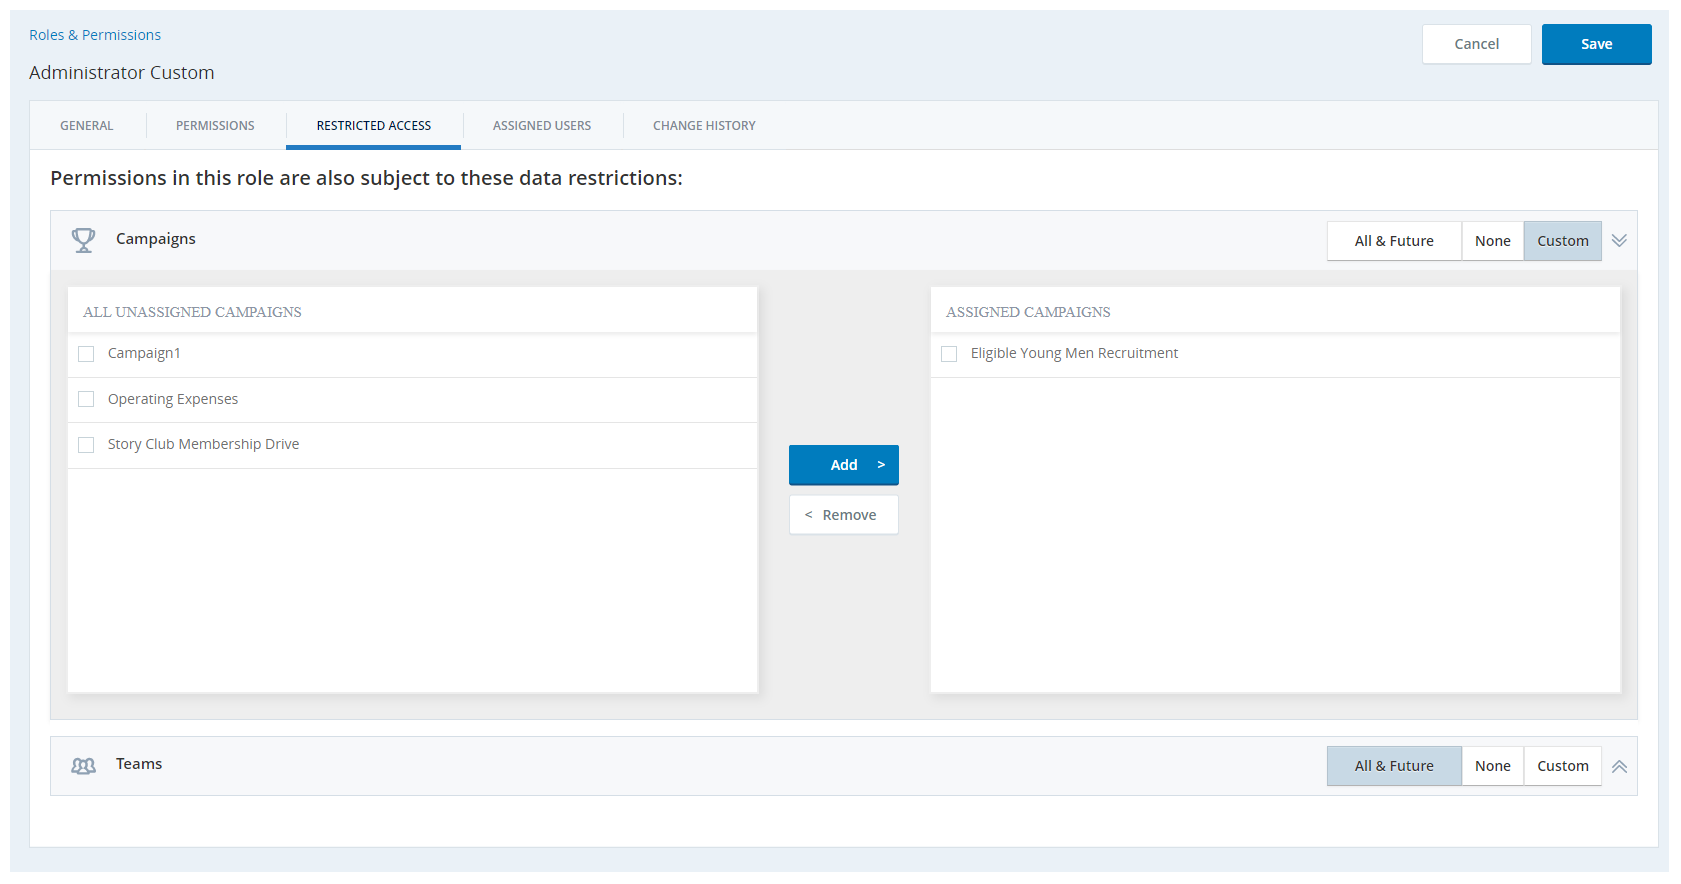
When you restrict data access for a role, you can choose from the following access levels for both teams and campaigns:
- All & Future: Allows access to data for all the teams or campaigns in your system, as well as any future teams or campaigns you create. This is the default setting.
- None: Prevents users from accessing any data for teams or campaigns.
-
Custom: Allows access to only the campaigns or teams that you define, and no others. If you choose this setting, you must remember to manually add newly-created campaigns or teams to which the role should have access. If you edit an employee that is outside of your custom access, then their profile only updates in Admin > Employees. It does not update in ACD > ACD Users.
You can use Custom to restrict the ACD skills
 Used to automate delivery of interactions based on agent skills, abilities, and knowledge. that appear to agents in the NiCE CXone Agent Workspace (Agent) Directory
  . When you follow the steps below and select Custom, the Directory only displays the ACD skills assigned to the campaigns you select.
- Click the app selector
 and select Admin.
 - Go to Security Settings > Roles & Permissions.
- In the roles list, click the role for which you want to restrict data.
- Click the Permissions tab.
- Click the ACD permissions category.
- Click the Restricted Access tab that appears.
- For Campaigns, click the setting you want to use: All & Future, None, or Custom. If you choose Custom, select the specific campaigns:
- Click Add Campaigns.
- In the pop-up that appears, select the checkboxes next to the campaigns you want to add.
- Click Confirm.
- For Teams, click the setting you want to use: All & Future, None, or Custom. If you choose Custom, select the specific teams:
- Click Add Teams.
- In the pop-up that appears, select the checkboxes next to the teams you want to add.
- Click Confirm.
- When you are finished configuring data access, click Save.