

Future activities are non-contact events such as meetings, training sessions, or time off that are scheduled for agents in advance. These activities reduce agent availability and are considered during schedule generation. When generating a new schedule, the automatic schedule generator does not overwrite existing future activities, ensuring that planned activities remain intact.
It is important to note that scheduling meetings on future days may get overwritten. This can happen when generating a new schedule on a day that you scheduled a meeting. To avoid this, use Future Activities instead of Meeting Scheduler when you plan to regenerate schedules.
-
Future activities are supported only in multi-skill schedule generation. They are not available when generating schedules for single-skill configurations.
-
Future Activities grid displays only activities created after the centralized page is available in your environment. Activities created before that are not shown in the grid.
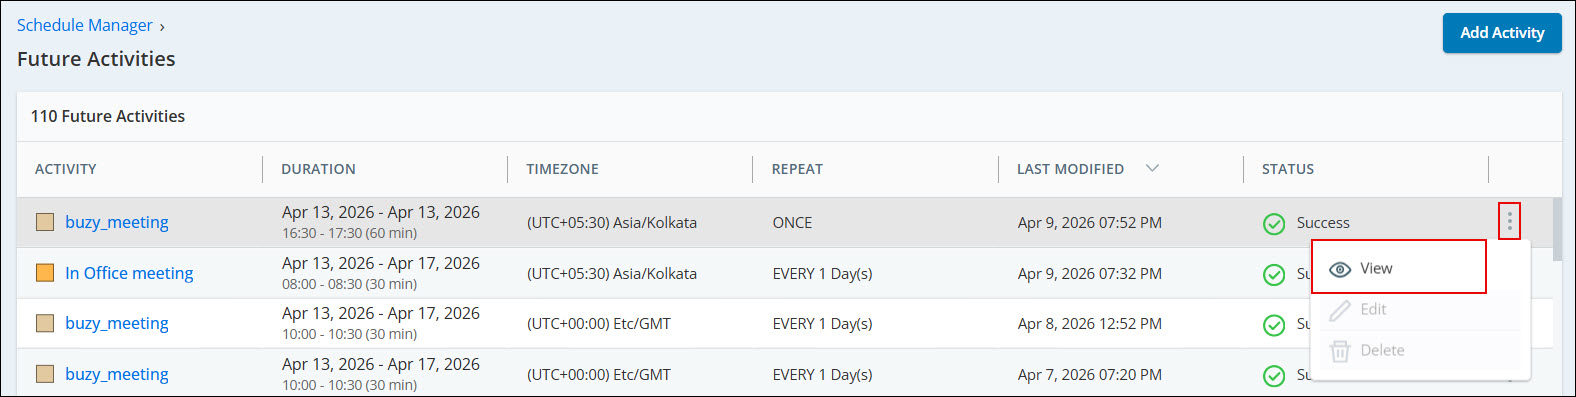
Future Activities Grid
The Future Activities grid lists all future activities created after this page became available. Each row represents one activity or activity series.
The grid includes the following columns:
-
Activity- Name and color of the activity.
-
Duration- Start date, end date, start and end times, and total minutes.
-
Timezone- Time zone used for the activity times.
-
Repeat- How often the activity occurs (once or recurring pattern).
-
Last Modified- When the activity or series was last updated.
-
Status- Whether creation or update was successful.
Click the Actions menu (three vertical dots) for an activity row to see these options:
-
View- Opens a read-only view of the activity details, including dates, times, recurrence, and assigned employees.
-
Edit- Allows you to change the configuration of the selected occurrence or the entire series.
-
Delete- Removes the selected occurrence or the entire series from the affected schedules.
To Add a Future Activity:
- Click the app selector
 and select WFM.
 -
Click Schedule Manager.
-
Click Settings
 and select Future Activities.
 -
Select the Activity, and set the Duration.
-
Choose the Start Date and Time for the meeting, and define the Time Zone.
-
Select Repeat to set recurring meetings.
-
Select the Frequency. It can be Once, Daily or Weekly.
If you select a recurring meeting, you'll receive an email when scheduling is complete.
-
Select the recurrence pattern and End date. Meeting end date cannot be more than 3 months from the meeting start date.
-
-
Click Settings and select the employees for whom you are creating the activity.
-
Click Schedule. The activity will be added to the employees’ schedules.
You can create a single occurrence or multiple occurrences using recurrence.
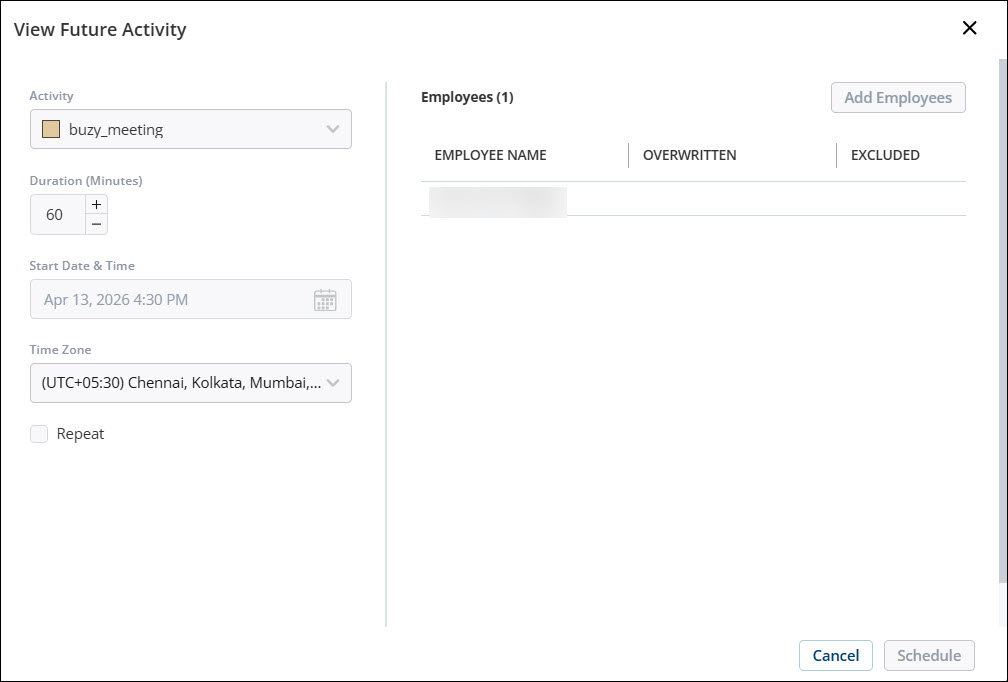
View a Future Activity
-
Go to Schedule Manager > Future Activities.
-
Locate the activity in the grid.
-
Click the Actions menu and select View.
The View Future Activity dialog displays the Activity type, Duration, Start date and time, Time Zone, Recurrence details, and assigned Employees.
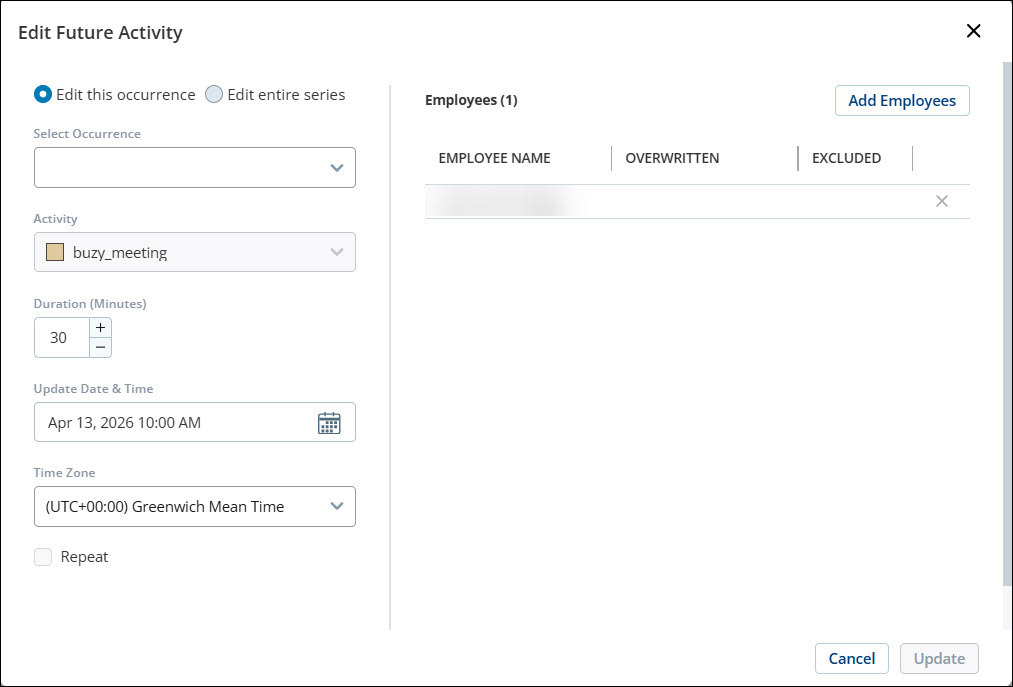
Edit a Future Activity
You can modify a single occurrence or the entire series.
-
Go to Schedule Manager > Future Activities.
-
Locate the activity in the grid.
-
Click the Actions menu and select Edit.

-
Select one of the following:
-
Edit this occurrence- Modify only the selected instance.
-
Edit entire series- Apply changes to all occurrences.
-
-
Update the required fields.
-
Click Update
If you update the entire series after modifying a single occurrence, the changes made to the individual occurrence are lost. All occurrences are recreated based on the series configuration.
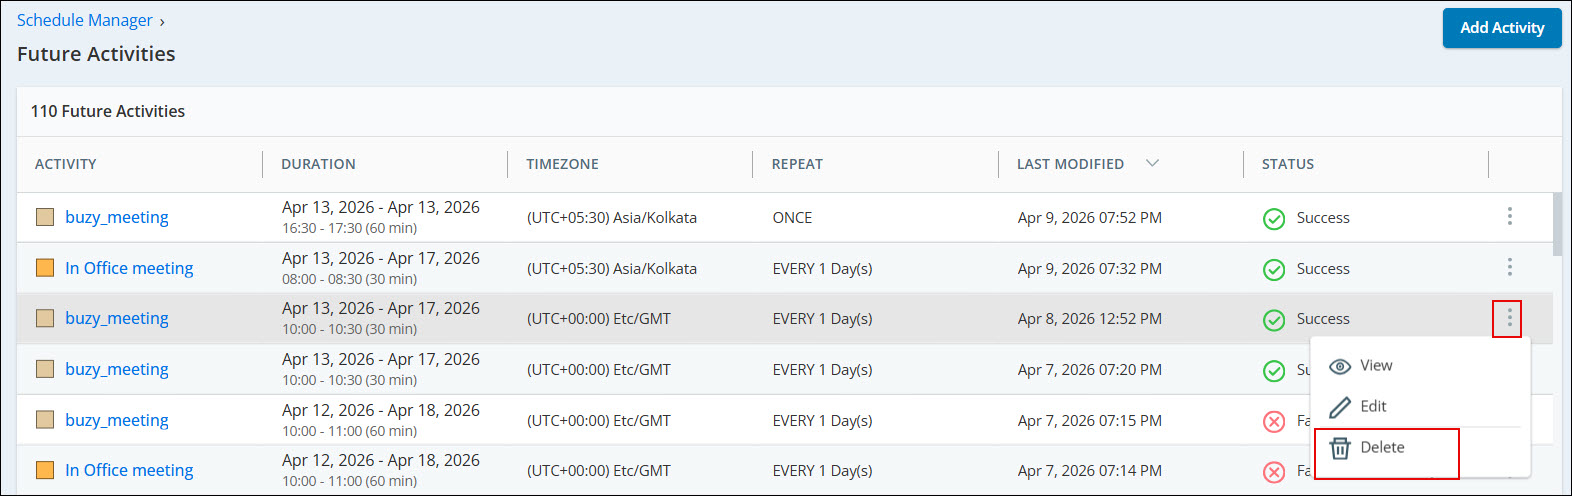
Delete a Future Activity
-
Go to Schedule Manager > Future Activities.
-
Locate the activity in the grid.
-
Click the Actions menu and select Delete.
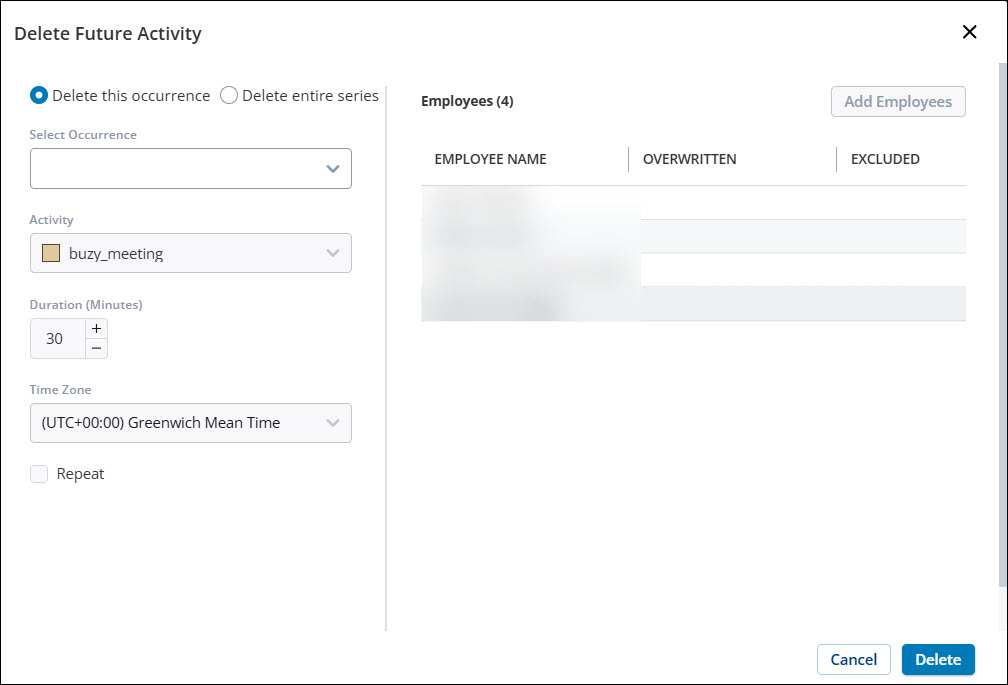
-
Select one of the following:
-
Delete this occurrence
-
Delete entire series
-
-
Confirm the deletion.
Ideal times to use future activities are when:
-
You have already generated a schedule and do not plan to regenerate it.
-
You have not generated a schedule yet.
Use the Meeting Scheduler when you have already created a schedule and plan to regenerate it. Once generated, these future activities can only be edited or deleted using Schedule Manager.
Choosing Between Meeting Scheduler and Future Activities
Meeting Scheduler and Future Activities may appear similar in the user interface, but they serve distinct purposes. Use them in different scenarios:
Meeting Scheduler
Use Meeting Scheduler when shifts are already generated and you want to add ad-hoc meetings on top of existing shifts.
Use Meeting Scheduler when you have generated shifts for next week and want to add a team meeting during one of those shifts.
Future Activities
Use Future Activities when shifts have not yet been generated and you want to schedule activities in advance.
Use Future Activities when you need to schedule training sessions for a future date where no shifts currently exist.
Refer to the table below for a detailed comparison of how Meeting Scheduler and Future Activities behave with automatic schedule generation and priorities:
|
Feature |
When to use |
Works With Automatic Schedule Generation? |
Protected from Overwrite? |
Activity Priorities applied? |
|---|---|---|---|---|
| Meeting Scheduler | When shifts already exist, and you want to add meetings on top of it. | No | No (Will be overwritten if shifts are generated later) | No |
| Future Activities | When no shifts exist yet, and you want to plan activities in advance. | Yes (Priorities considered) | Yes (Priority rules apply) | Yes |
-
If a shift exists, use Meeting Scheduler.
-
If a shift does not exist, use Future Activities.
Partial-Day Future Activity Rules
When using the partial-day future activity, the following rules apply:
-
Open shift activity- The future activity always takes precedence and is not be overwritten.
-
Closed shift activity-
-
The activity with the higher priority takes precedence.
-
If the shift activity is of Break or Lunch type, and the shift and future activities have the same priority, then Break or Lunch type is given preference.
-
If the shift activity is not of Break or Lunch type, then future activity is given precedence in case of equal priorities.
-
Future Activities and Priority Handling
When a future activity overlaps with an existing shift activity after schedule generation, the system uses two factors to determine which activity is displayed:
-
Activity Priority
-
Open Attribute
Overlap Scenarios and Outcomes
|
scenario |
Future activity |
shift activity |
result |
|---|---|---|---|
| 1 | Exact overlap | Not Break, Closed |
|
| 2 | Partial overlap, lower priority | Break, Higher Priority, Closed | Future activity partially visible; Break fully visible |
|
3 |
Exact overlap, lower priority | Break, Higher Priority, Closed | Future activity overwritten |
|
4 |
Exact overlap, equal priority | Break, Closed | Future activity overwritten |
|
5 |
Partial overlap, higher priority |
Break, Lower Priority, Closed |
Future activity fully visible; Break partially visible |
|
6 |
Partial overlap, equal priority |
Break, Closed |
Future activity partially visible; Break fully visible |
| 7 | Exact overlap (any priority) | Break, Open | Future activity not overwritten |
| 8 | Exact overlap, higher priority | Break, Lower Priority, Closed | Future activity not overwritten |
| 9 | Exact overlap (any priority) | Not Break, Open | Future activity not overwritten |
| 10 | Partial overlap | Not Break, Closed |
|
| 11 | Overlap (any priority) | Break, Open | Future activity fully visible; Break partially visible |
| 12 | Overlap (any priority) | Not Break, Open | Future activity fully visible; Shift partially visible |
Key Considerations
-
Priority matters only when both activities are marked as Closed.
-
If the shift activity is Open, the Future Activity is always favored.
-
Partial overlaps may result in both activities being partially visible.
Limitations
-
The Future Activities grid displays only activities created after the centralized page is available. Activities created before that are not shown.
-
After updating a single occurrence, the updated data may not be reflected in the UI, and further edits on that occurrence may not be supported.
-
If you update the entire series after modifying a single occurrence, all occurrences are recreated based on the series configuration, and individual changes are lost.
Frequently Asked Questions (FAQs)
This behavior is expected when Future Activities are used with single-skill schedule generation.
Future Activities are supported only in multi‑skill schedule generation. If the agent or schedule generation request is configured as single‑skill instead of multi‑skill, both of the following can occur:
-
The Weekly Rule field in Agent Configuration appears blank.
-
The Schedule Generator status shows an Internal Error related to Future Activities.
To resolve this issue:
-
Verify that the affected agents are configured with multi‑skill associations that match the Future Activity configuration.
-
Regenerate the schedule using multi‑skill schedule generation.
When agents and schedule generation are configured for multi‑skill, the Weekly rule is populated correctly, and the Internal Error in Schedule Generator status does not occur.